uniapp小程序自定义扫码页面创建及其完善
其中应用到图片选择、cover-image、cover-view实现动画扫码功能。中博主的分享,再进行个人更改去改善为自己所需的自定义扫码页面。同页面插入一个camera组件。
·
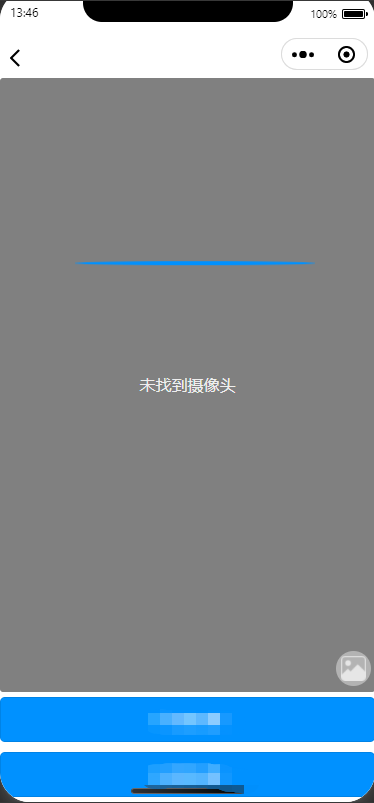
先上效果图:
同页面插入一个camera组件

其中应用到图片选择、cover-image、cover-view实现动画扫码功能。

不多说马上上代码!
<!-- 扫一扫 -->
<template>
  <view class="scan-view">
    <view class="scan-border">
      <camera
        class="scan-camera"
        @scancode="onScancode"
        @error="onError"
        mode="scanCode"
        device-position="back"
        flash="off"
      >
        <cover-view
          class="scan-animation"
          animation="{{animation}}"
        ></cover-view>
        <cover-view class="scan-pict"
          ><cover-image
            @click="onPhoto"
            class="pic"
            src="../../static/images/selectpic.png"
          ></cover-image>
        </cover-view>
      </camera>
      <button type="primary" class="btns" @click="gorepairs">手动报修</button>
      <button type="primary" class="btns">电话报修</button>
      <!-- 这里可以处理其他内容 -->
    </view>
  </view>
</template>
<script>
import * as utils from "@/util/util";
let animation = uni.createAnimation({});
let innerAudioContext = uni.createInnerAudioContext();
innerAudioContext.autoplay = true;
innerAudioContext.src = "../../static/voice/deep.mp3";
export default {
  data() {
    return {
      animation,
      hasScan: false, // false 还未跳转,true 已跳转一次
    };
  },
  onLoad() {},
  onShow() {
    this.donghua();
  },
  methods: {
    // 从相册中选择图片
    onPhoto() {
      uni.chooseImage({
        count: 1, //默认9
        sizeType: ["original", "compressed"], //可以指定是原图还是压缩图,默认二者都有
        sourceType: ["album"], //从相册选择
        success: function (res) {
          console.log(JSON.stringify(res.tempFilePaths));
        },
      });
    },

    // 动画闪电条
    donghua() {
      let that = this;
      let scode = true;
      setInterval(
        function () {
          if (scode) {
            animation.translateY(250).step({
              duration: 1500,
            });
            scode = !scode;
          } else {
            animation.translateY(-10).step({
              duration: 1500,
            });
            scode = !scode;
          }
          that.animation = animation.export();
        }.bind(this),
        1500
      );
    },
    //手动选择 跳转填写工单
    gorepairs() {
      uni.navigateTo({
        url: `/pages/repair/repairs`,
      });
    },
    onHide() {
      // 生命周期回调—监听页面隐藏
      this.hasScan = false;
    },
    onUnload() {
      //生命周期回调—监听页面卸载
      this.hasScan = false;
    },
    onScancode: utils.throttle(function (e) {
      let res = e.detail.result;
      if (!this.hasScan) {
        uni.navigateTo({
          url: `/pages/repair/repairs?data=${encodeURIComponent(
            JSON.stringify(res)
          )}`,
          success: function () {
            this.hasScan = true;
            innerAudioContext.onPlay(() => {
              console.log("开始播放");
            });
          },
        });
      }
    }, 1000),
  },
};
</script>
<style lang="scss" scoped>
.scan-view {
  width: 100%;
  height: 100%;
  display: flex;
  flex-direction: column;
  background-color: #ffffff;
  position: fixed;
  align-items: center;
  justify-content: space-around;
}

.scan-border {
  width: 100%;
  height: 100%;
  /* border: 6rpx solid #08FDFE; */
  display: flex;
  flex-direction: column;
  align-items: center;

  .scan-camera {
    width: 100%;
    height: 86.4%;
    border-radius: 6rpx;
  }
}

.scan-animation {
  position: absolute;
  top: 24%;
  left: 20%;
  width: 480rpx;
  height: 8rpx;
  background-color: #0091ff;
  border-radius: 50%;
}
.btns {
  margin: 10rpx;
  width: 100%;
  background-color: #0091ff;
}
.scan-pict {
  position: absolute;
  right: 1%;
  bottom: 1%;
  width: 70rpx;
  height: 70rpx;
  z-index: 20;
  border-radius: 50%;
  background-color: #c0c0c0;
  opacity: 0.8;
  .pic {
    z-index: 999;
    width: 50rpx;
    height: 50rpx;
    margin: 10rpx;
  }
}
</style>参考链接camera | uni-app官网 (dcloud.net.cn)
2.utils.throttle 方法:
// utils.js

/**
 * 防止小程序多次点击跳转
 * @param {*} obj
 * @returns
 */
export function throttle(fn, gapTime) {
    if (gapTime == null || gapTime == undefined) {
        gapTime = 1500
    }

    let _lastTime = null

    // 返回新的函数
    return function () {
        let _nowTime = + new Date()
        if (_nowTime - _lastTime > gapTime || !_lastTime) {
            fn.apply(this, arguments)   //将this和参数传给原函数
            _lastTime = _nowTime
        }
    }
}
3.接收参数页面
// 设备信息(扫一扫)
    if (options && options.data) {
      // 拿到参数
      this.optionsData = JSON.parse(decodeURIComponent(options.data));
      // 获取设备详情
      this.selectById(JSON.parse(this.optionsData));
}以上主要参考http://t.csdn.cn/gsn1I中博主的分享,再进行个人更改去改善为自己所需的自定义扫码页面。

为开发者提供学习成长、分享交流、生态实践、资源工具等服务,帮助开发者快速成长。
更多推荐


 3
3 0
0- 0


 已为社区贡献1条内容

所有评论(0)