
Jest使用
Jest是 Facebook 出品的一个 JavaScript 开源测试框架。相对其他测试框架,其一大特点就是就是内置了常用的测试工具,比如零配置、自带断言、测试覆盖率工具等功能,实现了开箱即用。Jest 适用但不局限于使用以下技术的项目:Babel,、TypeScript、 Node、 React、Angular、Vue 等。Jest 主要特点:● 零配置● 自带断言。
一、测试到底测什么
提到测试的时候,即使是最简单的一个代码块可能都让初学者不知所措。最常问的问题的是“我怎么知道要测试什么?”。如果你正在写一个 Web 应用,那么你每个页面每个页面的测试用户交互的方式,就是一个很好的开端了。但 Web 应用也是由很多个函数和模块组成的代码单元,也是需要测试的。通常有两种情况:
● 你接手的遗留代码没有写测试用例
● 你必须从无到有的实现一个新功能
该怎么办呢?对于上面两种场景,你可以把测试视为代码的一部分来编写。我所说的这些代码,是用来检查给定的函数是否产生预期输出结果的。 一个典型的测试流程如下:
- 引入要测试的函数
- 给函数一个输入
- 定义预期输出
- 检查函数是否返回了预期的输出结果
就这么多。这样看测试也没那么可怕的嘛:输入 —— 预期输出 —— 验证结果。
下面来看一个例子:
function sum (a, b) {
  return a * b
}

function subtract (x, y) {
  return x - y
}

module.exports = {
  add,
  subtract
}
如何保证上面代码的正确性?
下面来写一段测试代码:
const { add, subtract } = require('./math')

const result = add(1, 2)
const expected = 3

if (result !== expected) {
  throw new Error(`1 + 2 应该等于 ${expected},但是结果却是 ${result}`)
}

const result2 = subtract(2, 1)
const expected2 = 1

if (result2 !== expected2) {
  throw new Error(`2 - 1 应该等于 ${expected2},但是结果却是 ${result2}`)
}
通过测试代码可以很方便的帮助验证代码的正确性。
二、封装测试工具函数
之前示例的测试代码太过繁琐,可以思考一下能否封装的更简便一些,比如下面这样:
expect(add(1, 2)).toBe(3)
expect(subtract(2, 1)).toBe(-1)
上面的测试代码就像自然语言说话一样,很舒服。
实现 expect 方法:
expect(add(1, 2)).toBe(3)
expect(subtract(2, 1)).toBe(1)

function expect (result) {
  return {
    toBe (actual) {
      if (result !== actual) {
        throw new Error(`预期值和实际值不相等,预期 ${result},结果确实 ${actual}`)
      }
    }
  }
}
增加错误提示信息:
const { add, subtract } = require("./math")

test('测试加法', () => {
  expect(add(1, 2)).toBe(3)
})

test('测试减法', () => {
  expect(subtract(2, 1)).toBe(1)
})

function test (description, callback) {
  try {
    callback()
    console.log(`${description} 通过测试`)
  } catch (err) {
    console.error(`${description} 没有通过测试:${err}`)
  }
}

function expect (result) {
  return {
    toBe (actual) {
      if (result !== actual) {
        throw new Error(`预期值和实际值不相等,预期 ${result},结果确实 ${actual}`)
      }
    }
  }
}
三、Jest使用
Jest 介绍
Jest 是 Facebook 出品的一个 JavaScript 开源测试框架。相对其他测试框架,其一大特点就是就是内置了常用的测试工具,比如零配置、自带断言、测试覆盖率工具等功能,实现了开箱即用。
Jest 适用但不局限于使用以下技术的项目:Babel,、TypeScript、 Node、 React、Angular、Vue 等。
Jest 主要特点:
● 零配置
● 自带断言
● 而作为一个面向前端的测试框架, Jest 可以利用其特有的快照测试功能,通过比对 UI 代码生成的快照文件,实现对 React 等常见前端框架的自动测试。
● 此外, Jest 的测试用例是并行执行的,而且只执行发生改变的文件所对应的测试,提升了测试速度。
● 测试覆盖率
● Mock 模拟
快速体验 Jest
安装 Jest 到项目中:
npm install --save-dev jest
// sum.js
function sum(a, b) {
  return a + b;
}
module.exports = sum;
// sum.test.js
const sum = require('./sum');

// 测试用例
test('adds 1 + 2 to equal 3', () => {
  // 断言
  expect(sum(1, 2)).toBe(3);
});
// package.json
{
  "scripts": {
    "test": "jest"
  }
}
jest 命令会运行项目中所有以 .test.js 结尾的文件’’
最后运行测试命令:
npm run test
解析:
● jest 找到项目中所有以 .test.js 结尾的文件并运行
● jest 会给测试文件提供 test、expect 等全局函数,所以在测试文件中可以直接使用
● jest 为测试结果提供了良好的日志输出
解决 vscode 中 jest 代码提示问题
npm i -D @types/jest
注意:@types/jest 必须安装到项目的根目录,并且以根目录的方式在 vscode 中打开,否则不生效。
或者说只要是 vscode 打开的项目根目录有 @types/jest 这个包就可以了。
四、配置文件
npx jest --init
详细配置信息参考:https://jestjs.io/docs/zh-Hans/configuration。
// jest.config.js
/*
 * For a detailed explanation regarding each configuration property, visit:
 * https://jestjs.io/docs/en/configuration.html
 */

module.exports = {
  // 自动 mock 所有导入的外部模块
  // automock: false,

  // 在指定次数失败后停止运行测试
  // bail: 0,

  // The directory where Jest should store its cached dependency information
  // cacheDirectory: "/private/var/folders/5h/_98rffpj1z95b_0dm76lvzm40000gn/T/jest_dx",

  // 在每个测试之间自动清除 mock 调用和实例
  clearMocks: true,

  // 是否收集测试覆盖率信息
  // collectCoverage: false,

  // 一个 glob 模式数组,指示应该为其收集覆盖率信息的一组文件
  // collectCoverageFrom: undefined,

  // 测试覆盖率报错文件输出的目录
  coverageDirectory: "coverage",

  // 忽略测试覆盖率统计
  // coveragePathIgnorePatterns: [
  //   "/node_modules/"
  // ],

  // 指示应该使用哪个提供程序检测代码的覆盖率,默认是 babel,可选 v8,但是 v8 不太稳定,建议 Node 14 以上版本使用
  // coverageProvider: "babel",

  // A list of reporter names that Jest uses when writing coverage reports
  // coverageReporters: [
  //   "json",
  //   "text",
  //   "lcov",
  //   "clover"
  // ],

  // An object that configures minimum threshold enforcement for coverage results
  // coverageThreshold: undefined,

  // A path to a custom dependency extractor
  // dependencyExtractor: undefined,

  // Make calling deprecated APIs throw helpful error messages
  // errorOnDeprecated: false,

  // Force coverage collection from ignored files using an array of glob patterns
  // forceCoverageMatch: [],

  // A path to a module which exports an async function that is triggered once before all test suites
  // globalSetup: undefined,

  // A path to a module which exports an async function that is triggered once after all test suites
  // globalTeardown: undefined,

  // A set of global variables that need to be available in all test environments
  // globals: {},

  // The maximum amount of workers used to run your tests. Can be specified as % or a number. E.g. maxWorkers: 10% will use 10% of your CPU amount + 1 as the maximum worker number. maxWorkers: 2 will use a maximum of 2 workers.
  // maxWorkers: "50%",

  // An array of directory names to be searched recursively up from the requiring module's location
  // moduleDirectories: [
  //   "node_modules"
  // ],

  // An array of file extensions your modules use
  // moduleFileExtensions: [
  //   "js",
  //   "json",
  //   "jsx",
  //   "ts",
  //   "tsx",
  //   "node"
  // ],

  // A map from regular expressions to module names or to arrays of module names that allow to stub out resources with a single module
  // moduleNameMapper: {},

  // An array of regexp pattern strings, matched against all module paths before considered 'visible' to the module loader
  // modulePathIgnorePatterns: [],

  // Activates notifications for test results
  // notify: false,

  // An enum that specifies notification mode. Requires { notify: true }
  // notifyMode: "failure-change",

  // A preset that is used as a base for Jest's configuration
  // preset: undefined,

  // Run tests from one or more projects
  // projects: undefined,

  // Use this configuration option to add custom reporters to Jest
  // reporters: undefined,

  // Automatically reset mock state between every test
  // resetMocks: false,

  // Reset the module registry before running each individual test
  // resetModules: false,

  // A path to a custom resolver
  // resolver: undefined,

  // Automatically restore mock state between every test
  // restoreMocks: false,

  // The root directory that Jest should scan for tests and modules within
  // rootDir: undefined,

  // A list of paths to directories that Jest should use to search for files in
  // roots: [
  //   "<rootDir>"
  // ],

  // Allows you to use a custom runner instead of Jest's default test runner
  // runner: "jest-runner",

  // The paths to modules that run some code to configure or set up the testing environment before each test
  // setupFiles: [],

  // A list of paths to modules that run some code to configure or set up the testing framework before each test
  // setupFilesAfterEnv: [],

  // The number of seconds after which a test is considered as slow and reported as such in the results.
  // slowTestThreshold: 5,

  // A list of paths to snapshot serializer modules Jest should use for snapshot testing
  // snapshotSerializers: [],

  // The test environment that will be used for testing
  // testEnvironment: "jest-environment-jsdom",

  // Options that will be passed to the testEnvironment
  // testEnvironmentOptions: {},

  // Adds a location field to test results
  // testLocationInResults: false,

  // The glob patterns Jest uses to detect test files
  // testMatch: [
  //   "**/__tests__/**/*.[jt]s?(x)",
  //   "**/?(*.)+(spec|test).[tj]s?(x)"
  // ],

  // An array of regexp pattern strings that are matched against all test paths, matched tests are skipped
  // testPathIgnorePatterns: [
  //   "/node_modules/"
  // ],

  // The regexp pattern or array of patterns that Jest uses to detect test files
  // testRegex: [],

  // This option allows the use of a custom results processor
  // testResultsProcessor: undefined,

  // This option allows use of a custom test runner
  // testRunner: "jasmine2",

  // This option sets the URL for the jsdom environment. It is reflected in properties such as location.href
  // testURL: "http://localhost",

  // Setting this value to "fake" allows the use of fake timers for functions such as "setTimeout"
  // timers: "real",

  // A map from regular expressions to paths to transformers
  // transform: undefined,

  // An array of regexp pattern strings that are matched against all source file paths, matched files will skip transformation
  // transformIgnorePatterns: [
  //   "/node_modules/",
  //   "\\.pnp\\.[^\\/]+$"
  // ],

  // An array of regexp pattern strings that are matched against all modules before the module loader will automatically return a mock for them
  // unmockedModulePathPatterns: undefined,

  // Indicates whether each individual test should be reported during the run
  // verbose: undefined,

  // An array of regexp patterns that are matched against all source file paths before re-running tests in watch mode
  // watchPathIgnorePatterns: [],

  // Whether to use watchman for file crawling
  // watchman: true,
};
Jest CLI Options
参考:https://jestjs.io/zh-Hans/docs/cli。
五、Jest 监视模式
–watchAll
监视文件的更改并在任何更改时重新运行所有测试。
jest --watchALl
–watch
该模式需要 Git 支持。
监视 Git 仓库中的文件更改,并重新运行与已更改的文件相关的测试。
jest --watch
监视模式中的辅助命令
Watch Usage
 # 按 f 只运行失败的测试。
 # f 进入,f 退出
 › Press f to run only failed tests.

 # 按 o 只运行与更改文件相关的测试。
 # 需要 Git 支持
 # 也可以使用 jest --watch 直接进入 o 模式
 # jest --watchAll 监视所有文件变化并运行测试
 › Press o to only run tests related to changed files.

 # 按 p 以文件名正则表达式模式进行过滤。
 # 只有 --watchAll 的时候 p 模式才可以使用
 # 注意:testRegex 将尝试使用绝对文件路径来检测测试文件,因此,具有名称与之匹配的文件夹将所有文件作为测试运行
 # testRegex 与 testMatch 不能共存
 › Press p to filter by a filename regex pattern.

 # 按 t 以测试名称正则表达式模式进行过滤。
 › Press t to filter by a test name regex pattern.

 # 按 q 退出监视模式
 › Press q to quit watch mode.

 # 按 Enter 键触发测试运行
 › Press Enter to trigger a test run.
六、使用 ES6 模块
yarn add --dev babel-jest @babel/core @babel/preset-env
// babel.config.js
module.exports = {
  presets: [['@babel/preset-env', {targets: {node: 'current'}}]],
};
Jest 在运行测试的时候会自动找到 Babel 将 ES6 代码转换为 ES5 执行。
Jest 结合 Babel 的运行原理:运行测试之前,结合 Babel,先把你的代码做一次转化,模块被转换为了 CommonJS,运行转换之后的测试用例代码。
● npm run jest
● jest
● babel-jest
● babel-core
● babel 配置文件
● 转换为 ES5
● 执行转换之后的测试代码
七、Jest API
在测试文件中,Jest 将所有这些方法和对象放入全局环境中。您无需要求或导入任何内容即可使用它们。但是,如果您喜欢显式导入,则可以:
import { describe, expect, test } from '@jest/globals'
Test 函数
test 函数别名: it(name, fn, timeout)。
● test(name, fn, timeout)
● test.concurrent(name, fn, timeout)
● test.concurrent.each(table)(name, fn, timeout)
● test.concurrent.only.each(table)(name, fn)
● test.concurrent.skip.each(table)(name, fn)
● test.each(table)(name, fn, timeout)
● test.only(name, fn, timeout)
● test.only.each(table)(name, fn)
● test.skip(name, fn)
● test.skip.each(table)(name, fn)
● test.todo(name)
Expect 匹配器
describe 函数
describe 创建一个将几个相关测试组合在一起的块。
const myBeverage = {
  delicious: true,
  sour: false,
};

describe('my beverage', () => {
  test('is delicious', () => {
    expect(myBeverage.delicious).toBeTruthy();
  });

  test('is not sour', () => {
    expect(myBeverage.sour).toBeFalsy();
  });
});
● describe(name, fn)
● describe.each(table)(name, fn, timeout)
● describe.only(name, fn)
● describe.only.each(table)(name, fn)
● describe.skip(name, fn)
● describe.skip.each(table)(name, fn)
生命周期钩子
● afterAll(fn, timeout)
● afterEach(fn, timeout)
● beforeAll(fn, timeout)
● beforeEach(fn, timeout)
Jest 对象
Jest 对象自动位于每个测试文件中的范围内。 jest 对象中的方法有助于创建模拟,并让您控制 Jest 的整体行为。也可以通过从 import {jest} from ‘@jest/globals’ 导入。
详细内容参考:https://jestjs.io/docs/jest-object。
八、Jest 中的匹配器
参考:
https://jestjs.io/docs/using-matchers
https://jestjs.io/docs/expect
九、Jest 测试异步代码
回调方式
// Jest会等done回调函数执行结束后,结束测试
// 若 done() 函数从未被调用,测试用例会正如你预期的那样执行失败(显示超时错误)。
// 若 expect 执行失败,它会抛出一个错误,后面的 done() 不再执行。 若我们想知道测试用例为何失败,我们必须将 expect 放入 try 中,将 error 传递给 catch 中的 done函数。 否则,最后控制台将显示一个超时错误失败,不能显示我们在 expect(data) 中接收的值。
test('the data is peanut butter', done => {
  function callback(data) {
    try {
      expect(data).toBe('peanut butter');
      done();
    } catch (error) {
      done(error);
    }
  }

  fetchData(callback);
});
Promise 方式
test('the data is peanut butter', () => {
  // 一定要返回 promise
  return fetchData().then(data => {
    expect(data).toBe('peanut butter');
  });
});
如果您希望某个承诺被拒绝,请使用.catch方法。否则,一个兑现的诺言不会使测试失败。
test('the fetch fails with an error', () => {
  expect.assertions(1);
  return fetchData().catch(e => expect(e).toMatch('error'));
});
.resolvers / .rejects 匹配器
// 测试 Promise resolve 状态
test('the data is peanut butter', () => {
  return expect(fetchData()).resolves.toBe('peanut butter');
});

// 测试 Promise reject 状态
test('the fetch fails with an error', () => {
  return expect(fetchData()).rejects.toMatch('error');
});
Async / Await 方式
// 测试 Promise resolve 状态
test('the data is peanut butter', async () => {
  const data = await fetchData();
  expect(data).toBe('peanut butter');
});

// 测试 Promise reject 状态
test('the fetch fails with an error', async () => {
  expect.assertions(1);
  try {
    await fetchData();
  } catch (e) {
    expect(e).toMatch('error');
  }
});
也可以将 asyn/await 和 .resolvers/.rejects 结合使用。
test('the data is peanut butter', async () => {
  await expect(fetchData()).resolves.toBe('peanut butter');
});

test('the fetch fails with an error', async () => {
  await expect(fetchData()).rejects.toThrow('error');
});
在这些情况下,async/await 实际上是语法糖,与 Promise 示例使用的逻辑相同。
上述的诸多形式中没有哪个形式特别优于其他形式,你可以在整个代码库中,甚至也可以在单个文件中混合使用它们。 这只取决于哪种形式更能使您的测试变得简单。
十、Jest 测试定时器
组件可能会使用基于时间的函数如 setTimeout、setInterval 和 Date.now 等。在测试环境中,使用可以手动“推进”时间的替代物来模拟这些功能会很有帮助。它会确保你的测试快速运行!依赖于计时器的测试仍将按照顺序解析,但会更快(例子)。大部分测试框架,包括 Jest、sinon 和 lolex 都允许你在测试中模拟计时器。
有些时候可能你不想要模拟计时器。例如,在你测试动画时,或是交互端对时间较为敏感的情况下(如 API 访问速率限制器)。具有计时器模拟的库允许你在每个测试/套件上启用或禁用这个功能,因此你可以明确地选择这些测试的运行方式。
基本用法
// timerGame.js
'use strict';

function timerGame(callback) {
  console.log('Ready....go!');
  setTimeout(() => {
    console.log("Time's up -- stop!");
    callback && callback();
  }, 1000);
}

module.exports = timerGame;
// __tests__/timerGame-test.js
'use strict';

jest.useFakeTimers();

test('waits 1 second before ending the game', () => {
  const timerGame = require('../timerGame');
  timerGame();

  // 验证定时器函数被调用的次数
  expect(setTimeout).toHaveBeenCalledTimes(1);

  // 验证定时器的时间是1s
  expect(setTimeout).toHaveBeenLastCalledWith(expect.any(Function), 1000);
});
在这里我们通过jest.useFakeTimers();来模拟定时器函数。 通过mock函数可以模拟setTimeout和其他的定时器函数。 如果你需要在一个文件或一个describe块中运行多次测试,可以在每次测试前手动添加jest.useFakeTimers();,或者在beforeEach中添加。 如果不这样做的话将导致内部的定时器不被重置。
快进所有时间
对于这个模块我们还需要写一个测试,用于判断回调函数是否在1秒后被调用的。 为此,我们将使用Jest的定时器控制API,用于在测试中将时间“快进”到正确的时间点。
test('calls the callback after 1 second', () => {
  const timerGame = require('../timerGame');
  const callback = jest.fn();

  timerGame(callback);

  // 在这个时间点,定时器的回调不应该被执行
  expect(callback).not.toBeCalled();

  // “快进”时间使得所有定时器回调被执行
  jest.runAllTimers();

  // 现在回调函数应该被调用了!
  expect(callback).toBeCalled();
  expect(callback).toHaveBeenCalledTimes(1);
});
解决循环定时器问题
在某些场景下你可能还需要“循环定时器”——在定时器的callback函数中再次设置一个新定时器。 对于这种情况,如果将定时器一直运行下去那将陷入死循环,所以在此场景下不应该使用jest.runAllTimers() For these cases you might use jest.runOnlyPendingTimers():
// infiniteTimerGame.js
'use strict';

function infiniteTimerGame(callback) {
  console.log('Ready....go!');

  setTimeout(() => {
    console.log("Time's up! 10 seconds before the next game starts...");
    callback && callback();

    // Schedule the next game in 10 seconds
    setTimeout(() => {
      infiniteTimerGame(callback);
    }, 10000);
  }, 1000);
}

module.exports = infiniteTimerGame;
// __tests__/infiniteTimerGame-test.js
'use strict';

jest.useFakeTimers();

describe('infiniteTimerGame', () => {
  test('schedules a 10-second timer after 1 second', () => {
    const infiniteTimerGame = require('../infiniteTimerGame');
    const callback = jest.fn();

    infiniteTimerGame(callback);

    // At this point in time, there should have been a single call to
    // setTimeout to schedule the end of the game in 1 second.
    expect(setTimeout).toHaveBeenCalledTimes(1);
    expect(setTimeout).toHaveBeenLastCalledWith(expect.any(Function), 1000);

    // Fast forward and exhaust only currently pending timers
    // (but not any new timers that get created during that process)
    jest.runOnlyPendingTimers();

    // At this point, our 1-second timer should have fired it's callback
    expect(callback).toBeCalled();

    // And it should have created a new timer to start the game over in
    // 10 seconds
    expect(setTimeout).toHaveBeenCalledTimes(2);
    expect(setTimeout).toHaveBeenLastCalledWith(expect.any(Function), 10000);
  });
});
解决 Promise 定时器问题
参考链接:
● https://github.com/facebook/jest/issues/7151
function sleep(ms: number): Promise<void> {
  return new Promise((resolve) => {
    setTimeout(resolve, ms);
  });
}

export async function foo(fn: () => T, waitMs: number): Promise<T> {
  await sleep(waitMs);
	return fn();
}
it('calls fn after x milliseconds', async () => {
  jest.useFakeTimers();

  const fn = jest.fn(() => 3);
  const retVal = foo(fn, 1000);

  expect(fn).not.toBeCalled();
  await Promise.resolve().then(() => jest.advanceTimersByTime(1000));
  expect(fn).toHaveBeenCalledTimes(1);
  await expect(retVal).resolves.toBe(3);
});
按时间快进定时器
// timerGame.js
'use strict';

function timerGame(callback) {
  console.log('Ready....go!');
  setTimeout(() => {
    console.log("Time's up -- stop!");
    callback && callback();
  }, 1000);
}

module.exports = timerGame;
it('calls the callback after 1 second via advanceTimersByTime', () => {
  const timerGame = require('../timerGame');
  const callback = jest.fn();

  timerGame(callback);

  // 在这个时间点,回调函数不应该被执行
  expect(callback).not.toBeCalled();

  // “快进”时间,使得所有定时器回调都被执行
  jest.advanceTimersByTime(1000);

  // 到这里,所有的定时器回调都应该被执行了!
  expect(callback).toBeCalled();
  expect(callback).toHaveBeenCalledTimes(1);
});
清除所有挂起的定时器
jest.clearAllTimers()
总结
// 使用模拟定时器
jest.useFakeTimers()

// 验证定时器函数被调用的次数
expect(setTimeout).toHaveBeenCalledTimes(1)

// 验证定时器的时间是 1s
expect(setTimeout).toHaveBeenLastCalledWith(expect.any(Function), 1000)

// 快进所有定时器结束
jest.runAllTimers()

// 解决定时器循环问题
jest.runOnlyPendingTimers()

// 快进定时器到指定时间
jest.advanceTimersByTime(1000)

// 清除所有定时器
jest.clearAllTimers()
十一、使用 mock 函数
mock 函数的作用:
- 捕获函数的调用和返回结果,以及函数调用时的 this 指向
- 它可以让我们自由的设置返回结果
- 可以改变内部函数的实现
测试 callback 是否被执行:
export function runCallback (callback) {
  callback()
}
为了验证函数是否被执行,我们需要改造 runCallback:
export function runCallback (callback) {
  callback()
}
测试代码如下:
import { runCallback } from './01'

// 测试函数是否被调用
test('mock function', () => {
  function fn () {
    return 123
  }
  const ret = runCallback(fn)
  expect(ret).toBe(123)
})
Jest 中提供了一个 mock 函数,可以很方便的帮我们完成这件事情:
export function runCallback (callback) {
  callback()
}
import { runCallback } from './02'

test('mock function', () => {
  const fn = jest.fn()
  runCallback(fn)
  expect(fn).toBeCalled()
})
mock 属性
所有的 mock 函数都有这个特殊的 .mock属性,它保存了关于此函数如何被调用、调用时的返回值的信息。 .mock 属性还追踪每次调用时 this的值,所以我们同样可以也检视(inspect) this:
十二、深入学习 Jest Mock 功能
mock axios
● mock axios
● mock axios 的实例
● 一个更好的 mock axios 适配器:https://github.com/ctimmerm/axios-mock-adapter
十三、Jest 中的钩子函数
写测试的时候你经常需要在运行测试前做一些准备工作,和在运行测试后进行一些整理工作。 Jest 提供辅助函数来处理这个问题。
为多次测试重复设置
如果你有一些要为多次测试重复设置的工作,你可以使用 beforeEach 和 afterEach。
beforeEach(() => {
  initializeCityDatabase();
});

afterEach(() => {
  clearCityDatabase();
});

test('city database has Vienna', () => {
  expect(isCity('Vienna')).toBeTruthy();
});

test('city database has San Juan', () => {
  expect(isCity('San Juan')).toBeTruthy();
});
beforeEach 和 afterEach 能够通过与 异步代码测试 相同的方式处理异步代码。
一次性设置
beforeAll(() => {
  return initializeCityDatabase();
});

afterAll(() => {
  return clearCityDatabase();
});

test('city database has Vienna', () => {
  expect(isCity('Vienna')).toBeTruthy();
});

test('city database has San Juan', () => {
  expect(isCity('San Juan')).toBeTruthy();
});
钩子的作用域
默认情况下,before 和 after 的块可以应用到文件中的每个测试。 此外可以通过 describe 块来将测试分组。 当 before 和 after 的块在 describe 块内部时,则其只适用于该 describe 块内的测试。
例如,我们不仅有一个城市数据库,而且还有一个食品数据库。 我们可以为不同的测试进行不同的设置:
// Applies to all tests in this file
beforeEach(() => {
  return initializeCityDatabase();
});

test('city database has Vienna', () => {
  expect(isCity('Vienna')).toBeTruthy();
});

test('city database has San Juan', () => {
  expect(isCity('San Juan')).toBeTruthy();
});

describe('matching cities to foods', () => {
  // Applies only to tests in this describe block
  beforeEach(() => {
    return initializeFoodDatabase();
  });

  test('Vienna <3 sausage', () => {
    expect(isValidCityFoodPair('Vienna', 'Wiener Schnitzel')).toBe(true);
  });

  test('San Juan <3 plantains', () => {
    expect(isValidCityFoodPair('San Juan', 'Mofongo')).toBe(true);
  });
});
注意,顶级的 beforeEach 在 describe 块级的 beforeEach 之前被执行。 这可能有助于说明所有钩子的执行顺序。
beforeAll(() => console.log('1 - beforeAll'));
afterAll(() => console.log('1 - afterAll'));
beforeEach(() => console.log('1 - beforeEach'));
afterEach(() => console.log('1 - afterEach'));
test('', () => console.log('1 - test'));
describe('Scoped / Nested block', () => {
  beforeAll(() => console.log('2 - beforeAll'));
  afterAll(() => console.log('2 - afterAll'));
  beforeEach(() => console.log('2 - beforeEach'));
  afterEach(() => console.log('2 - afterEach'));
  test('', () => console.log('2 - test'));
});

// 1 - beforeAll
// 1 - beforeEach
// 1 - test
// 1 - afterEach
// 2 - beforeAll
// 1 - beforeEach
// 2 - beforeEach
// 2 - test
// 2 - afterEach
// 1 - afterEach
// 2 - afterAll
// 1 - afterAll
describe 和 test 块的执行顺序
Jest 会在所有真正的测试开始之前执行测试文件里所有的 describe 处理程序(handlers)。 这是在 before* 和 after* 处理程序里面 (而不是在 describe 块中)进行准备工作和整理工作的另一个原因。 当 describe 块运行完后,,默认情况下,Jest 会按照 test 出现的顺序(译者注:原文是in the order they were encountered in the collection phase)依次运行所有测试,,等待每一个测试完成并整理好,然后才继续往下走。
考虑以下示例测试文件和输出:
describe('outer', () => {
  console.log('describe outer-a');

  describe('describe inner 1', () => {
    console.log('describe inner 1');
    test('test 1', () => {
      console.log('test for describe inner 1');
      expect(true).toEqual(true);
    });
  });

  console.log('describe outer-b');

  test('test 1', () => {
    console.log('test for describe outer');
    expect(true).toEqual(true);
  });

  describe('describe inner 2', () => {
    console.log('describe inner 2');
    test('test for describe inner 2', () => {
      console.log('test for describe inner 2');
      expect(false).toEqual(false);
    });
  });

  console.log('describe outer-c');
});

// describe outer-a
// describe inner 1
// describe outer-b
// describe inner 2
// describe outer-c
// test for describe inner 1
// test for describe outer
// test for describe inner 2
注意事项:
● 不要把准备性的代码写到 describe 中,一定要放到钩子函数中
仅运行某个测试用例
如果测试失败,第一件要检查的事就是,当仅运行这条测试时,它是否仍然失败。 To run only one test with Jest, temporarily change that test command to a test.only:
test.only('this will be the only test that runs', () => {
  expect(true).toBe(false);
});

test('this test will not run', () => {
  expect('A').toBe('A');
});
如果你有一个测试,当它作为一个更大的用例中的一部分时,经常运行失败,但是当你单独运行它时,并不会失败,所以最好考虑其他测试对这个测试的影响。 通常可以通过修改 beforeEach 来清除一些共享的状态来修复这种问题。 If you’re not sure whether some shared state is being modified, you can also try a beforeEach that logs data.
十四、Jest 快照测试
快照的应用场景
● 配置文件
● 组件 UI 展示测试
使用快照测试
module.exports = {
  host: 'localhost',
  port: 8080
}
测试上面的配置文件:
import config from './config'

test('snapshot test', () => {
  expect()
})
更新快照
方式1:使用命令
jest --updateSnapshot

# 简写
jest -u
方式2:在监视模式下以交互方式更新失败的快照。
● u 更新所有失败的快照
● i 交互的方式选择要更新的快照
● s 跳过快照更新
解决快照中的动态数据问题
● 比如动态时间
● 解决方案:
toMatchSnapShot({
	time: expect.any(Date)
})
行内快照
内联快照的行为与外部快照(.snap文件)相同,但快照值会自动写回到源代码中。这意味着您可以享受自动生成的快照的好处,而不必切换到外部文件来确保写入正确的值。
注意:内联快照由Prettier提供支持。要使用嵌入式快照,必须在项目中安装漂亮的快照。写入测试文件时,将使用您的Prettier配置。
如果您在Jest找不到它的位置安装了漂亮的东西,则可以使用“ prettierPath”配置属性告诉Jest如何找到它。
十五、Jest 测试 DOM 节点
测试通常在无法访问真实渲染表面(如浏览器)的环境中运行。对于这些环境,我们建议使用 jsdom 来模拟浏览器,这是一个在 Node.js 内运行的轻量级浏览器实现。
在大多数情况下,jsdom 的行为类似于常规浏览器,但不具备如布局和导航的功能。这对于大多数基于 Web 的组件测试仍然有用,因为它的运行比为每个测试启动浏览器的方式效率更高。并且由于它与你编写的测试运行在同一个进程中,所以你能够编写代码来检查和断言渲染的 DOM。
就像在真实的浏览器中一样,jsdom 让我们模拟用户交互;测试可以在 DOM 节点上派发事件,然后观察并断言这些操作的副作用(例子)。
可以使用上述设置编写大部分 UI 测试:使用 Jest 作为测试运行器,渲染到 jsdom,使用 act() 辅助函数(例子)提供的能力通过一系列的浏览器事件来模拟用户交互行为。例如,大量 React 自己的测试都是用这种组合编写的。
如果您正在编写一个主要测试浏览器特定行为的库,并且需要布局或真实输入等原生浏览器行为,那么你可以使用像 mocha 这样的框架。
在你 无法 模拟 DOM 环境(例如,在 Node.js 上测试 React Native 组件)的情况下,可以使用 事件模拟辅助函数 来模拟与元素的交互。或者,你也可以使用 @testing-library/react-native 中的 fireEvent 辅助函数。
诸如 Cypress,puppeteer 和 webdriver 等框架对于运行端对端测试 都非常有用。
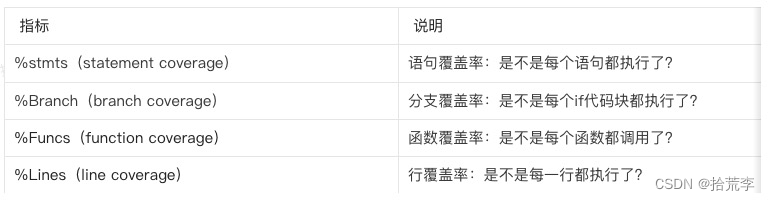
十六、Jest 测试覆盖率
测试覆盖率(test coverage)是衡量软件测试完整性的一个重要指标。掌握测试覆盖率数据,有利于客观认识软件质量,正确了解测试状态,有效改进测试工作。
Jest 测试覆盖率相关配置
// jest.config.js
module.exports = {
	...

  // 收集测试覆盖率
  collectCoverage: true,

  // 一组glob模式,指示一组应为其收集覆盖率信息的文件。如果文件与指定的 glob 模式匹配,则即使该文件不存在测试,也将为其收集覆盖率信息,并且在测试套件中从不需要它。
  collectCoverageFrom: [
    '**/*.{js,jsx}',
    '!**/node_modules/**',
    '!**/vendor/**'
  ],

  // 测试覆盖率报告输出目录
  coverageDirectory: 'coverage',

  // 指示应使用哪个提供程序来检测覆盖范围的代码。允许的值为 babel(默认)或 v8。
  // 请注意,使用 v8 被认为是实验性的。这使用了 V8 的内置代码覆盖率,而不是基于 Babel 的代码覆盖率。它没有经过很好的测试,并且在 Node 的最后几个版本中也得到了改进。使用最新版本的 Node(在撰写本文时为v14)会产生更好的结果。
  coverageProvider: 'babel',

  // Jest 在编写覆盖率报告时使用的报告人姓名列表。可以使用任何伊斯坦布尔记者
  coverageReporters: ["json", "lcov", "text", "clover"],

  // 覆盖率阈值,如果没有达到阈值则测试失败
  coverageThreshold: {
		"global": {
      "branches": 50,
      "functions": 50,
      "lines": 50,
      "statements": 50
    },
    "./src/components/": {
      "branches": 40,
      "statements": 40
    },
    "./src/reducers/**/*.js": {
      "statements": 90
    },
    "./src/api/very-important-module.js": {
      "branches": 100,
      "functions": 100,
      "lines": 100,
      "statements": 100
    }
  },

  // 通常,在收集代码覆盖率时会忽略测试文件。使用此选项,您可以覆盖此行为,并在代码覆盖率中包含否则被忽略的文件。
  forceCoverageMatch: ["**/*.t.js"]
}
覆盖率报告
--------------------|----------|----------|----------|----------|-------------------|
File                |  % Stmts | % Branch |  % Funcs |  % Lines | Uncovered Line #s |
--------------------|----------|----------|----------|----------|-------------------|
All files           |    95.65 |    83.33 |      100 |    95.56 |                   |
 components         |      100 |      100 |      100 |      100 |                   |
  HelloWorld.vue    |      100 |      100 |      100 |      100 |                   |
 components/TodoApp |    95.45 |    83.33 |      100 |    95.35 |                   |
  TodoFooter.vue    |      100 |      100 |      100 |      100 |                   |
  TodoHeader.vue    |       80 |       50 |      100 |       80 |                21 |
  TodoItem.vue      |      100 |      100 |      100 |      100 |                   |
  index.vue         |    96.77 |    85.71 |      100 |    96.67 |               102 |
--------------------|----------|----------|----------|----------|-------------------|
上传覆盖率
通常情况下不建议将测试覆盖率报告保存在项目仓库中。
# .gitignore
coverage
我们可以使用更专业的工具来帮助我们展示覆盖率报告。有两个网站可供选择:Codecov 和 Coveralls。这里以 Codecov 为例。
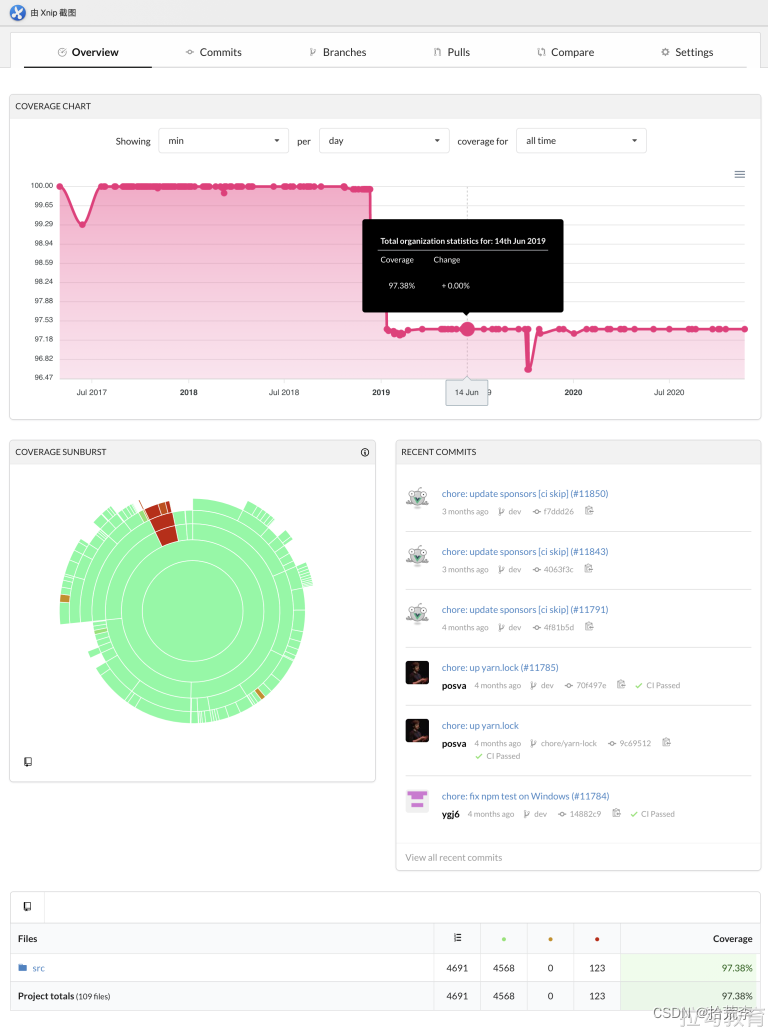
这是 Vue.js 发布在 codecov 上的测试覆盖率统计报告。
首先,打开 Codecov 官网,绑定 Github 账号之后,选择要展示测试覆盖率的仓库并获得 token。
然后,安装 Codecov:
npm install --save-dev codecov
生成测试覆盖率报告:
npm run coverage
将测试覆盖率报告上传到 codecov:
codecov --token=xxx
展示 codecov 徽章
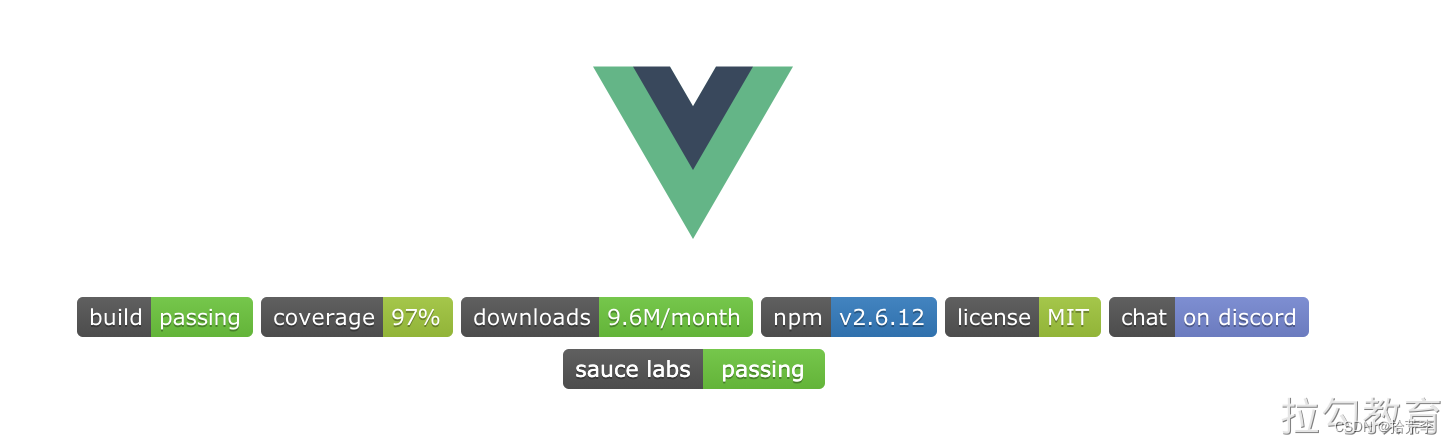
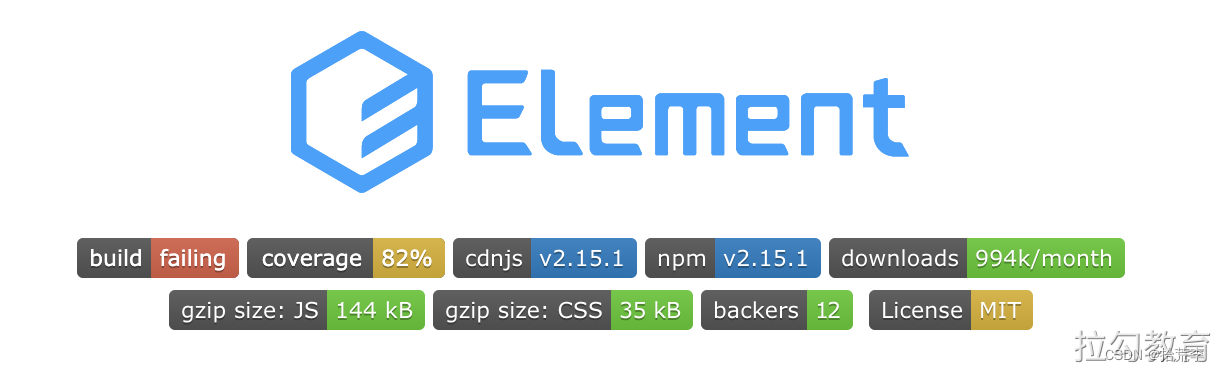
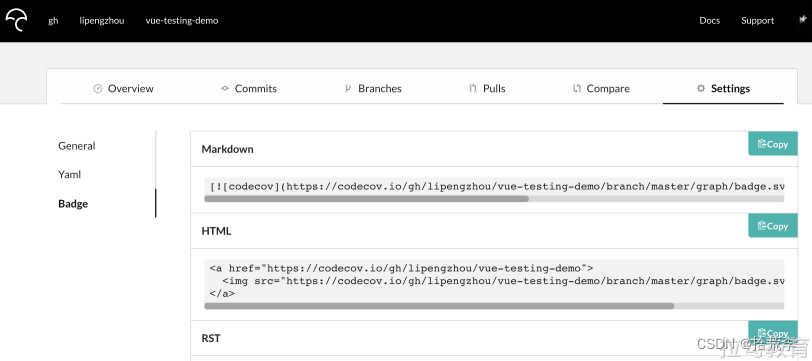
复制链接放到项目的 README.md 中即可。
十七、自动化测试和持续集成
如果每次修改代码之后,都手动进行单元测试,不仅加重工作量,而且容易出错,因此我们需要进行自动化测试,这就用到了持续集成。
持续集成是一种软件开发实践,每次集成都通过自动化的构建(包括编译,发布,测试等)来验证,从而尽早地发现代码中的错误。
此外项目如果接入持续集成在多人开发同一个仓库时候能起到很大的用途,比如每次 push 都能自动触发测试,测试没过会发生告警。或者如果需求采用 Issues + Merge Request 来管理,每个需求一个 Issue + 一个分支,开发完成后提交 Merge Request,由项目 Owner 负责合并,项目质量将更有保障。
配置 GitHub Actions
可供选择的持续集成工具有 Gitlab CI、 Travis CI 、 Circle CI、GitHub Actions 等。这里以 GitHub Actions 为例。
name: Publish And Deploy Demo

on:
  push:
    branches:
      - master
	pull_request:
  	branches:
    	- master

jobs:
  build-and-deploy:
    runs-on: ubuntu-latest
    steps:
      - name: Checkout
        uses: actions/checkout@master

			# 安装依赖 & 运行测试并生成覆盖率报告 & 项目打包
      - name: Install and Build
        run: |
          npm install
          npm run coverage
          npm run build

      # 发布到 GitHub Pages
      - name: Deploy
        uses: JamesIves/github-pages-deploy-action@4.1.0
        with:
          branch: gh-pages # The branch the action should deploy to.
          folder: dist # The folder the action should deploy.

			# 上传测试覆盖率报告到 codecov
      - name: codecov
        uses: codecov/codecov-action@v1
        with:
          token: ${{ secrets.CODECOV_TOKEN }}
最后,将所有修改提交到远程仓库的 master 分支上,就可以看到 GitHub Actions 正在自动构建。
展示 GitHub Actions 徽章
当 CI 构建完成之后,我们可以通过访问 Travis CI 和 Codecov 的网站查看到详细结果,当然也可以将结果以徽章的形式放入 README,这样更清晰明了。
GitHub Actions 的徽章这样获取:
https://github.com/<OWNER>/<REPOSITORY>/workflows/<WORKFLOW_NAME>/badge.svg
注意:如果您的工作流程使用 name 关键词,则必须按名称引用工作流程。 如果工作流程名称包含空格,您需要将空格替换为 URL 编码字符串 %20。 有关 name 关键词的更多信息,请参阅“GitHub Actions 的工作流程语法”。
或者,如果工作流程没有 name,则必须使用相对于仓库根目录的文件路径引用工作流程文件。
https://github.com/<OWNER>/<REPOSITORY>/workflows/<WORKFLOW_FILE_PATH>/badge.svg
每当 CI 构建完成,结果就会以徽章的形式,展示在你的项目文档中。
十八、调试测试代码

旨在为数千万中国开发者提供一个无缝且高效的云端环境,以支持学习、使用和贡献开源项目。
更多推荐


 3
3 0
0- 0


 已为社区贡献6条内容

所有评论(0)