
uniapp开发微信小程序-软考刷题小程序
计算机科学与技术辅修学士的毕业设计
记录一次基于uniapp的微信小程序开发
前言
计算机科学与技术辅修学士的课程设计
最终决定做微信小程序(比较简单)
刷题小程序方向
题库是软考内容
开发语言
前端uniapp开发
后端django开发
springboot目前不太会,django上手比较快,后端能用就行()
数据库MySQL
功能展示
主页

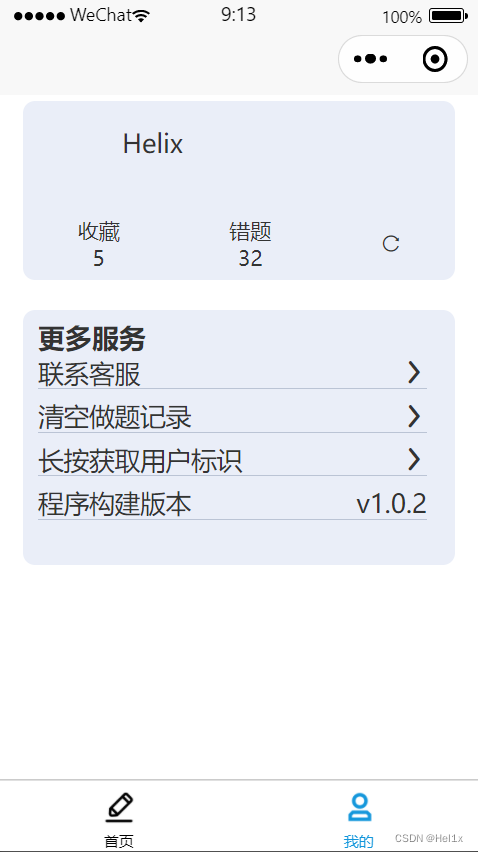
我的
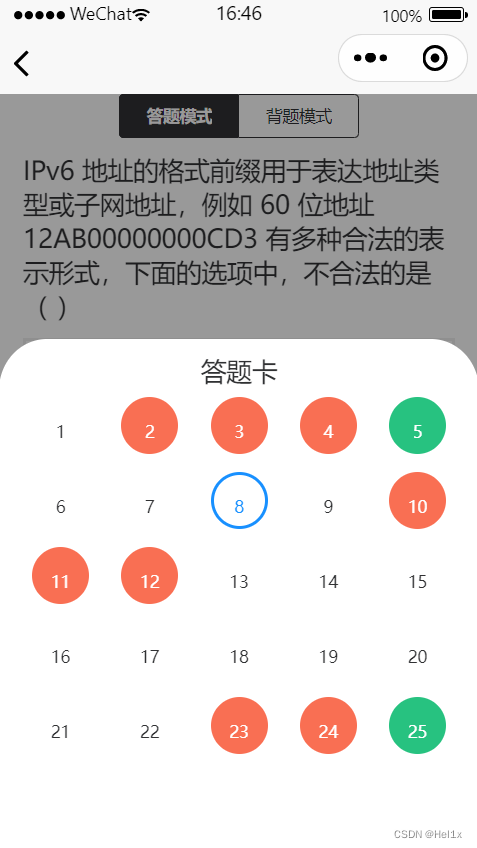
答题卡
框架设计
题库
题库直接从网上爬取
传送门: 记录一次爬虫题库
数据库结构
这个要写可以写好几页,先带过
前端
参考了软考通
功能实现
刷题部分
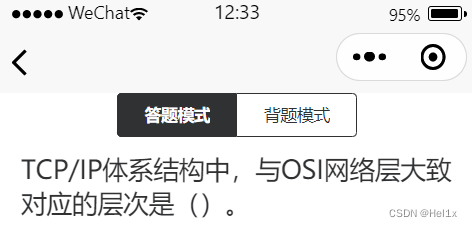
刷题模式选择
分段器
<view class="practice-title">
	 <u-subsection :list="list" mode="subsection" :current="model" @change="sectionChange"></u-subsection>
</view>
data
list:['答题模式','背题模式'],

:current绑定了当前选项
通过父子组件通信
PartPage
<PratPage :question="questionList" :swiperIndex="swiperIndex" @dex="indexChange" :logList="logList" @log="logChange" v-model="model"></PratPage>
用v-model模式双向绑定
PartPage.vue中
	props:[
		"question","swiperIndex","logList","value"
	],
v-model默认参数名为value
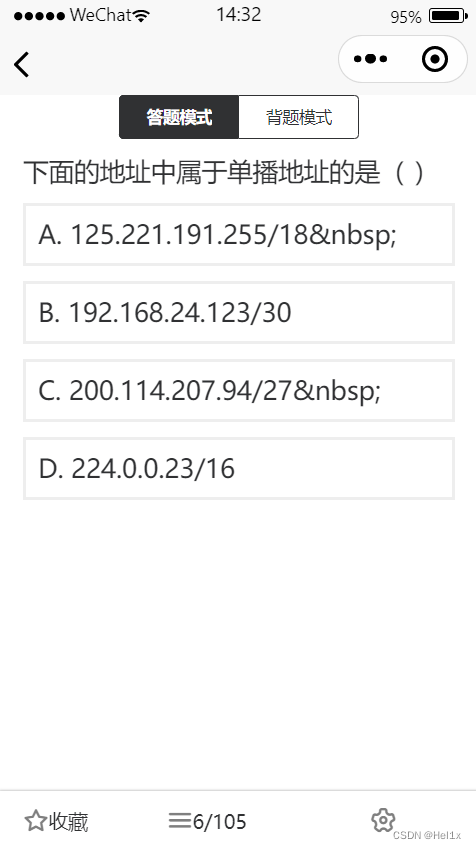
然后先看题目滑动显示
题目滑动显示
使用swpier组件遍历questionList即可实现题目显示
<swiper class="swipe-box" @change="dexChange" :current="currentIndex">
	<swiper-item skip-hidden-item-layout="true" class="swipe-item" v-for="(item,index) in question" :key="index">
		<view class="stem">{{item.stem}}</view>
	</swiper-item>
</swiper>
题号跟随
参考了这篇文章
父子组件传参
swpier组件传值给父组件
父组件传值给导航栏组件
swiper部分,滑动时会调用dexChange函数传值给父组件
<swiper class="swipe-box" @change="dexChange" :current="currentIndex">
	<swiper-item skip-hidden-item-layout="true" class="swipe-item" v-for="(item,index) in question" :key="index">
		<view class="stem">{{item.stem}}</view>
	</swiper-item>
</swiper>
父组件传入swiperIndex
<PratPage :question="questionList" :swiperIndex="swiperIndex" @dex="indexChange" :logList="logList" @log="logChange" v-model="model"></PratPage>
子组件传给父组件
swiper改变变时调用
dexChange(e) {
	this.$emit('dex', e.detail.current);
	this.currentIndex = e.detail.current;
},
父组件方法
indexChange(current) {
	this.currentIndex = current;
},
选项显示
父组件把每个question传给选项子组件
Option.vue
<template>
	<view>
		<view v-for="(option,itemindex) in options" class="option">
				<view class="option-item" :class="{isright:(isRight(option,itemindex)),iserror:(isError(option,itemindex)),isright:(model&option.rightFlag)}" @click="chooseOption(itemindex)" :key="index">
				{{option.option}}.{{option.content}}
				</view>
			</view>
			<view v-if="show | model" class="analysis">
				{{item.analysis}}
		</view>
	</view>
</template>
script
比较复杂,直接贴出
<script>
import http from "@/network/Request.js"
	export default {
		data() {
			return {
				options:JSON.parse(this.item.answer),
				index:-1,
				show:0,
			}
		},
		methods: {
			chooseOption(itemindex) {
				this.index = itemindex
				this.show = 1

				this.$emit('answered',this.options[itemindex].rightFlag);
				// console.log(itemindex)
				// 0 1 2 3 4
			},
			isRight(option,itemindex) {
				// console.log(itemindex)
				if(option.rightFlag == 1 && itemindex == (this.index)){
					// this.$emit('answered',true);
					return true;
				 }
			},
			isError(option,itemindex){
				if(option.rightFlag == 0 && itemindex == (this.index)){
					// this.$emit('answered',false);
					return true;
				 }
			}
		},
		props:[
			"item","model"
		],
		mounted() {
			// this.show()
			this.index = -1
		},
		computed: {
			listen() {
				this.model = this.$props.model
			}
		}
	}
</script>
通过computed监听model的变化
也就是上面那个刷题模式/背题模式的current
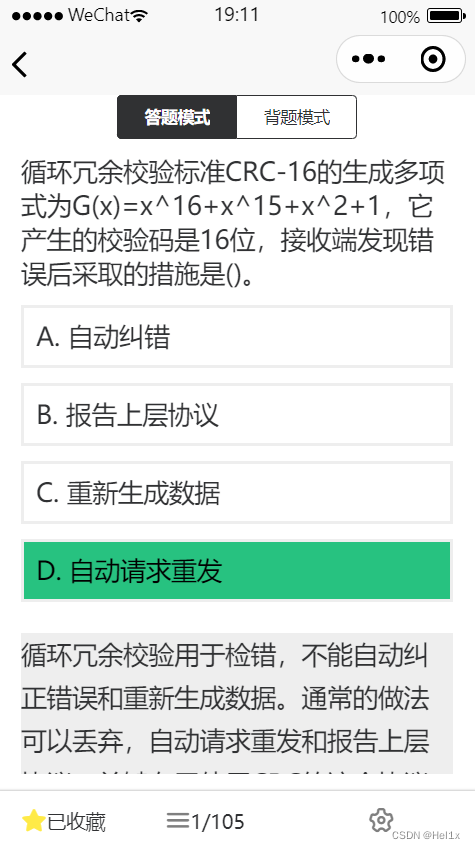
错题分析那里实现了刷题模式
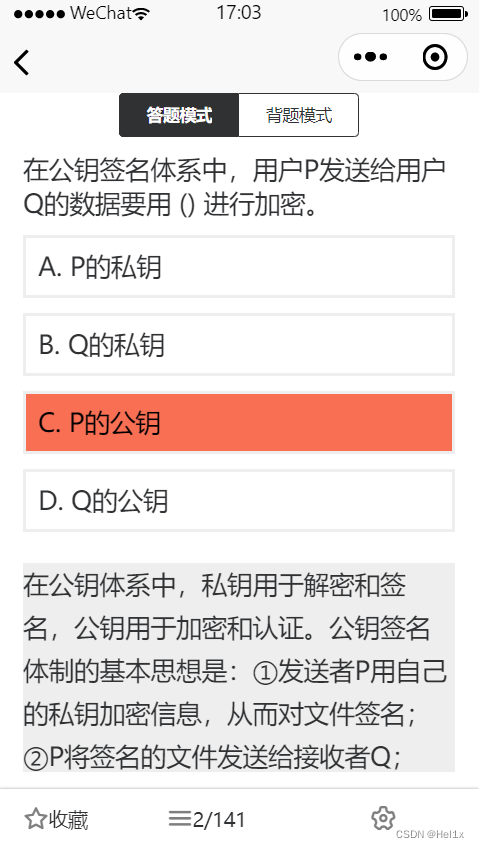
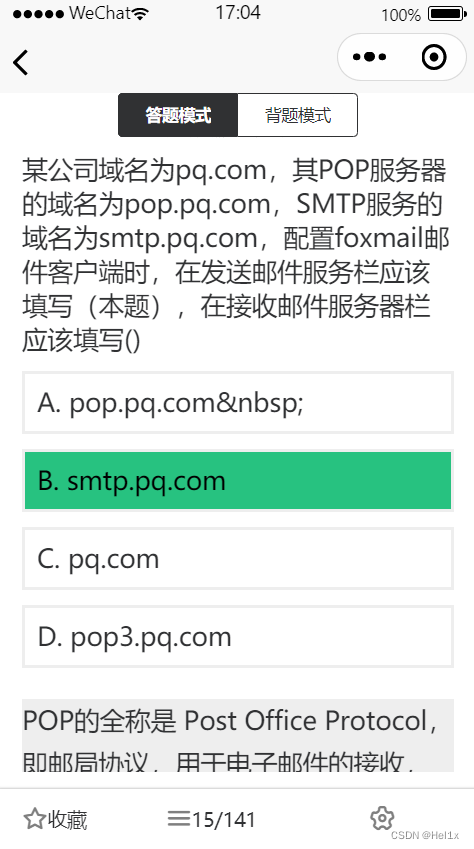
选项正误
通过dynamic class显示,关键在这一句
<view class="option-item" :class="{isright:(isRight(option,itemindex)),iserror:(isError(option,itemindex)),isright:(model&option.rightFlag)}" @click="chooseOption(itemindex)" :key="index">
</view>
methods
		methods: {
			chooseOption(itemindex) {
				this.index = itemindex
				this.show = 1

				this.$emit('answered',this.options[itemindex].rightFlag);
				// console.log(itemindex)
				// 0 1 2 3 4
			},
			isRight(option,itemindex) {
				// console.log(itemindex)
				if(option.rightFlag == 1 && itemindex == (this.index)){
					// this.$emit('answered',true);
					return true;
				 }
			},
			isError(option,itemindex){
				if(option.rightFlag == 0 && itemindex == (this.index)){
					// this.$emit('answered',false);
					return true;
				 }
			}
		},
实现逻辑是初始化了一个index
(由于是嵌入在swiper滑动栏里面的,每次滑动的时候都会调用mouted把index初始化)
判断当前选中的是不是itemindex
itemindex看源码即可知道是option中的索引
然后再判断选中option的rightFlag属性即可实现动态显示效果
效果图
刷题导航栏

创建BottomBar组件
<template>
	<view class="bomBar-box">
		<view class="bomBar">
			<view class="left">
				<slot name="left"></slot>
			</view>
			<view class="center">
				<slot name="center"></slot>
			</view>
			<view class="right">
				<slot name="right"></slot>
			</view>
		</view>
	</view>

</template>

<script>
	export default{
		name:"BottomBar",
		data(){
			return{

			}
		},

	}
</script>

<style scoped lang="scss">
	.bomBar-box{
		display: flex;
		justify-content: space-around;
		position: fixed;
		left: 0;
		bottom: 0;
		width: 100%;
		box-shadow: 0 0 6rpx #9E9E9E;
		z-index: 9;
		background-color: white;
	}
	.bomBar{
		width: 90vw;
		display: flex;
		height: 8vh;
		 // padding-bottom: 20rpx;
		font-size: $uni-font-size-sm;
		font-family: Microsoft YaHei, Microsoft YaHei-Bold;
		align-items: center;
		box-sizing: border-box;
	}
	.left,.right{
		height: 8vh;
		font-size: 28rpx;
		display: flex;
		align-items: center;
		justify-content: space-around;
		width: 30vw;
	}

	.center{
		height: 8vh;
		flex:1;
		display: flex;
		justify-content:space-around;
		align-items: center;
	}

	.page-dark{
		 -webkit-filter:brightness(20%);
		 // color: $uni-dark-font;
	}
</style>
主页面调用组件
<BottomBar>
	<template v-slot:left>
		<view v-if="favCompu" class="bom-left" @click="favClick">
			<u-icon name="star" size="40rpx" color="#7f7f7f"></u-icon>
			<view>
				收藏
			</view>
		</view>
		<view v-else class="bom-left" @click="favClick">
			<u-icon name="star-fill" size="40rpx" color="#ffea47"></u-icon>
			<view>
				已收藏
			</view>
		</view>
	</template>
	<template v-slot:center>
		<view @click="openCard" class="bom-center">
			<u-icon name="list" size="42rpx" color="#7f7f7f"></u-icon>
			<view class="">
				{{currentIndex}}/{{questionList.length}}
			</view>

		</view>
	</template>
	<template v-slot:right>
		<view @click="openSet" class="bom-right">
			<u-icon name="setting" size="46rpx" color="#7f7f7f"></u-icon>
		</view>
	</template>
</BottomBar>
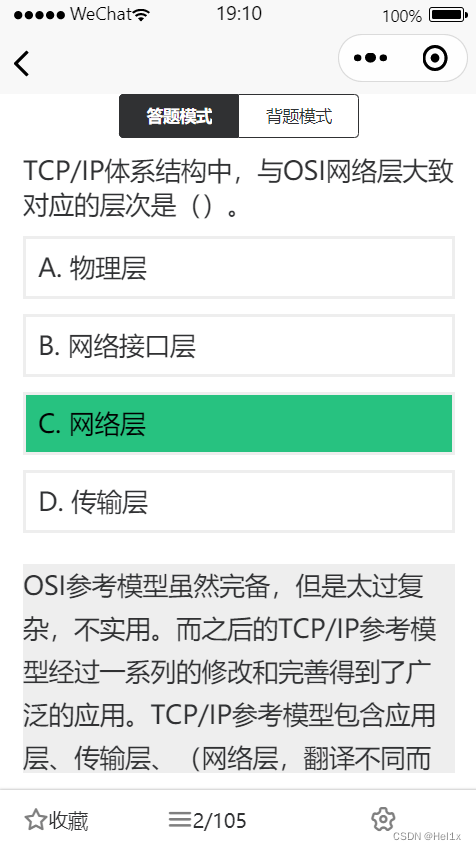
目前的UI
错题分析
用户在Option.vue组件中触发了chooseOption方法后可以将标志位置1
v-if即可显示解析
<view v-if="show | model" class="analysis">
	{{item.analysis}}
</view>
show作为标志位,model为前面的刷题模式选择
取或即可实现背题模式显示解析
由于双向绑定的问题
这里采用了监听
computed: {
	listen() {
		this.model = this.$props.model
	}
}
刷题导航栏功能
使用 uni-popup 组件
安装过程可见本人另外一文
传送门: uni-ui安装
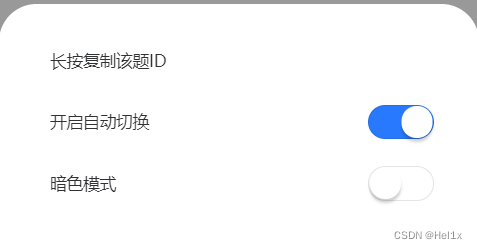
设置
<uni-popup ref="set">
	<view class="set-box">
		<view class="set" @longpress="copyID">
			长按复制该题ID
		</view>
		<view class="set">
			开启自动切换
			<u-switch v-model="isLoop"></u-switch>
		</view>
		<view class="set">
			暗色模式
			<u-switch v-model="isDark"></u-switch>
		</view>
	</view>
</uni-popup>
css
	.set-box {
		display: flex;
		flex-direction: column;
		padding-left: 80rpx;

		border-radius: 60rpx 60rpx 0 0;
		height: 390rpx;
		width: 100vw;
		background-color: white;

		box-sizing: border-box;
		padding-top: 40rpx;
	}
	.set {
		display: flex;
		align-items: center;
		justify-content: space-between;
		margin: 20rpx 0;
		height: 60rpx;
		width: 80vw;
		font-size: $uni-font-size-sm;
	}
	.wrapper {
		display: flex;
		flex-direction: column;
		align-items: center;
		border-radius: 10% 10% 0 0;
		width: 100%;
		background-color: white;
		z-index: 10;
		height: 800rpx;
	}
wrapper是蒙板
效果图
标页码&收藏
采用了一个logList来实现该功能
[{'questionId': '20201103145848-d02188e6-7ff1-45b2-9175-b7072bebd7af', 'index': 1, 'isChoose': False, 'isRight': False, 'collect': True}
{'questionId': '20201103145848-9cf85337-259b-4c87-9e67-2cfc57fff22c', 'index': 2, 'isChoose': True, 'isRight': 0, 'collect': False}
{'questionId': '20201103145848-228114f8-2ada-48df-9f2f-d3091ec2629a', 'index': 3, 'isChoose': True, 'isRight': 0, 'collect': True}
{'questionId': '20201103145848-0a107f96-fbea-4da0-b035-a9751838e21a', 'index': 4, 'isChoose': True, 'isRight': 0, 'collect': False}
{'questionId': '20201103145848-c854e3ac-ffcc-4596-a313-a4d52c78aacc', 'index': 5, 'isChoose': True, 'isRight': 1, 'collect': False}
{'questionId': '20201103145848-38fa3bcd-bd15-40e8-ad8c-76d6667a6c5f', 'index': 6, 'isChoose': False, 'isRight': False, 'collect': False}
{'questionId': '20201103145848-8cdccb64-45f6-4e64-ac16-5b0ed8523879', 'index': 7, 'isChoose': False, 'isRight': False, 'collect': False}
{'questionId': '20201103145848-972f9d13-621c-422b-9780-ac7240cd1727', 'index': 8, 'isChoose': False, 'isRight': False, 'collect': False}
{'questionId': '20201103145848-0a1243df-896c-485d-80c0-0bfc71574f46', 'index': 9, 'isChoose': False, 'isRight': False, 'collect': False}
{'questionId': '20201103145848-358d4afe-9d1c-4ca3-a2c3-2b6eb36429f8', 'index': 10, 'isChoose': True, 'isRight': 0, 'collect': False}
{'questionId': '20201103145848-ddb973b1-ea24-4d41-bc99-c4b04e5c39cc', 'index': 11, 'isChoose': True, 'isRight': 0, 'collect': False}
{'questionId': '20201103145848-1cacf73f-c65c-45c6-9d88-d87e63a25fcf', 'index': 12, 'isChoose': True, 'isRight': 0, 'collect': False}]
结构如图
0,1和布尔值用的有点不规范但是不影响使用
父组件通过网络请求/自己初始化一个logList然后传给子组件
logList获取/初始化方法
http.post('/api/get_log',{
	chapterId:this.chapterId,
	productId:this.productId,
}).then(res => {
	// console.log(JSON.stringify(res.data.data))
	if(res.data.code == 200)
	{
		this.logList =JSON.parse(JSON.parse(res.data.data.logList))
		store.state.logList = this.logList

	}
	if(res.data.code == 201)
	{
		for(var i=0;i<this.questionList.length;i++)
			{
				this.logList.push({
					questionId:this.questionList[i].id,
					index:i+1,
					isChoose:false,
					isRight:false,
					collect:false,
				})
			}
		store.state.logList = this.logList
	}
	})
http为封装好的axios组件
store是暂存组件
长期缓存需要使用setStorge方法
传给子组件PratPage.vue
<PratPage :question="questionList" :swiperIndex="swiperIndex" @dex="indexChange" :logList="logList" @log="logChange" v-model="model"></PratPage>
二级子组件Option.vue
<Option @answered="answered" :item="item" :model="value"></Option>
用户点击option后调用
answered(isRight) {
	// console.log(this.currentIndex,isRight)
	this.logList[this.currentIndex].isChoose = true
	// this.logList[index]['isChoose'] = true,
	this.logList[this.currentIndex].isRight = Number(isRight)

	this.$emit('log',this.logList)
},
修改logList的值并传给父组件
父组件接到传值后调用api缓存到数据库
logChange(logList) {
	// 会调用
	this.logList = logList
	http.post('/api/log',{
		logList:JSON.stringify(logList),
		chapterId:this.chapterId,
		productId:this.productId
	})
},
这里实现了题目对错的记录
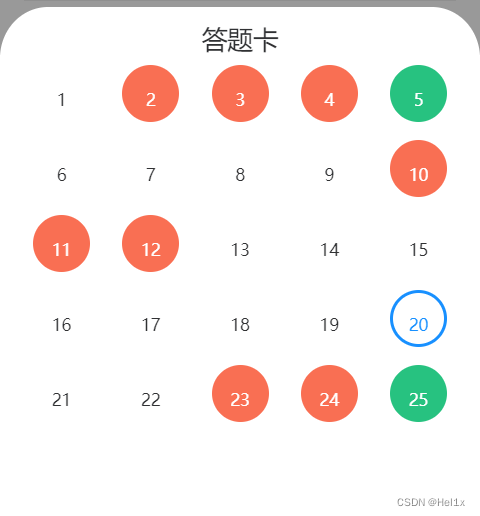
Pagnation.vue
<template>
	<view>
		<view class="title">
			答题卡
		</view>
		<scroll-view class="scroll-y" scroll-y="true">
			<view class="title-box">
				<view v-for="(item,itemindex) in statusList"
				:class="{isright:(item.isChoose & item.isRight==1),iserror:(item.isChoose & item.isRight==0),selected:(itemindex == (choose))}"
				@click="tp(item.index)" class="ball" >
						{{item.index}}
				</view>
			</view>
		</scroll-view>
	</view>
</template>
用一个下拉区域实现会更优雅
用户点击后把点击的index传到主组件中
直接修改swiper的current值即可实现跳转
如果下拉区域无法显示尝试给它加个高度
	.scroll-y {
		height: 50vh;
	}
收藏功能同理,修改logList里面的collect属性
Practice.vue通过index定位监听collect属性
computed: {
	favCompu() {
		if(this.logList[this.currentIndex]){
			if(this.logList[this.currentIndex].collect){
				return true
			}
			else{
				return false
			}
		}
	}
},
收藏显示跟随功能到此已实现
登录部分
经典jwt
django目录
/api/views.py
部分code
import pymysql
from authlib.jose import jwt
def login(request):
	nickname = request.POST.get('nickname')
	avatar_url = request.POST.get('avatar_url')
	code = request.POST.get('code')

	url = 'https://api.weixin.qq.com/sns/jscode2session'
	data = {
		'js_code':code,
		'appid':'手动打码',
		'密钥':'手动打码',
		'grant_type':'authorization_code',
	}
	r = requests.post(url,data = data)
	openid = json.loads(r.text)['openid']
	cursor = connection.cursor()
	cursor.execute('SELECT * FROM user_map WHERE openid = %s',[openid])
	if cursor.fetchone():
		pass
	else:
		cursor.execute("INSERT INTO user_map(openid,nickname,avatar_url) VALUES (%s,%s,%s)",[openid,nickname,avatar_url])

	token = jwt.encode(	{'alg': 'HS256'}, {
		'iss': '',
		'exp': int(time.time()) + 7200 ,
		'openid':openid
		}
		,settings.SECRET_KEY).decode('UTF-8')
	return packApiData(200,'ok','登录成功',{'token':token,'openid':openid})

def packApiData(code=0, message="Lack Parameter", tips="参数缺失", data={}):
	# packApiData 规范化组装接口回调数据
	return HttpResponse(json.dumps(

		{
			'code': code,
			'message': message,
			'tips': tips,
			'requestTime': int(time.time()),
			'data': data
		},
		cls=CJsonEncoder),content_type="application/json")
这里直接使用了openid作为用户唯一标识
openid的获取参考微信官方文档
获取openid
鉴权
try:
	claim = jwt.decode(request.headers['Authorization'], settings.SECRET_KEY)
	openid = claim.get('openid')
except:
	return packApiData(401, 'please login', '请先登录')
没有jwt的返回登录
后端返回jwt后储存在本地
login() {
	 wx.login({
	     success: res => {
	       // 发送 res.code 到后台换取 openId, sessionKey
	       if(res.code){
				 http.post('/api/login',{
					 code:res.code,
					 nickname:this.nickName,
					 avatar_url:this.avatarUrl,
				 }).then(res => {
					 // store.state.user.token = res.data.data.token
					 wx.setStorageSync('token',res.data.data.token)
					 wx.setStorageSync('openid',res.data.data.openid)
					 // store.state.user.openid = res.data.data.openid
					 // console.log(res.data.data.token)
				 })
	           }


	     }
	   })
},
store在每次进入小程序时会重置,长期存储需要使用wx.setStorageSync()
ps:
wx.setStorage()存储结构有一点区别
请求拦截器
import Luch from 'luch-request'
const http = new Luch({
	baseURL:"http://127.0.0.1:8000",
	// 自己的ip:host,微信小程序的后端需要使用域名
	withCredentials: false,
	timeout: 300000, //超时时长5分钟,
	header: {
		'Content-Type': 'application/x-www-form-urlencoded'
	}
});

http.interceptors.request.use((config)=>{
		 config.header.Authorization = wx.getStorageSync('token')
	return config
})
缓存部分
短期缓存可以使用Store组件
/store/index.js
//引用Vuex
import Vue from 'vue'
import Vuex from 'vuex'
Vue.use(Vuex)

//实例store对象
const store = new Vuex.Store({
	state: {
		user:{
			token:''
		},
		chapterList:[],
	},
	mutations: {
		/*......*/
	}
})
//导出store对象
export default store
//export default const store或者export const store会报错
缓存题目,logList等短期内不刷新的参数
长时间缓存如token 昵称 头像等需要使用wx.setStorage()
昵称,头像也可以通过网络请求获得
数据库部分
数据库采用MySQL
连接使用pymysql
django原生的语句我个人不太喜欢
部署
后端采用nginx+uwsgi+django的模式
nginx转发请求到uwsgi
wusgi安装可以参照我的这篇文章
ubuntu安装uwsgi
nginx的部分配置文件
server {
    listen      443;
    server_name 域名/ip地址;
    charset     utf-8;
    client_max_body_size 75M;

    location / {
        uwsgi_pass  127.0.0.1:8001;
        # 这里转发到uwsgi中设置的
        include     /etc/nginx/uwsgi_params;
        uwsgi_read_timeout 15;

    }
}
}
uwsgi.ini
[uwsgi]
socket = 127.0.0.1:8001
# 与nginx保持一致
chdir=django项目路径
module=项目名称.wsgi
py-autoreload = 1
#自动重载建议开
https配置参考腾讯云文档
Nginx 服务器 SSL 证书安装部署
后记
告一段落了,结课还有一段时间,慢慢打磨
2022-07-25 希望早日润
未完待续

为开发者提供学习成长、分享交流、生态实践、资源工具等服务,帮助开发者快速成长。
更多推荐


 6
6 0
0- 0


 已为社区贡献2条内容

所有评论(0)