K8S master高可用,多master节点 (keepalived + haproxy)案例
说明Apiserver是用户和 kubernetes 集群交互的入口,封装了核心对象的增删改查操作,提供了 RESTFul 风格的 API 接口,通过etcd来实现持久化并维护对象的一致性。所以在整个K8S集群中,Apiserver服务至关重要,一旦宕机,整个K8S平台将无法使用,所以保障企业高可用是运维必备的工作之一。一、环境:192.168.0.47 master192.168.0.33 ba
说明
Apiserver是用户和 kubernetes 集群交互的入口,封装了核心对象的增删改查操作,提供了 RESTFul 风格的 API 接口,通过etcd来实现持久化并维护对象的一致性。所以在整个K8S集群中,Apiserver服务至关重要,一旦宕机,整个K8S平台将无法使用,所以保障企业高可用是运维必备的工作之一。
一、环境:
192.168.0.47 master
192.168.0.33 backup
192.168.0.37 backup
vip :192.168.0.232
要求:一主两备,VIP自动漂移
二、3台服务器安装配置keepalived + haproxy
https://blog.csdn.net/oToyix/article/details/118110898
此链接文档为上篇,100%连续
三、Kubeadm安装配置K8S
1、三个节点安装docker、docker-compose
执行下面脚本
if [ $id -ne 0 ];then
	echo "username is not root,please use root,now exit"
	exit
fi

cd /usr/local/
echo "download docker-19.03.0.tgz, wait......"
wget -c http://mirrors.163.com/docker-ce/linux/static/stable/x86_64/docker-20.10.7.tgz
tar -xf docker-20.10.7.tgz
useradd -s /sbin/nologin docker -M

echo "set docker path"
cat>>/etc/profile<<EOF
export PATH=\$PATH:/usr/local/docker/
EOF

mkdir /etc/docker

echo "daemon.json"
cat > /etc/docker/daemon.json <<EOF
{
  "exec-opts": ["native.cgroupdriver=systemd"],
  "log-driver": "json-file",
  "log-opts": {
    "max-size": "100m"
  },
  "storage-driver": "overlay2",
  "storage-opts": [
    "overlay2.override_kernel_check=true"
  ],
  "registry-mirrors": ["https://uyah70su.mirror.aliyuncs.com"]
}
EOF

cd docker
echo "cp -rf * /usr/bin/"
cp -rf * /usr/bin/
echo "show version"
docker --version

echo "download docker-compose"
wget -c https://github.com/docker/compose/releases/download/1.29.2/docker-compose-Linux-x86_64
mv docker-compose-Linux-x86_64 /usr/local/bin/docker-compose
chmod a+x /usr/local/bin/docker-compose
ln -s /usr/local/bin/docker-compose /usr/bin/docker-compose
docker-compose --version

echo "docker.sevice in systemd"
cat > /etc/systemd/system/docker.service <<EOF
[Unit]
After=network-online.target firewalld.service
Wants=network-online.target
[Service]
Type=notify
ExecStart=/usr/bin/dockerd
ExecReload=/bin/kill -s HUP $MAINPID
LimitNOFILE=infinity
LimitNPROC=infinity
LimitCORE=infinity
TimeoutStartSec=0
Delegate=yes
KillMode=process
Restart=on-failure
StartLimitBurst=3
StartLimitInterval=60s
[Install]
WantedBy=multi-user.target
EOF

echo "reload daemon"
systemctl daemon-reload
echo "restart docker"
systemctl restart docker
docker ps
2、所有节点,HOST及防火墙设置
#添加hosts解析;
cat >/etc/hosts<<EOF
127.0.0.1 localhost localhost.localdomain
192.168.0.47 master1
192.168.0.33 node1				#这里可以写为master2、master3,原理一样
192.168.0.37 node2
EOF
#临时关闭selinux和防火墙;
sed -i '/SELINUX/s/enforcing/disabled/g'  /etc/sysconfig/selinux
setenforce  0
systemctl   stop     firewalld.service
systemctl   disable   firewalld.service
#同步节点时间;
yum install ntpdate -y
ntpdate  pool.ntp.org
#修改对应节点主机名;
hostname `cat /etc/hosts|grep $(ifconfig|grep broadcast|awk '{print $2}'|grep 192)|awk '{print $2}'`;su
#关闭swapoff;
swapoff -a
3、所有节点,内核优化
cat > /etc/modules-load.d/ipvs.conf <<EOF
# Load IPVS at boot
ip_vs
ip_vs_rr
ip_vs_wrr
ip_vs_sh
nf_conntrack_ipv4
EOF
systemctl enable --now systemd-modules-load.service
#确认内核模块加载成功
lsmod | grep -e ip_vs -e nf_conntrack_ipv4
#安装ipset、ipvsadm
yum install -y ipset ipvsadm
#配置内核参数;
cat <<EOF >  /etc/sysctl.d/k8s.conf
net.bridge.bridge-nf-call-ip6tables = 1
net.bridge.bridge-nf-call-iptables = 1
EOF
sysctl --system
4、所有节点-添加yum源
cat>>/etc/yum.repos.d/kubernetes.repo<<EOF
[kubernetes]
name=Kubernetes
baseurl=https://mirrors.aliyun.com/kubernetes/yum/repos/kubernetes-el7-x86_64
enabled=1
gpgcheck=0
repo_gpgcheck=0
gpgkey=https://mirrors.aliyun.com/kubernetes/yum/doc/yum-key.gpg
EOF
5、所有节点安装 kubeadm kubelet kubectl
#安装Kubeadm;
yum install -y kubeadm-1.20.4 kubelet-1.20.4 kubectl-1.20.4
rpm -qa|grep kube
kubeadm-1.20.4-0.x86_64
kubectl-1.20.4-0.x86_64
kubelet-1.20.4-0.x86_64
kubernetes-cni-0.8.7-0.x86_64
#启动kubelet服务
systemctl enable kubelet.service
systemctl start kubelet.service
6、master1节点 - 初始化Master集群
K8S集群引入Haproxy高可用集群,此时整个集群需要重新初始化,创建初始化kubeadmin-init.yaml配置文件。
#打印默认初始化配置信息至yaml文件中;
kubeadm config print init-defaults >kubeadmin-init.yaml
#将如下代码覆盖kubeadm-init.yaml文件。
apiVersion: kubeadm.k8s.io/v1beta2
bootstrapTokens:
- groups:
  - system:bootstrappers:kubeadm:default-node-token
  token: abcdef.0123456789abcdef
  ttl: 24h0m0s
  usages:
  - signing
  - authentication
kind: InitConfiguration
localAPIEndpoint:
  advertiseAddress: 192.168.0.47
  bindPort: 6443
nodeRegistration:
  criSocket: /var/run/dockershim.sock
  name: master1
  taints:
  - effect: NoSchedule
    key: node-role.kubernetes.io/master
---
apiServer:
  timeoutForControlPlane: 4m0s
apiVersion: kubeadm.k8s.io/v1beta2
certificatesDir: /etc/kubernetes/pki
clusterName: kubernetes
controlPlaneEndpoint: "192.168.0.232:8443"
controllerManager: {}
dns:
  type: CoreDNS
etcd:
  local:
    dataDir: /var/lib/etcd
imageRepository: registry.aliyuncs.com/google_containers
kind: ClusterConfiguration
kubernetesVersion: v1.20.4
networking:
  dnsDomain: cluster.local
  podSubnet: 10.244.0.0/16
  serviceSubnet: 10.10.0.0/16
scheduler: {}
注:如果这里使用外部的etcd,将改部分配置,见下两段:
mkdir -p /etc/kubernetes/pki/etcd/
cp ca.pem /etc/kubernetes/pki/etcd/
cp client.pem /etc/kubernetes/pki/apiserver-etcd-client.pem
cp client-key.pem /etc/kubernetes/pki/apiserver-etcd-client-key.pem
 #这里的3个pem文件是从etcd中复制过来的
etcd:
  external:
    endpoints:
    - https://192.168.0.35:2379
    - https://192.168.0.37:2379
    - https://192.168.0.38:2379
    /etc/kubernetes/pki/etcd/ca.pem
    /etc/kubernetes/pki/apiserver-etcd-client.pem
    /etc/kubernetes/pki/apiserver-etcd-client.pem
#然后执行如下命令初始化集群即可,操作指令如下:
kubeadm init --config kubeadmin-init.yaml --upload-certs
 kubeadm init --config kubeadmin-init.yaml --upload-certs
[init] Using Kubernetes version: v1.20.4
[preflight] Running pre-flight checks
        [WARNING Service-Docker]: docker service is not enabled, please run 'systemctl enable docker.service'
        [WARNING SystemVerification]: this Docker version is not on the list of validated versions: 20.10.7. Latest validated version: 19.03
[preflight] Pulling images required for setting up a Kubernetes cluster
[preflight] This might take a minute or two, depending on the speed of your internet connection
[preflight] You can also perform this action in beforehand using 'kubeadm config images pull'
[certs] Using certificateDir folder "/etc/kubernetes/pki"
[certs] Generating "ca" certificate and key
[certs] Generating "apiserver" certificate and key
[certs] apiserver serving cert is signed for DNS names [kubernetes kubernetes.default kubernetes.default.svc kubernetes.default.svc.cluster.local master1] and IPs [10.10.0.1 192.168.0.47 192.168.0.232]
[certs] Generating "apiserver-kubelet-client" certificate and key
[certs] Generating "front-proxy-ca" certificate and key
[certs] Generating "front-proxy-client" certificate and key
[certs] Generating "etcd/ca" certificate and key
[certs] Generating "etcd/server" certificate and key
[certs] etcd/server serving cert is signed for DNS names [localhost master1] and IPs [192.168.0.47 127.0.0.1 ::1]
[certs] Generating "etcd/peer" certificate and key
[certs] etcd/peer serving cert is signed for DNS names [localhost master1] and IPs [192.168.0.47 127.0.0.1 ::1]
[certs] Generating "etcd/healthcheck-client" certificate and key
[certs] Generating "apiserver-etcd-client" certificate and key
[certs] Generating "sa" key and public key
[kubeconfig] Using kubeconfig folder "/etc/kubernetes"
[endpoint] WARNING: port specified in controlPlaneEndpoint overrides bindPort in the controlplane address
[kubeconfig] Writing "admin.conf" kubeconfig file
[endpoint] WARNING: port specified in controlPlaneEndpoint overrides bindPort in the controlplane address
[kubeconfig] Writing "kubelet.conf" kubeconfig file
[endpoint] WARNING: port specified in controlPlaneEndpoint overrides bindPort in the controlplane address
[kubeconfig] Writing "controller-manager.conf" kubeconfig file
[endpoint] WARNING: port specified in controlPlaneEndpoint overrides bindPort in the controlplane address
[kubeconfig] Writing "scheduler.conf" kubeconfig file
[kubelet-start] Writing kubelet environment file with flags to file "/var/lib/kubelet/kubeadm-flags.env"
[kubelet-start] Writing kubelet configuration to file "/var/lib/kubelet/config.yaml"
[kubelet-start] Starting the kubelet
[control-plane] Using manifest folder "/etc/kubernetes/manifests"
[control-plane] Creating static Pod manifest for "kube-apiserver"
[control-plane] Creating static Pod manifest for "kube-controller-manager"
[control-plane] Creating static Pod manifest for "kube-scheduler"
[etcd] Creating static Pod manifest for local etcd in "/etc/kubernetes/manifests"
[wait-control-plane] Waiting for the kubelet to boot up the control plane as static Pods from directory "/etc/kubernetes/manifests". This can take up to 4m0s
[kubelet-check] Initial timeout of 40s passed.
[apiclient] All control plane components are healthy after 86.013093 seconds
[upload-config] Storing the configuration used in ConfigMap "kubeadm-config" in the "kube-system" Namespace
[kubelet] Creating a ConfigMap "kubelet-config-1.20" in namespace kube-system with the configuration for the kubelets in the cluster
[upload-certs] Storing the certificates in Secret "kubeadm-certs" in the "kube-system" Namespace
[upload-certs] Using certificate key:
0a5b92bde97a67f531ab45d87e9f9ce8efda54a44bc0967f3ca0bb9e174e0bb2
[mark-control-plane] Marking the node master1 as control-plane by adding the labels "node-role.kubernetes.io/master=''" and "node-role.kubernetes.io/control-plane='' (deprecated)"
[mark-control-plane] Marking the node master1 as control-plane by adding the taints [node-role.kubernetes.io/master:NoSchedule]
[bootstrap-token] Using token: abcdef.0123456789abcdef
[bootstrap-token] Configuring bootstrap tokens, cluster-info ConfigMap, RBAC Roles
[bootstrap-token] configured RBAC rules to allow Node Bootstrap tokens to get nodes
[bootstrap-token] configured RBAC rules to allow Node Bootstrap tokens to post CSRs in order for nodes to get long term certificate credentials
[bootstrap-token] configured RBAC rules to allow the csrapprover controller automatically approve CSRs from a Node Bootstrap Token
[bootstrap-token] configured RBAC rules to allow certificate rotation for all node client certificates in the cluster
[bootstrap-token] Creating the "cluster-info" ConfigMap in the "kube-public" namespace
[kubelet-finalize] Updating "/etc/kubernetes/kubelet.conf" to point to a rotatable kubelet client certificate and key
[addons] Applied essential addon: CoreDNS
[endpoint] WARNING: port specified in controlPlaneEndpoint overrides bindPort in the controlplane address
[addons] Applied essential addon: kube-proxy

Your Kubernetes control-plane has initialized successfully!

To start using your cluster, you need to run the following as a regular user:

  mkdir -p $HOME/.kube
  sudo cp -i /etc/kubernetes/admin.conf $HOME/.kube/config
  sudo chown $(id -u):$(id -g) $HOME/.kube/config

Alternatively, if you are the root user, you can run:

  export KUBECONFIG=/etc/kubernetes/admin.conf

You should now deploy a pod network to the cluster.
Run "kubectl apply -f [podnetwork].yaml" with one of the options listed at:
  https://kubernetes.io/docs/concepts/cluster-administration/addons/

You can now join any number of the control-plane node running the following command on each as root:

  kubeadm join 192.168.0.232:8443 --token abcdef.0123456789abcdef \
    --discovery-token-ca-cert-hash sha256:d1c458faf8dc0ca9f3a2de8c58e5b8948c417eb2fe379db7ce2728bd9efa5101 \
    --control-plane --certificate-key 0a5b92bde97a67f531ab45d87e9f9ce8efda54a44bc0967f3ca0bb9e174e0bb2

Please note that the certificate-key gives access to cluster sensitive data, keep it secret!
As a safeguard, uploaded-certs will be deleted in two hours; If necessary, you can use
"kubeadm init phase upload-certs --upload-certs" to reload certs afterward.

Then you can join any number of worker nodes by running the following on each as root:

kubeadm join 192.168.0.232:8443 --token abcdef.0123456789abcdef \
    --discovery-token-ca-cert-hash sha256:d1c458faf8dc0ca9f3a2de8c58e5b8948c417eb2fe379db7ce2728bd9efa5101
去除Master节点污点,使其可以分配Pod资源;
kubectl taint nodes --all node-role.kubernetes.io/master-
7、根据提示,执行如下指令即可;
mkdir -p $HOME/.kube
sudo cp -i /etc/kubernetes/admin.conf $HOME/.kube/config
sudo chown $(id -u):$(id -g) $HOME/.kube/config
8、在master1上生成新的token,打印加入K8S集群指令,操作命令如下:
kubeadm token create --print-join-command
kubeadm token create --print-join-command
kubeadm join 192.168.0.232:8443 --token ygatg3.4fetkjz6qadvb5zv     --discovery-token-ca-cert-hash sha256:d1c458faf8dc0ca9f3a2de8c58e5b8948c417eb2fe379db7ce2728bd9efa5101
9、在master上生成用于新master2加入的证书,操作命令如下:
kubeadm init phase upload-certs --upload-certs
W0625 17:52:52.929053   12346 version.go:102] could not fetch a Kubernetes version from the internet: unable to get URL "https://dl.k8s.io/release/stable-1.txt": Get "https://dl.k8s.io/release/stable-1.txt": context deadline exceeded (Client.Timeout exceeded while awaiting headers)
W0625 17:52:52.929204   12346 version.go:103] falling back to the local client version: v1.20.4
[upload-certs] Storing the certificates in Secret "kubeadm-certs" in the "kube-system" Namespace
[upload-certs] Using certificate key:
3d5884bb6f1b4c3db50ff04ea5bfe8015a1ceb9995e84457572560bbd625dbdf
10、故:加入节点具体命令为:
加入master节点
kubeadm join 192.168.0.232:8443 --token ygatg3.4fetkjz6qadvb5zv \
    --discovery-token-ca-cert-hash sha256:d1c458faf8dc0ca9f3a2de8c58e5b8948c417eb2fe379db7ce2728bd9efa5101 \
    --control-plane --certificate-key 3d5884bb6f1b4c3db50ff04ea5bfe8015a1ceb9995e84457572560bbd625dbdf
加入node节点
kubeadm join 192.168.0.232:8443 --token ygatg3.4fetkjz6qadvb5zv \
    --discovery-token-ca-cert-hash sha256:d1c458faf8dc0ca9f3a2de8c58e5b8948c417eb2fe379db7ce2728bd9efa5101
11、node1以master节点身份加入master集群
kubeadm join 192.168.0.232:8443 --token ygatg3.4fetkjz6qadvb5zv \
>     --discovery-token-ca-cert-hash sha256:d1c458faf8dc0ca9f3a2de8c58e5b8948c417eb2fe379db7ce2728bd9efa5101 \
>     --control-plane --certificate-key 3d5884bb6f1b4c3db50ff04ea5bfe8015a1ceb9995e84457572560bbd625dbdf
[preflight] Running pre-flight checks
        [WARNING SystemVerification]: this Docker version is not on the list of validated versions: 20.10.7. Latest validated version: 19.03
[preflight] Reading configuration from the cluster...
[preflight] FYI: You can look at this config file with 'kubectl -n kube-system get cm kubeadm-config -o yaml'
[preflight] Running pre-flight checks before initializing the new control plane instance
[preflight] Pulling images required for setting up a Kubernetes cluster
[preflight] This might take a minute or two, depending on the speed of your internet connection
[preflight] You can also perform this action in beforehand using 'kubeadm config images pull'
[download-certs] Downloading the certificates in Secret "kubeadm-certs" in the "kube-system" Namespace
[certs] Using certificateDir folder "/etc/kubernetes/pki"
[certs] Generating "apiserver-kubelet-client" certificate and key
[certs] Generating "apiserver" certificate and key
[certs] apiserver serving cert is signed for DNS names [kubernetes kubernetes.default kubernetes.default.svc kubernetes.default.svc.cluster.local node1] and IPs [10.10.0.1 192.168.0.33 192.168.0.232]
[certs] Generating "apiserver-etcd-client" certificate and key
[certs] Generating "etcd/peer" certificate and key
[certs] etcd/peer serving cert is signed for DNS names [localhost node1] and IPs [192.168.0.33 127.0.0.1 ::1]
[certs] Generating "etcd/healthcheck-client" certificate and key
[certs] Generating "etcd/server" certificate and key
[certs] etcd/server serving cert is signed for DNS names [localhost node1] and IPs [192.168.0.33 127.0.0.1 ::1]
[certs] Generating "front-proxy-client" certificate and key
[certs] Valid certificates and keys now exist in "/etc/kubernetes/pki"
[certs] Using the existing "sa" key
[kubeconfig] Generating kubeconfig files
[kubeconfig] Using kubeconfig folder "/etc/kubernetes"
[endpoint] WARNING: port specified in controlPlaneEndpoint overrides bindPort in the controlplane address
[kubeconfig] Writing "admin.conf" kubeconfig file
[endpoint] WARNING: port specified in controlPlaneEndpoint overrides bindPort in the controlplane address
[kubeconfig] Writing "controller-manager.conf" kubeconfig file
[endpoint] WARNING: port specified in controlPlaneEndpoint overrides bindPort in the controlplane address
[kubeconfig] Writing "scheduler.conf" kubeconfig file
[control-plane] Using manifest folder "/etc/kubernetes/manifests"
[control-plane] Creating static Pod manifest for "kube-apiserver"
[control-plane] Creating static Pod manifest for "kube-controller-manager"
[control-plane] Creating static Pod manifest for "kube-scheduler"
[check-etcd] Checking that the etcd cluster is healthy
[kubelet-start] Writing kubelet configuration to file "/var/lib/kubelet/config.yaml"
[kubelet-start] Writing kubelet environment file with flags to file "/var/lib/kubelet/kubeadm-flags.env"
[kubelet-start] Starting the kubelet
[kubelet-start] Waiting for the kubelet to perform the TLS Bootstrap...
[etcd] Announced new etcd member joining to the existing etcd cluster
[etcd] Creating static Pod manifest for "etcd"
[etcd] Waiting for the new etcd member to join the cluster. This can take up to 40s
[upload-config] Storing the configuration used in ConfigMap "kubeadm-config" in the "kube-system" Namespace
[mark-control-plane] Marking the node node1 as control-plane by adding the labels "node-role.kubernetes.io/master=''" and "node-role.kubernetes.io/control-plane='' (deprecated)"
[mark-control-plane] Marking the node node1 as control-plane by adding the taints [node-role.kubernetes.io/master:NoSchedule]

This node has joined the cluster and a new control plane instance was created:

* Certificate signing request was sent to apiserver and approval was received.
* The Kubelet was informed of the new secure connection details.
* Control plane (master) label and taint were applied to the new node.
* The Kubernetes control plane instances scaled up.
* A new etcd member was added to the local/stacked etcd cluster.

To start administering your cluster from this node, you need to run the following as a regular user:

        mkdir -p $HOME/.kube
        sudo cp -i /etc/kubernetes/admin.conf $HOME/.kube/config
        sudo chown $(id -u):$(id -g) $HOME/.kube/config

Run 'kubectl get nodes' to see this node join the cluster.
        mkdir -p $HOME/.kube
        sudo cp -i /etc/kubernetes/admin.conf $HOME/.kube/config
        sudo chown $(id -u):$(id -g) $HOME/.kube/config
node2同上(命令一样)
12、查看节点信息
3台服务器上都可查看
[root@master1 ]# kubectl get node
NAME      STATUS     ROLES                  AGE     VERSION
master1   NotReady   control-plane,master   24m     v1.20.4
node1     NotReady   control-plane,master   7m33s   v1.20.4
node2     NotReady   control-plane,master   5m12s   v1.20.4
[root@master1 ]#
[root@node1 ~]# kubectl get node
NAME      STATUS     ROLES                  AGE   VERSION
master1   NotReady   control-plane,master   38m   v1.20.4
node1     NotReady   control-plane,master   21m   v1.20.4
node2     NotReady   control-plane,master   19m   v1.20.4
从上可以看到roles列为master
四、VIP漂移
即停止master1时,查看群体是否还存在,VIP是否漂移
[root@master1 ~]# shutdown -h now
[root@node1 ~]# ip addr|grep 232
    inet 192.168.0.232/32 scope global ens32
VIP已自动漂移到node1节点
集群还存在
[root@node1 ~]# kubectl get node
NAME      STATUS     ROLES                  AGE   VERSION
master1   NotReady   control-plane,master   43m   v1.20.4
node1     NotReady   control-plane,master   26m   v1.20.4
node2     NotReady   control-plane,master   24m   v1.20.4
当master1启动时,会自动加入集群,并会抢到VIP地址
[root@master1 ~]# ip addr|grep 232
    inet 192.168.0.232/32 scope global ens32
[root@master1 ~]# kubectl get node
NAME      STATUS     ROLES                  AGE   VERSION
master1   NotReady   control-plane,master   56m   v1.20.4
node1     NotReady   control-plane,master   38m   v1.20.4
node2     NotReady   control-plane,master   36m   v1.20.4
五、K8S节点网络配置
Kubernetes整个集群所有服务器(Master、Minions)配置Flanneld,操作方法和指令如下:
参考:https://github.com/containernetworking/cni
必须安装pod网络插件,以便pod之间可以相互通信,必须在任何应用程序之前部署网络,CoreDNS不会在安装网络插件之前启动。
1、安装Flanneld网络插件
Fanneld定义POD的网段为: 10.244.0.0/16,POD容器的IP地址会自动分配10.244开头的网段IP。安装Flanneld网络插件指令如下:
#下载Fanneld插件YML文件;
yum install wget -y
wget https://raw.githubusercontent.com/coreos/flannel/master/Documentation/kube-flannel.yml
#提前下载Flanneld组建所需镜像;
for i in $(cat kube-flannel.yml |grep image|awk -F: '{print $2":"$3}'|uniq );do docker pull $i ;done
#应用YML文件;
[root@master1 ~]# kubectl apply -f kube-flannel.yml
podsecuritypolicy.policy/psp.flannel.unprivileged created
clusterrole.rbac.authorization.k8s.io/flannel created
clusterrolebinding.rbac.authorization.k8s.io/flannel created
serviceaccount/flannel created
configmap/kube-flannel-cfg created
daemonset.apps/kube-flannel-ds created
#查看Flanneld网络组建是否部署成功;
[root@master1 ~]# kubectl -n kube-system get pods|grep -aiE flannel
kube-flannel-ds-hvckx             1/1     Running   0          91s
kube-flannel-ds-npsrk             1/1     Running   0          91s
kube-flannel-ds-tb8cq             1/1     Running   0          91s
kube-flannel.yml内容为
---
apiVersion: policy/v1beta1
kind: PodSecurityPolicy
metadata:
  name: psp.flannel.unprivileged
  annotations:
    seccomp.security.alpha.kubernetes.io/allowedProfileNames: docker/default
    seccomp.security.alpha.kubernetes.io/defaultProfileName: docker/default
    apparmor.security.beta.kubernetes.io/allowedProfileNames: runtime/default
    apparmor.security.beta.kubernetes.io/defaultProfileName: runtime/default
spec:
  privileged: false
  volumes:
  - configMap
  - secret
  - emptyDir
  - hostPath
  allowedHostPaths:
  - pathPrefix: "/etc/cni/net.d"
  - pathPrefix: "/etc/kube-flannel"
  - pathPrefix: "/run/flannel"
  readOnlyRootFilesystem: false
  # Users and groups
  runAsUser:
    rule: RunAsAny
  supplementalGroups:
    rule: RunAsAny
  fsGroup:
    rule: RunAsAny
  # Privilege Escalation
  allowPrivilegeEscalation: false
  defaultAllowPrivilegeEscalation: false
  # Capabilities
  allowedCapabilities: ['NET_ADMIN', 'NET_RAW']
  defaultAddCapabilities: []
  requiredDropCapabilities: []
  # Host namespaces
  hostPID: false
  hostIPC: false
  hostNetwork: true
  hostPorts:
  - min: 0
    max: 65535
  # SELinux
  seLinux:
    # SELinux is unused in CaaSP
    rule: 'RunAsAny'
---
kind: ClusterRole
apiVersion: rbac.authorization.k8s.io/v1
metadata:
  name: flannel
rules:
- apiGroups: ['extensions']
  resources: ['podsecuritypolicies']
  verbs: ['use']
  resourceNames: ['psp.flannel.unprivileged']
- apiGroups:
  - ""
  resources:
  - pods
  verbs:
  - get
- apiGroups:
  - ""
  resources:
  - nodes
  verbs:
  - list
  - watch
- apiGroups:
  - ""
  resources:
  - nodes/status
  verbs:
  - patch
---
kind: ClusterRoleBinding
apiVersion: rbac.authorization.k8s.io/v1
metadata:
  name: flannel
roleRef:
  apiGroup: rbac.authorization.k8s.io
  kind: ClusterRole
  name: flannel
subjects:
- kind: ServiceAccount
  name: flannel
  namespace: kube-system
---
apiVersion: v1
kind: ServiceAccount
metadata:
  name: flannel
  namespace: kube-system
---
kind: ConfigMap
apiVersion: v1
metadata:
  name: kube-flannel-cfg
  namespace: kube-system
  labels:
    tier: node
    app: flannel
data:
  cni-conf.json: |
    {
      "name": "cbr0",
      "cniVersion": "0.3.1",
      "plugins": [
        {
          "type": "flannel",
          "delegate": {
            "hairpinMode": true,
            "isDefaultGateway": true
          }
        },
        {
          "type": "portmap",
          "capabilities": {
            "portMappings": true
          }
        }
      ]
    }
  net-conf.json: |
    {
      "Network": "10.244.0.0/16",
      "Backend": {
        "Type": "vxlan"
      }
    }
---
apiVersion: apps/v1
kind: DaemonSet
metadata:
  name: kube-flannel-ds
  namespace: kube-system
  labels:
    tier: node
    app: flannel
spec:
  selector:
    matchLabels:
      app: flannel
  template:
    metadata:
      labels:
        tier: node
        app: flannel
    spec:
      affinity:
        nodeAffinity:
          requiredDuringSchedulingIgnoredDuringExecution:
            nodeSelectorTerms:
            - matchExpressions:
              - key: kubernetes.io/os
                operator: In
                values:
                - linux
      hostNetwork: true
      priorityClassName: system-node-critical
      tolerations:
      - operator: Exists
        effect: NoSchedule
      serviceAccountName: flannel
      initContainers:
      - name: install-cni
        image: quay.io/coreos/flannel:v0.14.0
        command:
        - cp
        args:
        - -f
        - /etc/kube-flannel/cni-conf.json
        - /etc/cni/net.d/10-flannel.conflist
        volumeMounts:
        - name: cni
          mountPath: /etc/cni/net.d
        - name: flannel-cfg
          mountPath: /etc/kube-flannel/
      containers:
      - name: kube-flannel
        image: quay.io/coreos/flannel:v0.14.0
        command:
        - /opt/bin/flanneld
        args:
        - --ip-masq
        - --kube-subnet-mgr
        resources:
          requests:
            cpu: "100m"
            memory: "50Mi"
          limits:
            cpu: "100m"
            memory: "50Mi"
        securityContext:
          privileged: false
          capabilities:
            add: ["NET_ADMIN", "NET_RAW"]
        env:
        - name: POD_NAME
          valueFrom:
            fieldRef:
              fieldPath: metadata.name
        - name: POD_NAMESPACE
          valueFrom:
            fieldRef:
              fieldPath: metadata.namespace
        volumeMounts:
        - name: run
          mountPath: /run/flannel
        - name: flannel-cfg
          mountPath: /etc/kube-flannel/
      volumes:
      - name: run
        hostPath:
          path: /run/flannel
      - name: cni
        hostPath:
          path: /etc/cni/net.d
      - name: flannel-cfg
        configMap:
          name: kube-flannel-cfg
查看pod
[root@master1 ~]# kubectl -n kube-system get pods
NAME                              READY   STATUS    RESTARTS   AGE
coredns-7f89b7bc75-lwdvp          1/1     Running   0          71m
coredns-7f89b7bc75-s2fx4          1/1     Running   0          71m
etcd-master1                      1/1     Running   1          71m
etcd-node1                        1/1     Running   0          54m
etcd-node2                        1/1     Running   0          52m
kube-apiserver-master1            1/1     Running   1          71m
kube-apiserver-node1              1/1     Running   0          54m
kube-apiserver-node2              1/1     Running   0          52m
kube-controller-manager-master1   1/1     Running   3          71m
kube-controller-manager-node1     1/1     Running   1          54m
kube-controller-manager-node2     1/1     Running   0          52m
kube-flannel-ds-hvckx             1/1     Running   0          2m46s
kube-flannel-ds-npsrk             1/1     Running   0          2m46s
kube-flannel-ds-tb8cq             1/1     Running   0          2m46s
kube-proxy-cxcrg                  1/1     Running   0          54m
kube-proxy-gqsbh                  1/1     Running   1          71m
kube-proxy-wg79l                  1/1     Running   0          52m
kube-scheduler-master1            1/1     Running   3          71m
kube-scheduler-node1              1/1     Running   1          54m
kube-scheduler-node2              1/1     Running   0          52m
六、K8S开启IPVS模块
修改kube-proxy的configmap,在config.conf中找到mode参数,改为mode: "ipvs"然后保存:
kubectl -n kube-system get cm kube-proxy -o yaml | sed ‘s/mode: “”/mode: “ipvs”/g’ | kubectl replace -f -
#或者手动修改
kubectl -n kube-system edit cm kube-proxy
kubectl -n kube-system get cm kube-proxy -o yaml | grep mode
    mode: "ipvs"
#重启kube-proxy pod
[root@master1 ~]# kubectl -n kube-system delete pods -l k8s-app=kube-proxy
pod "kube-proxy-cxcrg" deleted
pod "kube-proxy-gqsbh" deleted
pod "kube-proxy-wg79l" deleted
#确认ipvs模式开启成功
kubectl -n kube-system logs -f -l k8s-app=kube-proxy | grep ipvs
七、Dashboard
Kubernetes实现的最重要的工作是对Docker容器集群统一的管理和调度,通常使用命令行来操作Kubernetes集群及各个节点,命令行操作非常不方便,如果使用UI界面来可视化操作,会更加方便的管理和维护。如下为配置kubernetes dashboard完整过程:
1、下载Dashboard配置文件;
wget https://raw.githubusercontent.com/kubernetes/dashboard/v2.0.0-rc5/aio/deploy/recommended.yaml

\cp recommended.yaml recommended.yaml.bak
2、修改文件recommended.yaml的39行内容,
#因为默认情况下,service的类型是cluster IP,需更改为NodePort的方式,便于访问,也可映射到指定的端口。 两行
 32 kind: Service
 33 apiVersion: v1
 34 metadata:
 35   labels:
 36     k8s-app: kubernetes-dashboard
 37   name: kubernetes-dashboard
 38   namespace: kubernetes-dashboard
 39 spec:
 40   type: NodePort     改了此行
 41   ports:
 42     - port: 443
 43       targetPort: 8443
 44       nodePort: 31001     加了此行
 45   selector:
 46     k8s-app: kubernetes-dashboard
 47
 48 ---
 49
 50 apiVersion: v1
 51 kind: Secret
 52 metadata:
3、修改文件recommended.yaml的198行内容,
#因为默认情况下Dashboard为英文显示,可以设置为中文。
- name: ACCEPT_LANGUAGE
value: zh
172 kind: Deployment
173 apiVersion: apps/v1
174 metadata:
175   labels:
176     k8s-app: kubernetes-dashboard
177   name: kubernetes-dashboard
178   namespace: kubernetes-dashboard
179 spec:
180   replicas: 1
181   revisionHistoryLimit: 10
182   selector:
183     matchLabels:
184       k8s-app: kubernetes-dashboard
185   template:
186     metadata:
187       labels:
188         k8s-app: kubernetes-dashboard
189     spec:
190       containers:
191         - name: kubernetes-dashboard
192           image: kubernetesui/dashboard:v2.0.0-rc5
193           imagePullPolicy: Always
194           ports:
195             - containerPort: 8443
196               protocol: TCP
197           env:
198             - name: ACCEPT_LANGUAGE				加了此行及下行
199               value: zh						加了此行
200           args:
4、创建Dashboard服务,指令操作如下:
[root@master1 ~]# kubectl apply -f recommended.yaml
namespace/kubernetes-dashboard created
serviceaccount/kubernetes-dashboard created
service/kubernetes-dashboard created
secret/kubernetes-dashboard-certs created
secret/kubernetes-dashboard-csrf created
secret/kubernetes-dashboard-key-holder created
configmap/kubernetes-dashboard-settings created
role.rbac.authorization.k8s.io/kubernetes-dashboard created
clusterrole.rbac.authorization.k8s.io/kubernetes-dashboard created
rolebinding.rbac.authorization.k8s.io/kubernetes-dashboard created
clusterrolebinding.rbac.authorization.k8s.io/kubernetes-dashboard created
deployment.apps/kubernetes-dashboard created
service/dashboard-metrics-scraper created
deployment.apps/dashboard-metrics-scraper created
5、查看Dashboard运行状态;
kubectl get pod -n kubernetes-dashboard
kubectl get svc -n kubernetes-dashboard
6、基于Token的方式访问,设置和绑定Dashboard权限,命令如下;
#创建Dashboard的管理用户;
kubectl create serviceaccount dashboard-admin -n kube-system
#将创建的dashboard用户绑定为管理用户;
kubectl create clusterrolebinding dashboard-cluster-admin --clusterrole=cluster-admin --serviceaccount=kube-system:dashboard-admin
#获取刚刚创建的用户对应的Token名称;
kubectl get secrets -n kube-system | grep dashboard
#查看Token的详细信息;
kubectl describe secrets -n kube-system $(kubectl get secrets -n kube-system | grep dashboard |awk '{print $1}')
kubectl describe secrets -n kube-system $(kubectl get secrets -n kube-system | grep dashboard |awk '{print $1}')
Name:         dashboard-admin-token-g9qgp
Namespace:    kube-system
Labels:       <none>
Annotations:  kubernetes.io/service-account.name: dashboard-admin
              kubernetes.io/service-account.uid: 78051352-fa90-47fb-9b9a-8906b0632c3c

Type:  kubernetes.io/service-account-token

Data
====
namespace:  11 bytes
token:      eyJhbGciOiJSUzI1NiIsImtpZCI6Im10OEY1N2RSYlFLTEdtcnU4ay1lQlRDR2cyRHZuX1gyZHRwTUVwNmdyRkkifQ.eyJpc3MiOiJrdWJlcm5ldGVzL3NlcnZpY2VhY2NvdW50Iiwia3ViZXJuZXRlcy5pby9zZXJ2aWNlYWNjb3VudC9uYW1lc3BhY2UiOiJrdWJlLXN5c3RlbSIsImt1YmVybmV0ZXMuaW8vc2VydmljZWFjY291bnQvc2VjcmV0Lm5hbWUiOiJkYXNoYm9hcmQtYWRtaW4tdG9rZW4tZzlxZ3AiLCJrdWJlcm5ldGVzLmlvL3NlcnZpY2VhY2NvdW50L3NlcnZpY2UtYWNjb3VudC5uYW1lIjoiZGFzaGJvYXJkLWFkbWluIiwia3ViZXJuZXRlcy5pby9zZXJ2aWNlYWNjb3VudC9zZXJ2aWNlLWFjY291bnQudWlkIjoiNzgwNTEzNTItZmE5MC00N2ZiLTliOWEtODkwNmIwNjMyYzNjIiwic3ViIjoic3lzdGVtOnNlcnZpY2VhY2NvdW50Omt1YmUtc3lzdGVtOmRhc2hib2FyZC1hZG1pbiJ9.Qhg9CWNHrMPPmGpCNXKY24lBwkgJYdu7sq0enOdTwfVj3cyIc_4OqvSBBNK1jippiz8_IF8ZPhvKKluuGGVIE5bZllzLOWohCLvJ3kR3OVsJ1B8y-hATCTldgO-ag_2VgthisYf0IsWjbZ_QFSOJXMQEXJo0C3pkF_k6otefIufidQQvzi6EN5QJ6dwpJjgR5QBakEsd8cY_s3omXs25Zgffsp1AxKlccNdqaTrV7ZshtXcgQ_QnBAaE_DTpjISv3m1F1-Xre8m_HAdPcMX4TqvoJJvbT29xhhh4ncggtG0PxPD30RQT6EjhTcC-AduBvwtebkAAXyuBngH35DujRQ
ca.crt:     1066 bytes
7、通过浏览器访问Dashboard WEB,https://192.168.0.47:31001/,如图所示,输入Token登录即可。
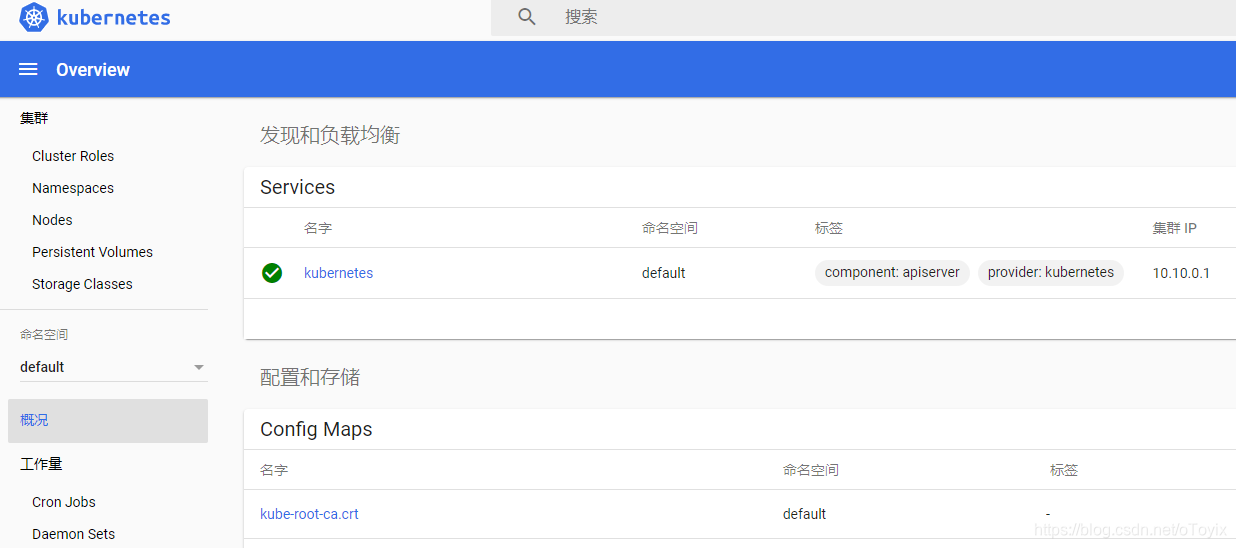
创建外部服务测试一下

已创建,证明各master节点 污点已取消,可以被调度创建POD

注:
此时,如果停止VIP所在的节点,会自动发生VIP漂移,不影响业务访问
[root@master1 ~]# ip addr|grep 232
    inet 192.168.0.232/32 scope global ens32
[root@master1 ~]# shutdown -h now
[root@node1 ~]#  ip addr|grep 232
    inet 192.168.0.232/32 scope global ens32
----------------------------end

开源、云原生的融合云平台
更多推荐
 0
0 0
0- 0


 已为社区贡献5条内容

所有评论(0)