com.qihoo.android.float window,悬浮窗的一种实现 | Android悬浮窗Window应用
本文以业务应用为出发点,从零开始抽象一个浮窗工具类,它用于在任意业务界面上展示悬浮窗。它可以同时管理多个浮窗,而且浮窗可以响应触摸事件,可拖拽,有贴边动画。文中实例代码使用 kotlin 编写,kotlin 系列教程可以点击这里效果如下:这是 Android Window 应用的第一篇,系列文章目录如下:显示浮窗原生ViewManager接口提供了向窗口添加并操纵View的方法:public in
本文以业务应用为出发点,从零开始抽象一个浮窗工具类,它用于在任意业务界面上展示悬浮窗。它可以同时管理多个浮窗,而且浮窗可以响应触摸事件,可拖拽,有贴边动画。
文中实例代码使用 kotlin 编写,kotlin 系列教程可以点击这里
效果如下: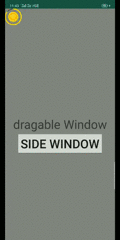
这是 Android Window 应用的第一篇,系列文章目录如下:
显示浮窗
原生ViewManager接口提供了向窗口添加并操纵View的方法:
public interface ViewManager{
//'向窗口添加视图'
public void addView(View view, ViewGroup.LayoutParams params);
//'更新窗口中视图'
public void updateViewLayout(View view, ViewGroup.LayoutParams params);
//'移除窗口中视图'
public void removeView(View view);
}
使用这个接口显示窗口的模版代码如下:
//'解析布局文件为视图'
val windowView = LayoutInflater.from(context).inflate(R.id.window_view, null)
//'获取WindowManager系统服务'
val windowManager = context.getSystemService(Context.WINDOW_SERVICE) as WindowManager
//'构建窗口布局参数'
WindowManager.LayoutParams().apply {
type = WindowManager.LayoutParams.TYPE_APPLICATION
width = WindowManager.LayoutParams.WRAP_CONTENT
height = WindowManager.LayoutParams.WRAP_CONTENT
gravity = Gravity.START or Gravity.TOP
x = 0
y = 0
}.let { layoutParams->
//'将视图添加到窗口'
windowManager.addView(windowView, layoutParams)
}上述代码在当前界面的左上角显示R.id.window_view.xml中定义的布局。
为避免重复,将这段代码抽象成一个函数,其中窗口视图内容和展示位置会随着需求而变,遂将其参数化:
object FloatWindow{
private var context: Context? = null
//'当前窗口参数'
var windowInfo: WindowInfo? = null
//'把和Window布局有关的参数打包成一个内部类'
class WindowInfo(var view: View?) {
var layoutParams: WindowManager.LayoutParams? = null
//'窗口宽'
var width: Int = 0
//'窗口高'
var height: Int = 0
//'窗口中是否有视图'
fun hasView() = view != null && layoutParams != null
//'窗口中视图是否有父亲'
fun hasParent() = hasView() && view?.parent != null
}
//'显示窗口'
fun show(
context: Context,
windowInfo: WindowInfo?,
x: Int = windowInfo?.layoutParams?.x.value(),
y: Int = windowInfo?.layoutParams?.y.value(),
) {
if (windowInfo == null) { return }
if (windowInfo.view == null) { return }
this.windowInfo = windowInfo
this.context = context
//'创建窗口布局参数'
windowInfo.layoutParams = createLayoutParam(x, y)
//'显示窗口'
if (!windowInfo.hasParent().value()) {
val windowManager = this.context?.getSystemService(Context.WINDOW_SERVICE) as WindowManager
windowManager.addView(windowInfo.view, windowInfo.layoutParams)
}
}
//'创建窗口布局参数'
private fun createLayoutParam(x: Int, y: Int): WindowManager.LayoutParams {
if (context == null) { return WindowManager.LayoutParams() }
return WindowManager.LayoutParams().apply {
//'该类型不需要申请权限'
type = WindowManager.LayoutParams.TYPE_APPLICATION
format = PixelFormat.TRANSLUCENT
flags = WindowManager.LayoutParams.FLAG_NOT_FOCUSABLE or WindowManager.LayoutParams.FLAG_LAYOUT_NO_LIMITS
gravity = Gravity.START or Gravity.TOP
width = windowInfo?.width.value()
height = windowInfo?.height.value()
this.x = x
this.y = y
}
}
//'为空Int提供默认值'
fun Int?.value() = this ?: 0
}将FloatWindow声明成了单例,目的是在 app 整个生命周期,任何界面都可以方便地显示浮窗。
为了方便统一管理窗口的参数,抽象了内部类WindowInfo
现在就可以像这样在屏幕左上角显示一个浮窗了:
val windowView = LayoutInflater.from(context).inflate(R.id.window_view, null)
WindowInfo(windowView).apply{
width = 100
height = 100
}.let{ windowInfo ->
FloatWindow.show(context, windowInfo, 0, 0)
}
浮窗背景色
产品要求当浮窗显示时,屏幕变暗。设置WindowManager.LayoutParams.FLAG_DIM_BEHIND标签配合dimAmount就能轻松实现:
object FloatWindow{
//当前窗口参数
var windowInfo: WindowInfo? = null
private fun createLayoutParam(x: Int, y: Int): WindowManager.LayoutParams {
if (context == null) { return WindowManager.LayoutParams() }
return WindowManager.LayoutParams().apply {
type = WindowManager.LayoutParams.TYPE_APPLICATION
format = PixelFormat.TRANSLUCENT
flags =
WindowManager.LayoutParams.FLAG_NOT_FOCUSABLE or
WindowManager.LayoutParams.FLAG_LAYOUT_NO_LIMITS or
//'设置浮窗背景变暗'
WindowManager.LayoutParams.FLAG_DIM_BEHIND
//'设置默认变暗程度为0,即不变暗,1表示全黑'
dimAmount = 0f
gravity = Gravity.START or Gravity.TOP
width = windowInfo?.width.value()
height = windowInfo?.height.value()
this.x = x
this.y = y
}
}
//'供业务界面在需要的时候调整浮窗背景亮暗'
fun setDimAmount(amount:Float){
windowInfo?.layoutParams?.let { it.dimAmount = amount }
}
}
设置浮窗点击事件
为浮窗设置点击事件等价于为浮窗视图设置点击事件,但如果直接对浮窗视图使用setOnClickListener()的话,浮窗的触摸事件就不会被响应,那拖拽就无法实现。所以只能从更底层的触摸事件着手:
object FloatWindow : View.OnTouchListener{
//'显示窗口'
fun show(
context: Context,
windowInfo: WindowInfo?,
x: Int = windowInfo?.layoutParams?.x.value(),
y: Int = windowInfo?.layoutParams?.y.value(),
) {
if (windowInfo == null) { return }
if (windowInfo.view == null) { return }
this.windowInfo = windowInfo
this.context = context
//'为浮窗视图设置触摸监听器'
windowInfo.view?.setOnTouchListener(this)
windowInfo.layoutParams = createLayoutParam(x, y)
if (!windowInfo.hasParent().value()) {
val windowManager = this.context?.getSystemService(Context.WINDOW_SERVICE) as WindowManager
windowManager.addView(windowInfo.view, windowInfo.layoutParams)
}
}
override fun onTouch(v: View, event: MotionEvent): Boolean {
return false
}
}在onTouch(v: View, event: MotionEvent)中可以拿到更详细的触摸事件,比如ACTION_DOWN,ACTION_MOVE、ACTION_UP。这方便了拖拽的实现,但点击事件的捕获变得复杂,因为需要定义上述三个 ACTION 以怎样的序列出现时才判定为点击事件。幸好GestureDetector为我们做了这件事:
public class GestureDetector {
public interface OnGestureListener {
//'ACTION_DOWN事件'
boolean onDown(MotionEvent e);
//'单击事件'
boolean onSingleTapUp(MotionEvent e);
//'拖拽事件'
boolean onScroll(MotionEvent e1, MotionEvent e2, float distanceX, float distanceY);
...
}
}
构建GestureDetector实例并将MotionEvent传递给它就能将触摸事件解析成感兴趣的上层事件:
object FloatWindow : View.OnTouchListener{
private var gestureDetector: GestureDetector = GestureDetector(context, GestureListener())
private var clickListener: WindowClickListener? = null
private var lastTouchX: Int = 0
private var lastTouchY: Int = 0
//'为浮窗设置点击监听器'
fun setClickListener(listener: WindowClickListener) {
clickListener = listener
}
override fun onTouch(v: View, event: MotionEvent): Boolean {
//'将触摸事件传递给 GestureDetector 解析'
gestureDetector.onTouchEvent(event)
return true
}
//'记忆起始触摸点坐标'
private fun onActionDown(event: MotionEvent) {
lastTouchX = event.rawX.toInt()
lastTouchY = event.rawY.toInt()
}
private class GestureListener : GestureDetector.OnGestureListener {
//'记忆起始触摸点坐标'
override fun onDown(e: MotionEvent): Boolean {
onActionDown(e)
return false
}
override fun onSingleTapUp(e: MotionEvent): Boolean {
//'点击事件发生时,调用监听器'
return clickListener?.onWindowClick(windowInfo) ?: false
}
...
}
//'浮窗点击监听器'
interface WindowClickListener {
fun onWindowClick(windowInfo: WindowInfo?): Boolean
}
}
拖拽浮窗
ViewManager提供了updateViewLayout(View view, ViewGroup.LayoutParams params)用于更新浮窗位置,所以只需监听ACTION_MOVE事件并实时更新浮窗视图位置就可实现拖拽。ACTION_MOVE事件被GestureDetector解析成OnGestureListener.onScroll()回调:
object FloatWindow : View.OnTouchListener{
private var gestureDetector: GestureDetector = GestureDetector(context, GestureListener())
private var lastTouchX: Int = 0
private var lastTouchY: Int = 0
override fun onTouch(v: View, event: MotionEvent): Boolean {
//'将触摸事件传递给GestureDetector解析'
gestureDetector.onTouchEvent(event)
return true
}
private class GestureListener : GestureDetector.OnGestureListener {
override fun onDown(e: MotionEvent): Boolean {
onActionDown(e)
return false
}
override fun onScroll(e1: MotionEvent,e2: MotionEvent,distanceX: Float,distanceY:Float): Boolean {
//'响应手指滚动事件'
onActionMove(e2)
return true
}
}
private fun onActionMove(event: MotionEvent) {
//'获取当前手指坐标'
val currentX = event.rawX.toInt()
val currentY = event.rawY.toInt()
//'获取手指移动增量'
val dx = currentX - lastTouchX
val dy = currentY - lastTouchY
//'将移动增量应用到窗口布局参数上'
windowInfo?.layoutParams!!.x += dx
windowInfo?.layoutParams!!.y += dy
val windowManager = context?.getSystemService(Context.WINDOW_SERVICE) as WindowManager
var rightMost = screenWidth - windowInfo?.layoutParams!!.width
var leftMost = 0
val topMost = 0
val bottomMost = screenHeight - windowInfo?.layoutParams!!.height - getNavigationBarHeight(context)
//'将浮窗移动区域限制在屏幕内'
if (windowInfo?.layoutParams!!.x < leftMost) {
windowInfo?.layoutParams!!.x = leftMost
}
if (windowInfo?.layoutParams!!.x > rightMost) {
windowInfo?.layoutParams!!.x = rightMost
}
if (windowInfo?.layoutParams!!.y < topMost) {
windowInfo?.layoutParams!!.y = topMost
}
if (windowInfo?.layoutParams!!.y > bottomMost) {
windowInfo?.layoutParams!!.y = bottomMost
}
//'更新浮窗位置'
windowManager.updateViewLayout(windowInfo?.view, windowInfo?.layoutParams)
lastTouchX = currentX
lastTouchY = currentY
}
}
浮窗自动贴边
新的需求来了,拖拽浮窗松手后,需要自动贴边。
把贴边理解成一个水平位移动画。在松手时求出动画起点和终点横坐标,利用动画值不断更新浮窗位置::
object FloatWindow : View.OnTouchListener{
private var gestureDetector: GestureDetector = GestureDetector(context, GestureListener())
private var lastTouchX: Int = 0
private var lastTouchY: Int = 0
//'贴边动画'
private var weltAnimator: ValueAnimator? = null
override fun onTouch(v: View, event: MotionEvent): Boolean {
//'将触摸事件传递给GestureDetector解析'
gestureDetector.onTouchEvent(event)
//'处理ACTION_UP事件'
val action = event.action
when (action) {
MotionEvent.ACTION_UP -> onActionUp(event, screenWidth, windowInfo?.width ?: 0)
else -> {
}
}
return true
}
private fun onActionUp(event: MotionEvent, screenWidth: Int, width: Int) {
if (!windowInfo?.hasView().value()) { return }
//'记录抬手横坐标'
val upX = event.rawX.toInt()
//'贴边动画终点横坐标'
val endX = if (upX > screenWidth / 2) {
screenWidth - width
} else {
0
}
//'构建贴边动画'
if (weltAnimator == null) {
weltAnimator = ValueAnimator.ofInt(windowInfo?.layoutParams!!.x, endX).apply {
interpolator = LinearInterpolator()
duration = 300
addUpdateListener { animation ->
val x = animation.animatedValue as Int
if (windowInfo?.layoutParams != null) {
windowInfo?.layoutParams!!.x = x
}
val windowManager = context?.getSystemService(Context.WINDOW_SERVICE) as WindowManager
//'更新窗口位置'
if (windowInfo?.hasParent().value()) {
windowManager.updateViewLayout(windowInfo?.view, windowInfo?.layoutParams)
}
}
}
}
weltAnimator?.setIntValues(windowInfo?.layoutParams!!.x, endX)
weltAnimator?.start()
}
//为空Boolean提供默认值
fun Boolean?.value() = this ?: false
}GestureDetector解析后ACTION_UP事件被吞掉了,所以只能在onTouch()中截获它。
根据抬手横坐标和屏幕中点横坐标的大小关系,来决定浮窗贴向左边还是右边。
管理多个浮窗
若 app 的不同业务界面同时需要显示浮窗:进入 界面A 时显示 浮窗A,然后它被拖拽到右下角,退出 界面A 进入 界面B,显示浮窗B,当再次进入 界面A 时,期望还原上次离开时的浮窗A的位置。
当前FloatWindow中用windowInfo成员存储单个浮窗参数,为了同时管理多个浮窗,需要将所有浮窗参数保存在Map结构中用 tag 区分:
object FloatWindow : View.OnTouchListener {
//'浮窗参数容器'
private var windowInfoMap: HashMap = HashMap()
//'当前浮窗参数'
var windowInfo: WindowInfo? = null
//'显示浮窗'
fun show(
context: Context,
//'浮窗标签'
tag: String,
//'若不提供浮窗参数则从参数容器中获取该tag上次保存的参数'
windowInfo: WindowInfo? = windowInfoMap[tag],
x: Int = windowInfo?.layoutParams?.x.value(),
y: Int = windowInfo?.layoutParams?.y.value()
) {
if (windowInfo == null) { return }
if (windowInfo.view == null) { return }
//'更新当前浮窗参数'
this.windowInfo = windowInfo
//'将浮窗参数存入容器'
windowInfoMap[tag] = windowInfo
windowInfo.view?.setOnTouchListener(this)
this.context = context
windowInfo.layoutParams = createLayoutParam(x, y)
if (!windowInfo.hasParent().value()) {
val windowManager =this.context?.getSystemService(Context.WINDOW_SERVICE) as WindowManager
windowManager.addView(windowInfo.view, windowInfo.layoutParams)
}
}
}
在显示浮窗时,增加tag标签参数用以唯一标识浮窗,并且为windowInfo提供默认参数,当恢复原有浮窗时,可以不提供windowInfo参数,FloatWindow就会去windowInfoMap中根据给定tag寻找对应windowInfo。
监听浮窗界外点击事件
新的需求来了,点击浮窗时,贴边的浮窗像抽屉一样展示,点击浮窗以外区域时,抽屉收起。
刚开始接到这个新需求时,没什么思路。转念一想PopupWindow有一个setOutsideTouchable():
public class PopupWindow {
/**
*
Controls whether the pop-up will be informed of touch events outside
* of its window.
*
* @param touchable true if the popup should receive outside
* touch events, false otherwise
*/
public void setOutsideTouchable(boolean touchable) {
mOutsideTouchable = touchable;
}
}
该函数用于设置是否允许 window 边界外的触摸事件传递给 window。跟踪mOutsideTouchable变量应该就能找到更多线索:
public class PopupWindow {
private int computeFlags(int curFlags) {
curFlags &= ~(
WindowManager.LayoutParams.FLAG_IGNORE_CHEEK_PRESSES |
WindowManager.LayoutParams.FLAG_NOT_FOCUSABLE |
WindowManager.LayoutParams.FLAG_NOT_TOUCHABLE |
WindowManager.LayoutParams.FLAG_WATCH_OUTSIDE_TOUCH |
WindowManager.LayoutParams.FLAG_LAYOUT_NO_LIMITS |
WindowManager.LayoutParams.FLAG_ALT_FOCUSABLE_IM |
WindowManager.LayoutParams.FLAG_SPLIT_TOUCH);
...
//'如果界外可触摸,则将FLAG_WATCH_OUTSIDE_TOUCH赋值给flag'
if (mOutsideTouchable) {
curFlags |= WindowManager.LayoutParams.FLAG_WATCH_OUTSIDE_TOUCH;
}
...
}
}
继续往上跟踪computeFlags()调用的地方:
public class PopupWindow {
protected final WindowManager.LayoutParams createPopupLayoutParams(IBinder token) {
final WindowManager.LayoutParams p = new WindowManager.LayoutParams();
p.gravity = computeGravity();
//'计算窗口布局参数flag属性并赋值'
p.flags = computeFlags(p.flags);
p.type = mWindowLayoutType;
p.token = token;
...
}
}
而createPopupLayoutParams()会在窗口显示的时候被调用:
public class PopupWindow {
public void showAtLocation(IBinder token, int gravity, int x, int y) {
if (isShowing() || mContentView == null) { return; }
TransitionManager.endTransitions(mDecorView);
detachFromAnchor();
mIsShowing = true;
mIsDropdown = false;
mGravity = gravity;
//'构建窗口布局参数'
final WindowManager.LayoutParams p = createPopupLayoutParams(token);
preparePopup(p);
p.x = x;
p.y = y;
invokePopup(p);
}
}
想在源码中继续搜索,但到FLAG_WATCH_OUTSIDE_TOUCH,线索就断了。现在只知道为了让界外点击事件传递给 window,必须为布局参数设置FLAG_WATCH_OUTSIDE_TOUCH。但事件响应逻辑应该写在哪里?
当调用PopupWindow.setOutsideTouchable(true),在窗口界外点击后,窗口会消失。这必然是调用了dismiss(),沿着dismiss()的调用链往上找一定能找到界外点击事件的响应逻辑:
public class PopupWindow {
//'窗口根视图'
private class PopupDecorView extends FrameLayout {
//'窗口根视图触摸事件'
@Override
public boolean onTouchEvent(MotionEvent event) {
final int x = (int) event.getX();
final int y = (int) event.getY();
if ((event.getAction() == MotionEvent.ACTION_DOWN)
&& ((x < 0) || (x >= getWidth()) || (y < 0) || (y >= getHeight()))) {
dismiss();
return true;
//'如果发生了界外触摸事件则解散窗口'
} else if (event.getAction() == MotionEvent.ACTION_OUTSIDE) {
dismiss();
return true;
} else {
return super.onTouchEvent(event);
}
}
}
}
所以只需要在窗口根视图的触摸事件回调中捕获ACTION_OUTSIDE即可:
object FloatWindow : View.OnTouchListener {
//'界外触摸事件回调'
private var onTouchOutside: (() -> Unit)? = null
//'设置是否响应界外点击事件'
fun setOutsideTouchable(enable: Boolean, onTouchOutside: (() -> Unit)? = null) {
windowInfo?.layoutParams?.let { layoutParams ->
layoutParams.flags = layoutParams.flags or WindowManager.LayoutParams.FLAG_WATCH_OUTSIDE_TOUCH
this.onTouchOutside = onTouchOutside
}
}
override fun onTouch(v: View, event: MotionEvent): Boolean {
//'界外触摸事件处理'
if (event.action == MotionEvent.ACTION_OUTSIDE) {
onTouchOutside?.invoke()
return true
}
//'点击和拖拽事件处理'
gestureDetector.onTouchEvent(event).takeIf { !it }?.also {
//there is no ACTION_UP event in GestureDetector
val action = event.action
when (action) {
MotionEvent.ACTION_UP -> onActionUp(event, screenWidth, windowInfo?.width ?: 0)
else -> {
}
}
}
return true
}
}
talk is cheap, show me the code
实例代码隐藏了不重要的细节,完整代码可点击上面链接。

为开发者提供学习成长、分享交流、生态实践、资源工具等服务,帮助开发者快速成长。
更多推荐


 0
0 0
0- 0


 已为社区贡献3条内容

所有评论(0)