android fragment 菜单栏,android UI:底部菜单栏的学习与制作——Fragment碎片一
碎片(Fragment) 嵌入与活动中的UI片段,为了合理的分配布局而存在,这是我的简单理解。多用于兼顾手机与平板的UI,也适用于灵活高级的UI制作。Demo 简单的按键切换两片不同的Demo新建left_fragment.xmlandroid:id="@+id/button"android:layout_width="match_parent"android:layout_height="wra
碎片(Fragment) 嵌入与活动中的UI片段,为了合理的分配布局而存在,这是我的简单理解。多用于兼顾手机与平板的UI,也适用于灵活高级的UI制作。
Demo 简单的按键切换两片不同的Demo
新建left_fragment.xml
android:id="@+id/button"android:layout_width="match_parent"android:layout_height="wrap_content"android:layout_gravity="center_horizontal"android:text="Button"
/>
新建right_fragment.xml
android:layout_width="wrap_content"android:layout_height="wrap_content"android:layout_gravity="center_horizontal"android:textSize="20sp"android:text="This is right fragment"/>
新建another_right_fragment.xml
android:layout_width="wrap_content"android:layout_height="wrap_content"android:layout_gravity="center_horizontal"android:textSize="20sp"android:text="This is right fragment"/>
main_Activity.xml
>
android:layout_width="0dp"android:name="test.example.com.fragmenttest.LeftFragment"android:layout_height="match_parent"android:layout_weight="1"android:id="@+id/left_fragment"/>
android:id="@+id/right_layout"android:layout_width="0dp"android:layout_height="match_parent"android:layout_weight="1">
分别新建对应的类
packagetest.example.com.fragmenttest;importandroid.app.Fragment;importandroid.os.Bundle;importandroid.view.LayoutInflater;importandroid.view.View;importandroid.view.ViewGroup;/*** Created by hs769 on 2017/4/4.*/
public class LeftFragment extendsFragment {
@OverridepublicView onCreateView(LayoutInflater inflater, ViewGroup container, Bundle savedInstanceState){
View view=inflater.inflate(R.layout.lift_fregment,container,false);returnview;
}
}
packagetest.example.com.fragmenttest;//import android.app.Fragment;
importandroid.support.v4.app.Fragment;importandroid.os.Bundle;importandroid.view.LayoutInflater;importandroid.view.View;importandroid.view.ViewGroup;/*** Created by hs769 on 2017/4/4.*/
public class RightFragment extendsFragment{
@OverridepublicView onCreateView(LayoutInflater inflater, ViewGroup container, Bundle savedInstanceState){
View view=inflater.inflate(R.layout.right_fragment,container,false);returnview;
}
}
packagetest.example.com.fragmenttest;importandroid.support.v4.app.Fragment;importandroid.os.Bundle;importandroid.view.LayoutInflater;importandroid.view.View;importandroid.view.ViewGroup;/*** Created by hs769 on 2017/4/4.*/
public class AnotherRightFragment extendsFragment {
@OverridepublicView onCreateView(LayoutInflater inflater, ViewGroup container, Bundle savedInstanceState){
View view=inflater.inflate(R.layout.another_right_fragment,container,false);returnview;
}
}
packagetest.example.com.fragmenttest;importandroid.support.v4.app.Fragment;importandroid.support.v4.app.FragmentManager;importandroid.support.v4.app.FragmentTransaction;importandroid.support.v7.app.AppCompatActivity;importandroid.os.Bundle;importandroid.view.View;importandroid.widget.Button;public class MainActivity extends AppCompatActivity implementsView.OnClickListener{
@Overrideprotected voidonCreate(Bundle savedInstanceState) {super.onCreate(savedInstanceState);
setContentView(R.layout.activity_main);
Button button=(Button)findViewById(R.id.button);
button.setOnClickListener(this);
replaceFragment(newRightFragment());
}
@Overridepublic voidonClick(View v) {switch(v.getId()){caseR.id.button:
replaceFragment(newAnotherRightFragment());break;default:break;
}
}private voidreplaceFragment(Fragment fragment){
FragmentManager fragmentManager=getSupportFragmentManager();
FragmentTransaction transaction=fragmentManager.beginTransaction();
transaction.replace(R.id.right_layout,fragment);
transaction.commit();
}
}

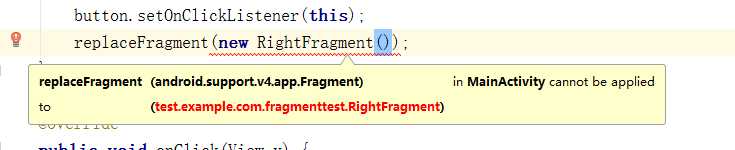
LeftFragment,RightFragment和another_Right_Fragment这三个类分别extends(继承)Fragment类,这是一个关键,因为有两个包中含有Fragment,建议选择android.support.v4.app.Fragment
如果包选择不一样会出现如下错误(MainAcitvity.java),如图更改即可:找到出问题的类,更换包,完毕

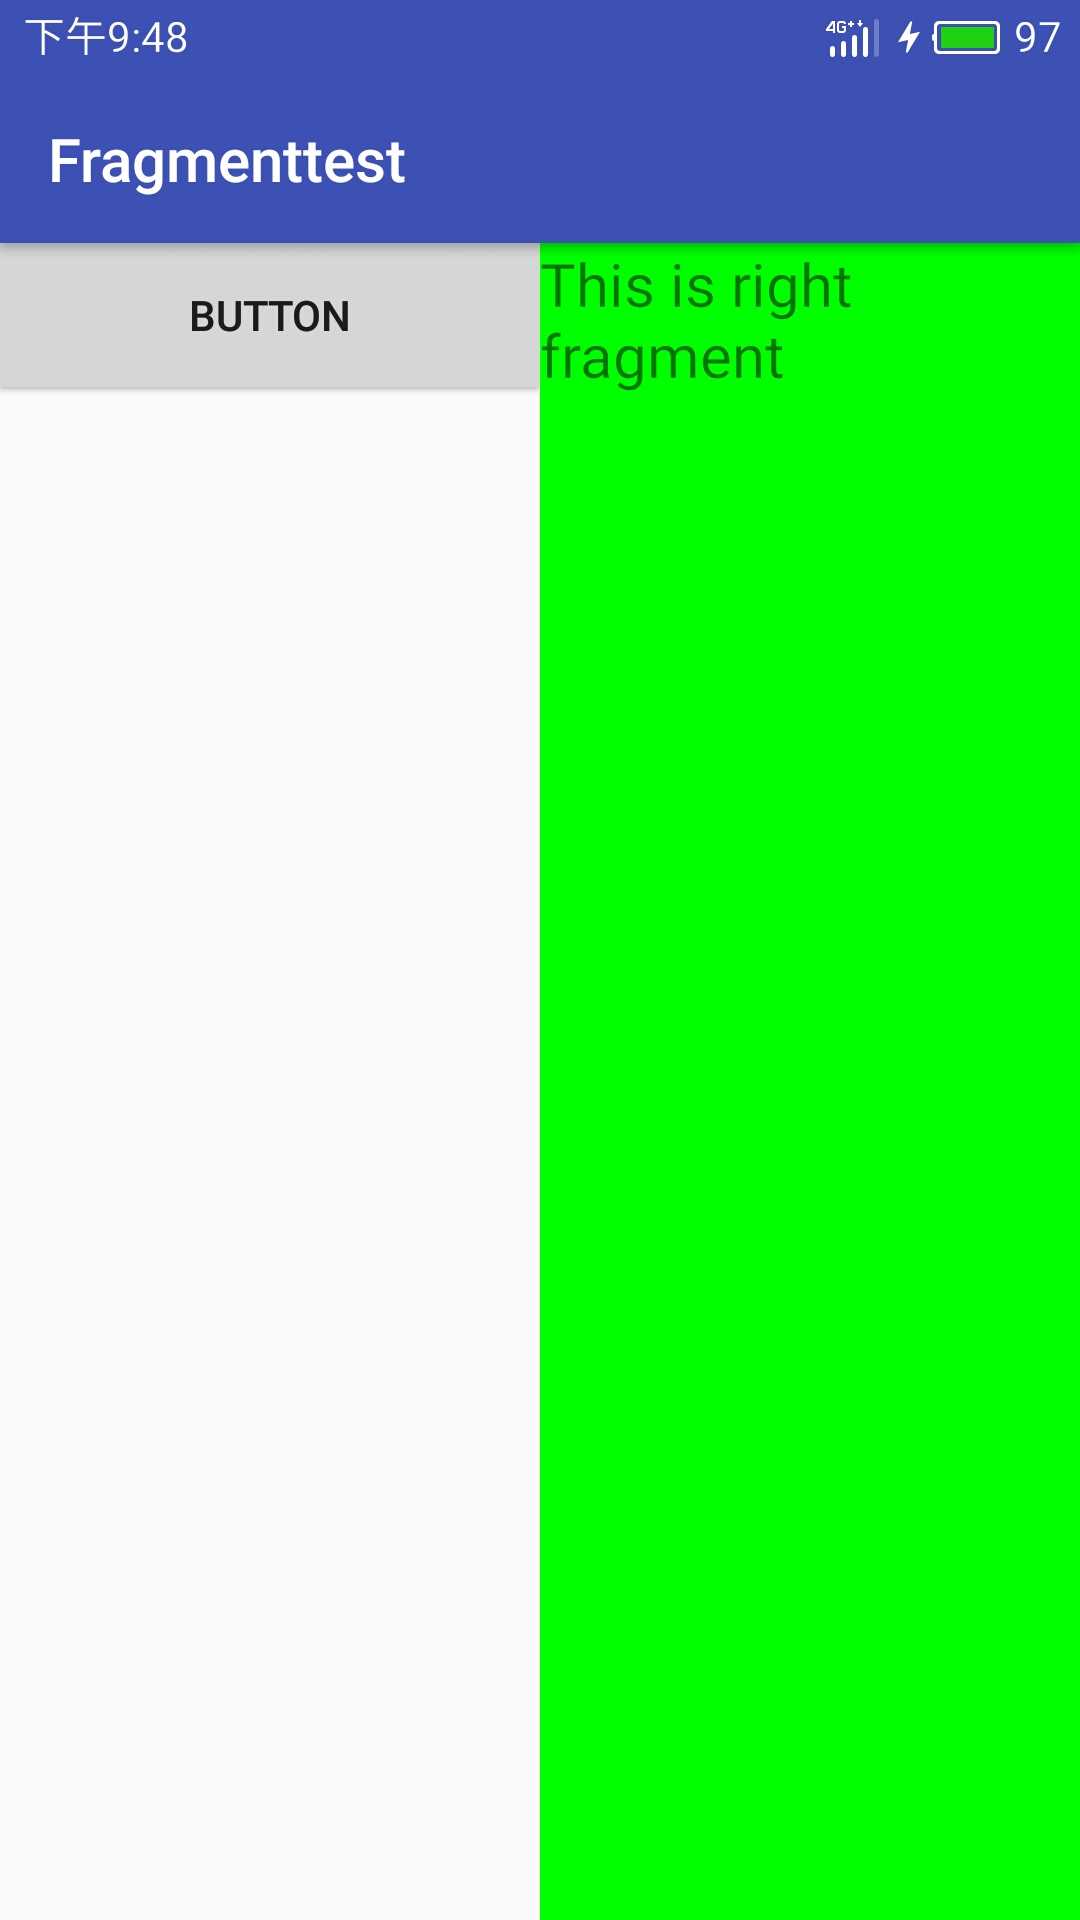
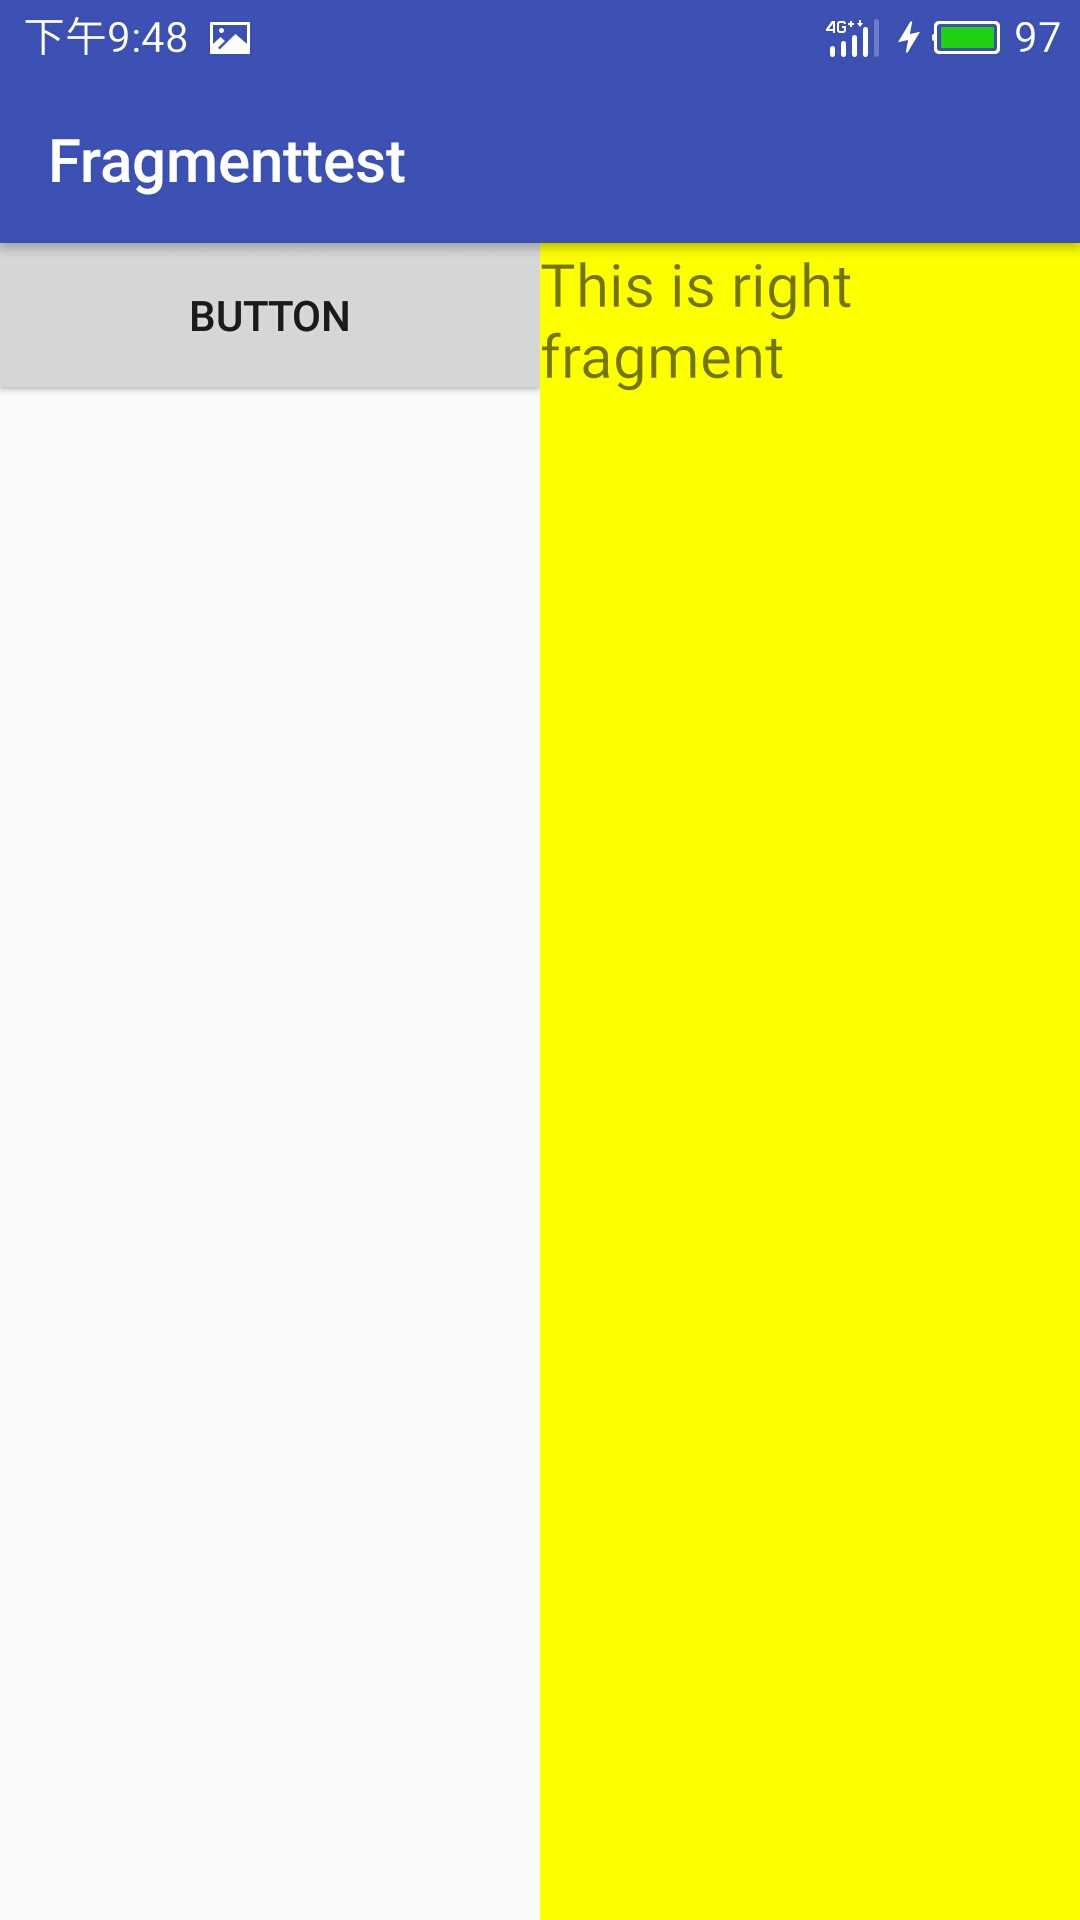
最终效果实现点击button切换碎片(下图为点击前后的变化,分别为两个Fragment)

为开发者提供学习成长、分享交流、生态实践、资源工具等服务,帮助开发者快速成长。
更多推荐


 0
0 0
0- 0


 已为社区贡献1条内容

所有评论(0)