uniapp里的mounted_uni-app数据请求封装
uni-app数据请求封装1.开发环境 uni-app2.电脑系统 windows10专业版3.在使用uni-app开发的过程中,我们会使用到数据请求,下面我来分享一下,uni-app数据请求封装,希望对你有所帮助!4.和pages同级新增一个目录,名字自己定义,在这里我的名字是 chenhttp在这个文件下面新建一个 chenhttp.js,代码如下:const BASE_URL='http:/
uni-app数据请求封装
1.开发环境 uni-app
2.电脑系统 windows10专业版
3.在使用uni-app开发的过程中,我们会使用到数据请求,下面我来分享一下,uni-app数据请求封装,希望对你有所帮助!
4.和pages同级新增一个目录,名字自己定义,在这里我的名字是 chenhttp在这个文件下面新建一个 chenhttp.js,代码如下:
const BASE_URL='http://192.168.137.78:3000'; //后台接口地址
export const myRequest=(options)=>{
return new Promise((resolve,reject)=>{
uni.request({
url:BASE_URL+options.url,
method:options.method || 'GET', //配置请求方法,默认为 get请求
data:options.data || {},
success:(res)=>{
if(res.data.statusCode ==0){
return uni.showToast({
title:'获取数据失败'
})
}
resolve(res)
},
fail:(err)=>{
uni.showToast({
title:'请求接口失败'
})
reject(err)
}
})
})
}
5.为了方便使用,我们把这个方法挂载到全局,在main.js中添加如下代码:
import {myRequest} from 'chenhttp/chenhttp.js';
Vue.prototype.$myRequest=myRequest;
6.在uni-app模板中使用,在methods中添加如下代码:
async chenget(){
const res=await this.$myRequest({
url:'/feng', //请求的接口
method:'post', //请求方法
data:this.ChenindexconOnj //传递的参数
})
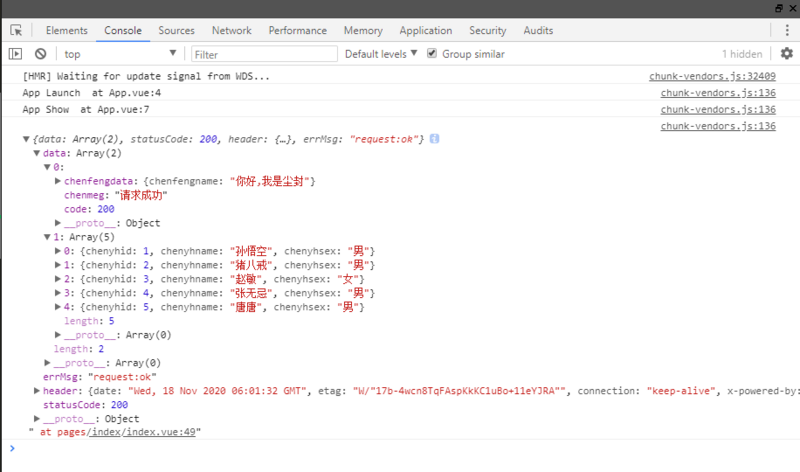
console.log(res); //输出请求的数据
}
7.在mounted 进行调用,添加如下代码:
this.chenget();
8.效果如下:
9.后台接受的参数,效果为:

10.本期的分享到了这里就结束啦,是不是很nice,希望对你有所帮助,让我们一起努力走向巅峰!

为开发者提供学习成长、分享交流、生态实践、资源工具等服务,帮助开发者快速成长。
更多推荐


 0
0 0
0- 0


 已为社区贡献2条内容

所有评论(0)