[kubernetes]-helm创建自己的chart
导语:编写自己的chart 完成部署打算自己开始使用起来。如何自己创建Chart使用命令创建chart#helm create chart名称mkdir -p /opt/helmcd /opt/helmhelm create mychartChart.yaml:当前chart属性配置信息templates:编写yaml文件放到这个目录中values.yaml:yaml文件可以使用全局变量chart
·
导语:编写自己的chart 完成部署 打算自己开始使用起来。
如何自己创建Chart
-
使用命令创建chart
#helm create chart名称
mkdir -p /opt/helm
cd /opt/helm
helm create mychart
Chart.yaml:当前chart属性配置信息
templates:编写yaml文件放到这个目录中
values.yaml:yaml文件可以使用全局变量
charts:默认创建是空的
-
在templates文件夹创建两个yaml文件
deployment.yaml
# 创建deployment.yaml
# 先删除templates下默认的文件
cd mychart
rm -rf templates/*
cd templates
# 创建yaml
kubectl create deployment web1 --image=nginx --dry-run -o yaml > deployment.yaml
service.yaml
# 先创建deployment
kubectl create deployment web1 --image=nginx
# 生成service.yaml
kubectl expose deployment web1 --port=80 --target-port=80 --type=NodePort --dry-run -o yaml > service.yaml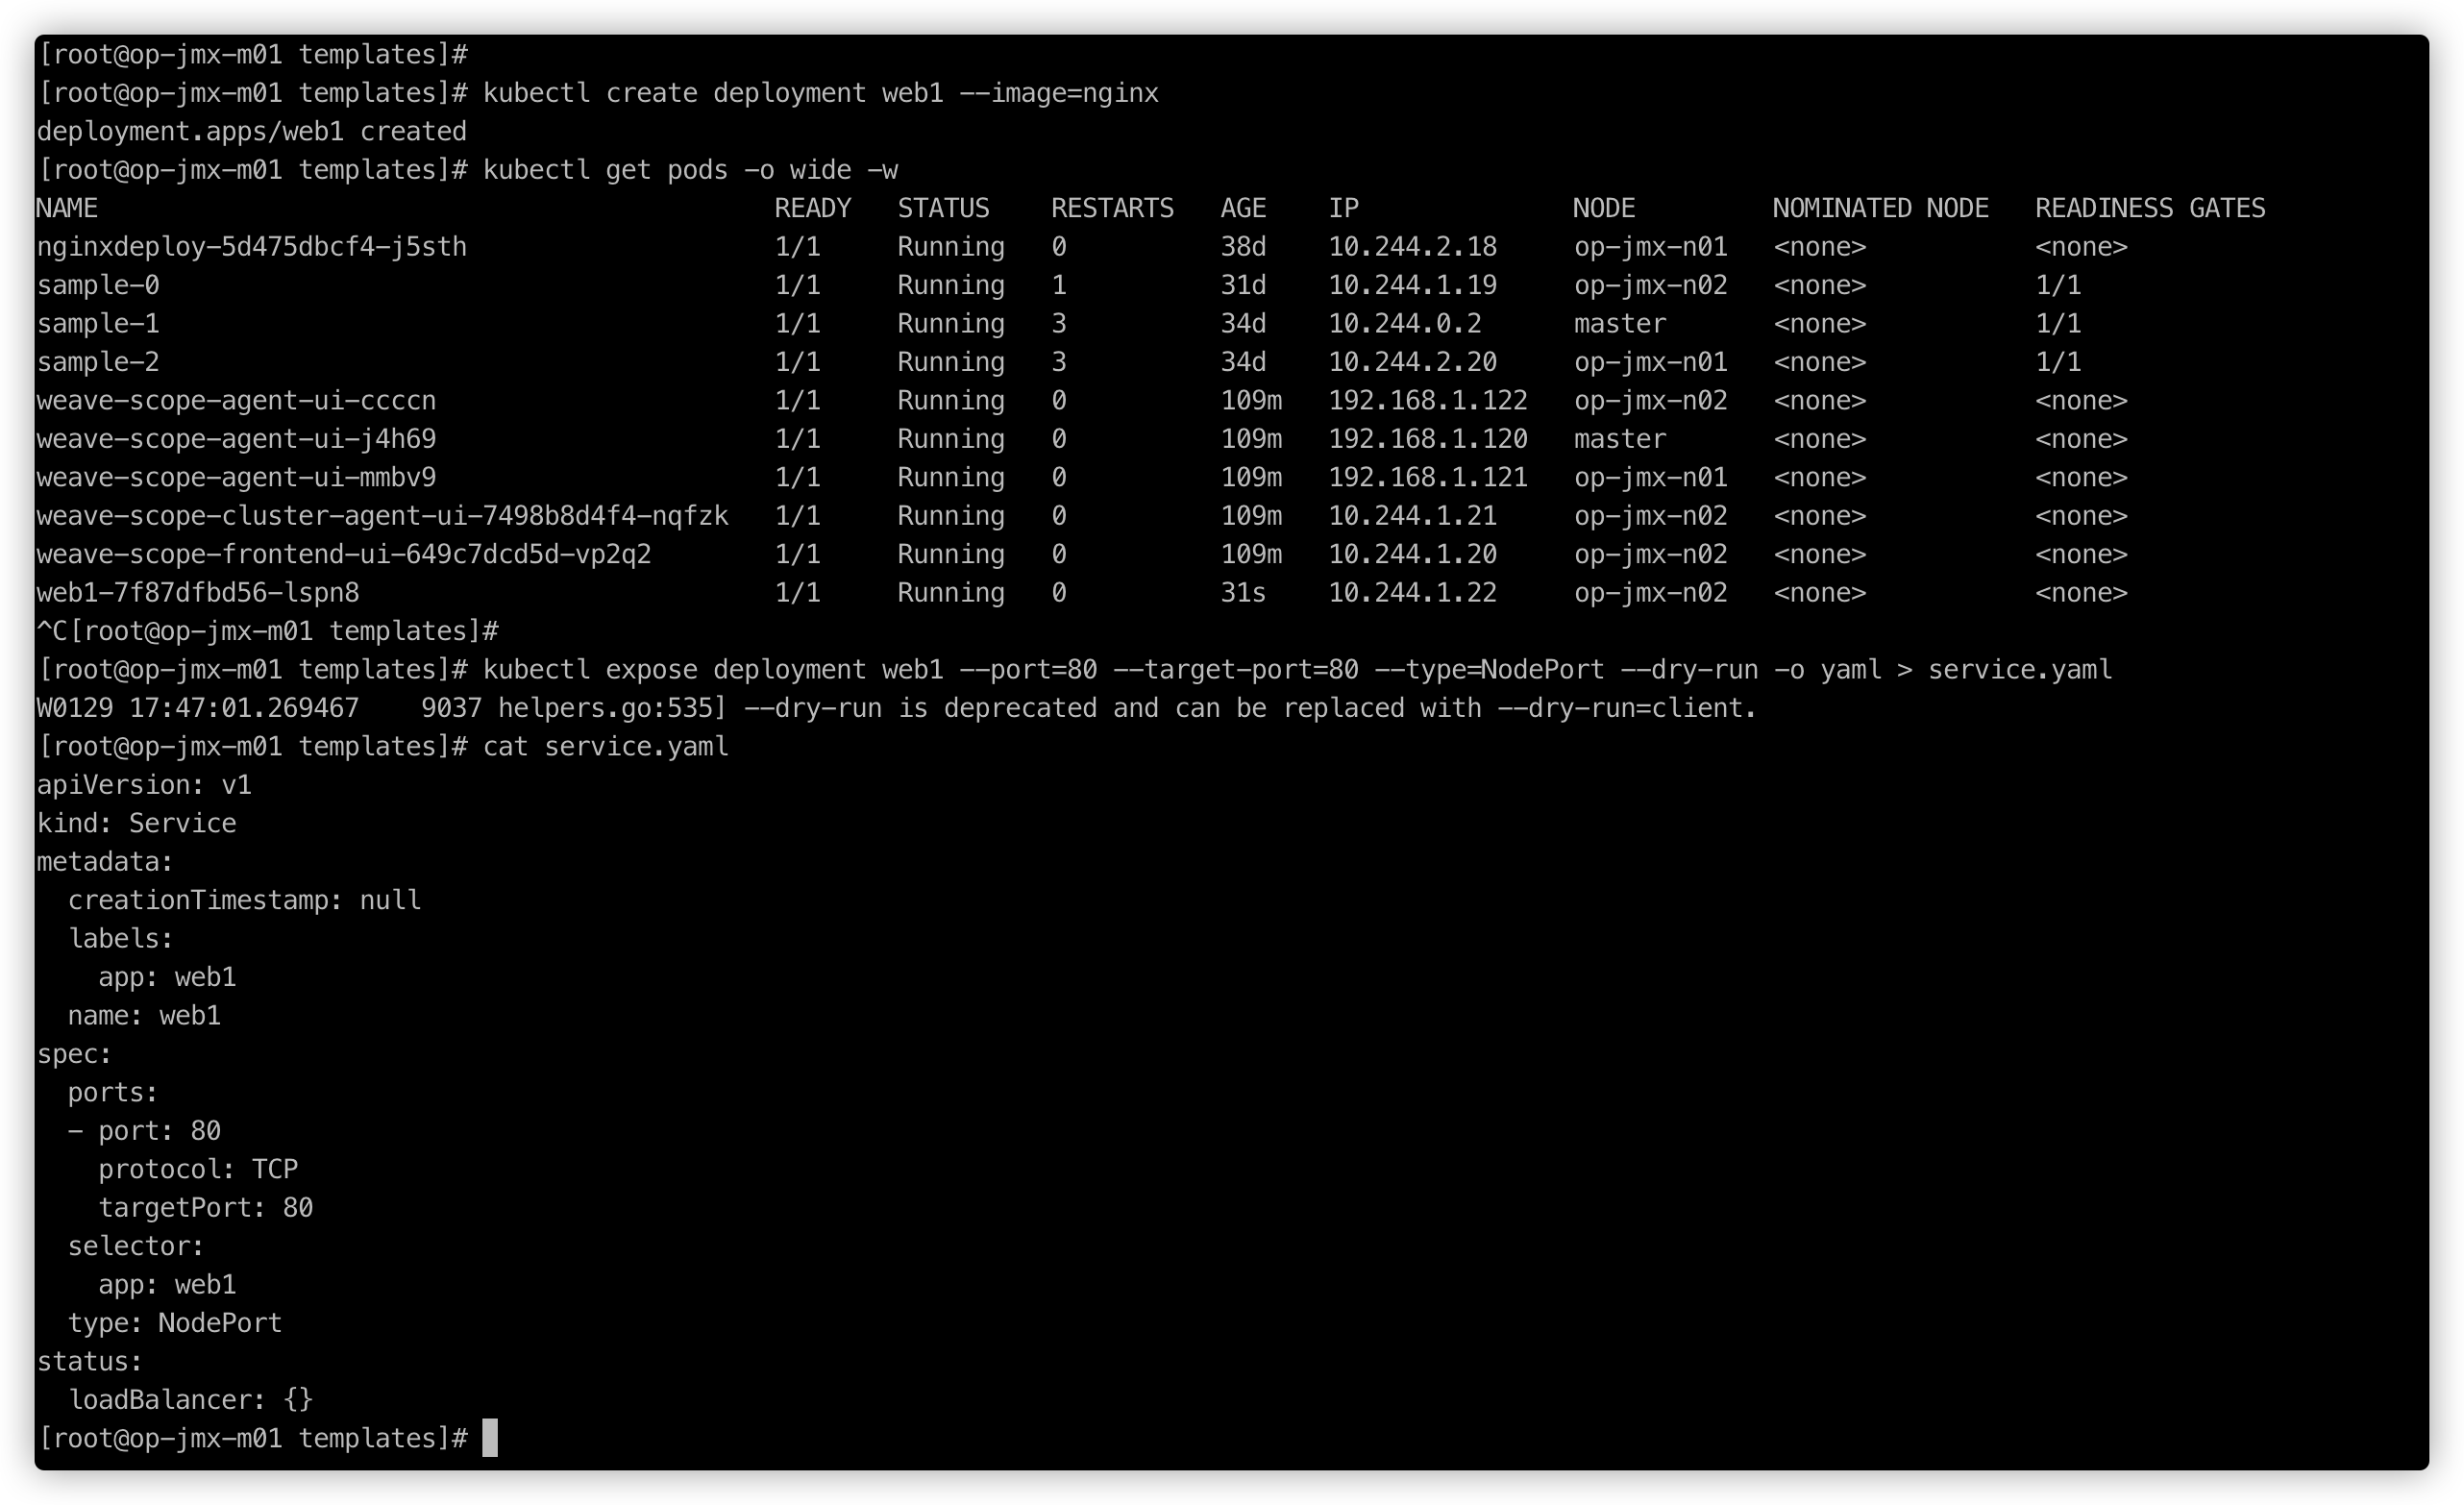
测试完成删除deployment
kubectl delete deployment web1 -
安装mychart
cd /opt/helm
helm install web1 mychart/
-
应用升级
# helm upgrade chart名称 chart路径
helm upgrade web1 mychart/
实现helm文件的高效复用
yaml文件大致有以下几个地方不同 需要做成变量
- images
- tag
- label
- port
- replicas
-
在values,yaml定义变量和值
# values,yaml replicas: 1 image: nginx tag: 1.16 label: nginx port: 80 serviceAccount: create: true annotations: {} name: "" podAnnotations: {} podSecurityContext: {} securityContext: {} service: type: ClusterIP port: 80 ingress: enabled: false annotations: {} hosts: - host: chart-example.local paths: [] tls: [] resources: {} autoscaling: enabled: false minReplicas: 1 maxReplicas: 100 targetCPUUtilizationPercentage: 80 nodeSelector: {} tolerations: [] affinity: {} -
在templates的yaml文件获取定义变量和值
通过表达式的形式使用全局变量{{ .Values.变量名称 }}
如:{{ .Release.Name }}
定义deployment.yaml
apiVersion: apps/v1
kind: Deployment
metadata:
  creationTimestamp: null
  labels:
    app: {{ .Values.label}}
  name: {{ .Release.Name}}-deploy
spec:
  replicas: 1
  selector:
    matchLabels:
      app: {{ .Values.label}}
  strategy: {}
  template:
    metadata:
      creationTimestamp: null
      labels:
        app: {{ .Values.label}}
    spec:
      containers:
      - image: {{ .Values.image}}
        name: nginx
        resources: {}
status: {}
service.yaml
# service.yaml
apiVersion: v1
kind: Service
metadata:
  creationTimestamp: null
  labels:
    app: {{ .Values.label}}
  name: {{ .Release.Name}}
spec:
  ports:
  - port: {{ .Values.port}}
    protocol: TCP
    targetPort: 80
  selector:
    app: {{ .Values.label}}
  type: NodePort
status:
  loadBalancer: {}
验证配置文件
helm install --dry-run web2 mychart/
参数没问题启动测试
helm install web2 mychart/

开源、云原生的融合云平台
更多推荐
 0
0 0
0- 0


 已为社区贡献52条内容

所有评论(0)