
VuePress +Gitee 快速搭建个人博客教程
VuePress +Gitee 快速搭建个人博客教程教程步骤本地搭建快速上手# clone the projectgit clone https://github.com/xugaoyi/vuepress-theme-vdoing.git# enter the project directorycd vuepress-theme-vdoing# install dependencynpm inst
VuePress +Gitee 快速搭建个人博客教程
教程步骤
本地搭建
快速上手
# clone the project
git clone https://github.com/xugaoyi/vuepress-theme-vdoing.git

# enter the project directory
cd vuepress-theme-vdoing

# install dependency
npm install # or yarn install

# develop
npm run dev # or yarn dev
安装最新的Vdoing 主题
npm install vuepress-theme-vdoing -D
使用Gitalk实现静态博客无后台评论系统
Gitalk,一个基于 Github Issue 和 Preact 开发的评论插件。
下面我们来用它在vuepress搭建的博客中搭建评论区吧
准备
使用一个新的东西首先当然是要了解它
Gitalk demo:https://gitalk.github.io/
Gitalk github:https://github.com/gitalk/gitalk
实现
如何实现?最好的方法我认为是看官方文档,这里我只是记录一下实现的步骤。
使用一个别人已经开发好的 vuepress-plugin-comment 插件来帮助我们把Gitalk应用到vuepress搭建的静态博客。
安装
npm install --save vuepress-plugin-comment
使用
options的配置和Gitalk的配置相同
module.exports = {
  plugins: [
    [
      'vuepress-plugin-comment',
      {
        choosen: 'gitalk',
        options: {
          clientID: 'GitHub Application Client ID',
          clientSecret: 'GitHub Application Client Secret',
          repo: 'GitHub repo',
          owner: 'GitHub repo owner',
          admin: ['GitHub repo owner and collaborators, only these guys can initialize github issues'],
          distractionFreeMode: false
        }
      }
    ]
  ]
}
需要 GitHub Application,如果没有 点击这里申请,Authorization callback URL 填写当前使用插件页面的域名。
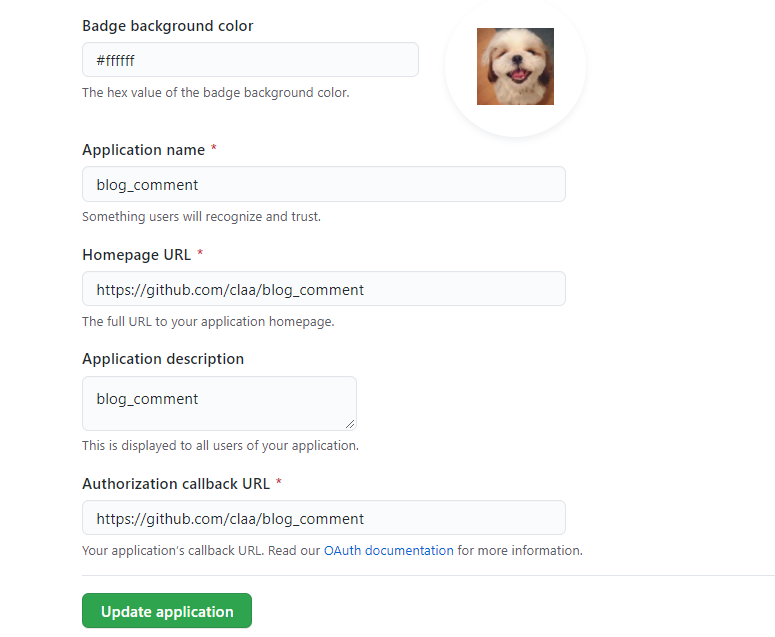
申请完成就会得 Client ID 和 Client Secret。然后把对应参数填写到配置中,例:
module.exports = {
  plugins: [
    [
      'vuepress-plugin-comment',
      {
        choosen: 'gitalk',
        options: {
          clientID: 'a6e*******4709b88b',
          clientSecret: 'f0e***************beb8b2d54d7241',
          repo: 'blog_comment', // GitHub 仓库
          owner: 'claa', // GitHub仓库所有者
          admin: ['claa'], // 对仓库有写权限的人
          distractionFreeMode: false
        }
      }
    ]
  ]
}
配置好之后重启项目就发现页面上多了一个评论区,说明评论功能实现啦。但还是有一些bug,继续完善它~
VuePress集成Live2D看板娘
安装
npm install vuepress-plugin-helper-live2d --save
使用
[
            'vuepress-plugin-helper-live2d', {
                live2d: {
                    // 是否启用(关闭请设置为false)(default: true)
                    enable: true,
                    // 模型名称(default: hibiki)>>>取值请参考:
                    // https://github.com/JoeyBling/hexo-theme-yilia-plus/wiki/live2d%E6%A8%A1%E5%9E%8B%E5%8C%85%E5%B1%95%E7%A4%BA
                    model: 'hibiki',
                    display: {
                        position: "right", // 显示位置:left/right(default: 'right')
                        width: 135, // 模型的长度(default: 135)
                        height: 300, // 模型的高度(default: 300)
                        hOffset: 65, //  水平偏移(default: 65)
                        vOffset: 0, //  垂直偏移(default: 0)
                    },
                    mobile: {
                        show: false // 是否在移动设备上显示(default: false)
                    },
                    react: {
                        opacity: 0.8 // 模型透明度(default: 0.8)
                    }
                }
            }
        ],
看板样式
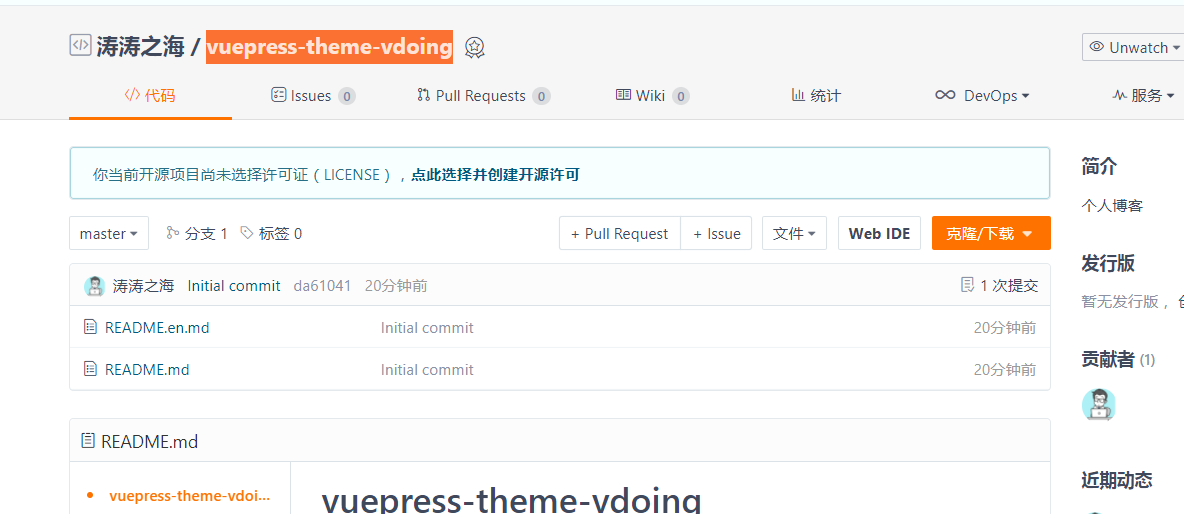
代码推送到码云(Gitee)
Gitee创建项目
找到vuepress-theme-vdoing\docs.vuepress\config.js 添加一行代码
base: '/vuepress-theme-vdoing/', #设置站点根路径
b.推送的代码到Gitee
git clone https://gitee.com/claa/vuepress-theme-vdoing.git #克隆空项目到本地

cd vuepress-theme-vdoing

# 生成静态文件
npm run build

# 进入生成的文件夹
cd docs/.vuepress/dist


git status #git 状态

git add . #添加当前目录所有文件

git commit -m "init blog" #提交文件

git push #推送代码

# 提示名字错误时,可以使用下面
git remote add origin https://gitee.com/claa/vuepress-theme-vdoing.git
git push -u origin master

history #git操作历史
c.设置Gitee Pages
进入 Gitee 的 person_blog 仓库,选择"服务"–>“Gitee Pages”
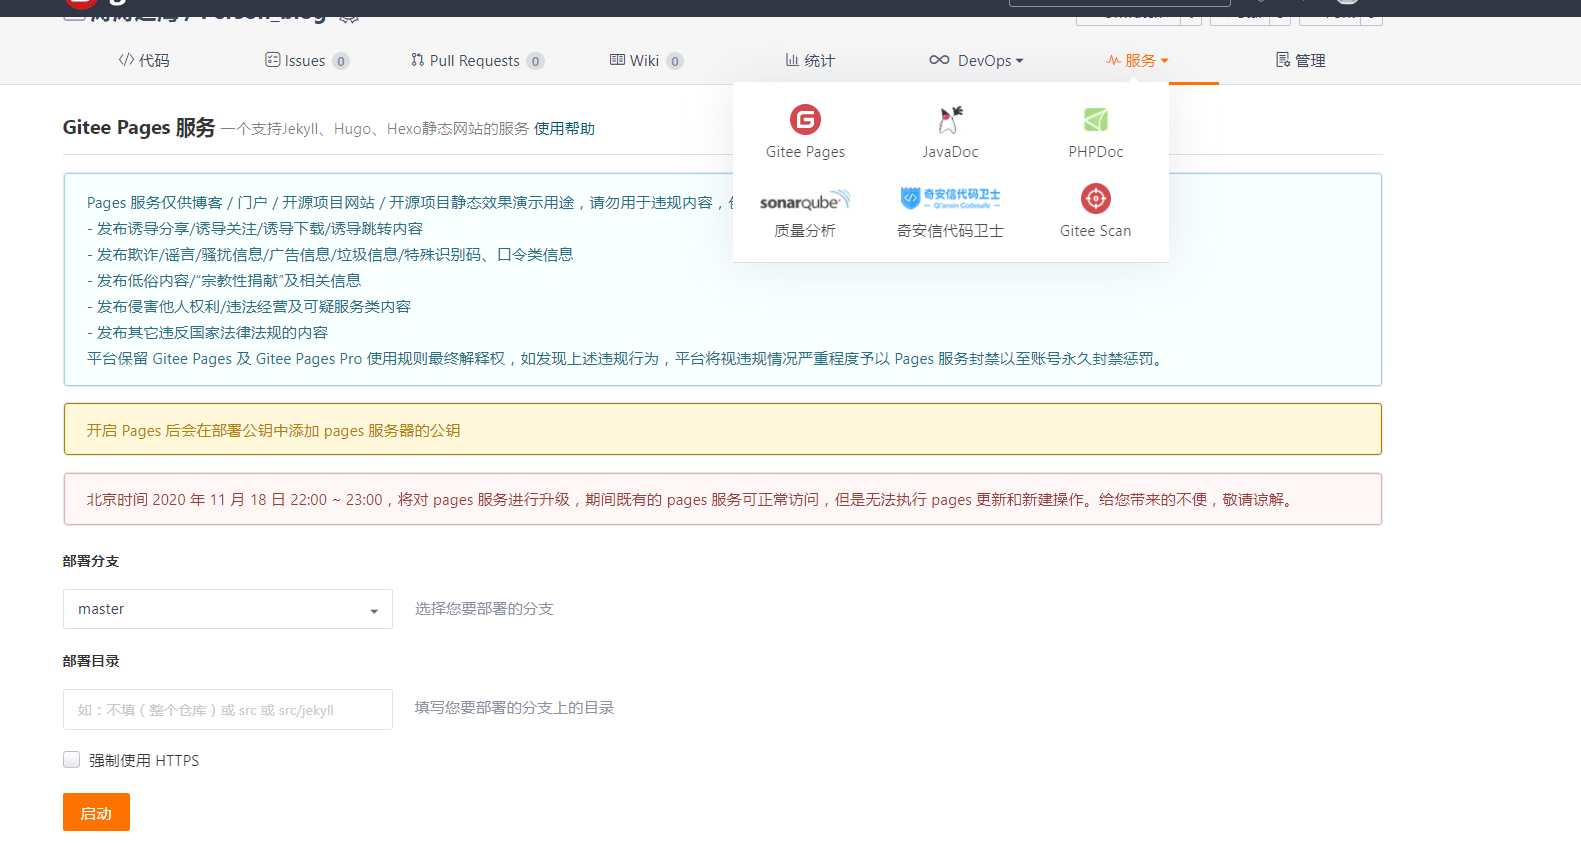
不需要填写任何内容,点击"启动"就行。

最终在线访问:http://claa.gitee.io/vuepress-theme-vdoing/
采坑
(1) 修改一个md 文件后,再重新启动,报错
YAMLException: can not read a block mapping entry; a multiline key may not be an implicit key at line 5, column 1:
百度后,原来冒号后需要加空格

(2) vuepress-plugin-helper-live2d 下载失败
npm install vuepress-plugin-helper-live2d --save
看报错信息是npm 自己的错,更新npm最新的版本,下载成功。
有不对的地方,欢迎大家一起讨论。
最后,欢迎大家关注我的微信号,您的点赞,收藏,转发就是对我的最大鼓励。


瓜分20万奖金 获得内推名额 丰厚实物奖励 易参与易上手
更多推荐

 1
1 0
0- 0


 已为社区贡献3条内容

所有评论(0)