SpringBoot+vue信息管理系统(3)
SpringBoot整合视图层技术目前流行的模板引擎有两种:1、官方推荐的模板引擎Thymeleaf 2、FreeMarker,下面就来讲解一下这两者的区别:3.1Thymeleaf作为新一代的Java模板引擎,类似于Velocity、FreeMarker等传统Java引擎。与传统的Java引擎不同的是:Thymeleaf...
1、SpringBoot整合视图层技术
目前流行的模板引擎有两种:1、官方推荐的模板引擎Thymeleaf 2、FreeMarker,下面就来讲解一下这两者的区别:
1.1 Thymeleaf
作为新一代的Java模板引擎,类似于Velocity、FreeMarker等传统Java引擎。与传统的Java引擎不同的是:Thymeleaf支持HTML原型,同时SpringBoot也提供了Thymeleaf自动化配置解决方案,因此在springboot中使用Thymeleaf非常方便。SpringBoot整合Thymeleaf,主要步骤如下:
(1)pom.xml 引入依赖
<dependency>
            <groupId>org.springframework.boot</groupId>
            <artifactId>spring-boot-starter-web</artifactId>
           <!-- <exclusions>
                <exclusion>
                    <groupId>org.springframework.boot</groupId>
                    <artifactId>spring-boot-starter-tomcat</artifactId>
                </exclusion>
            </exclusions>-->
        </dependency>
        <dependency>
            <groupId>org.springframework.boot</groupId>
            <artifactId>spring-boot-starter-thymeleaf</artifactId>
        </dependency>
(2)配置Thymeleaf
SpringBoot为Thymeleaf提供了自动化配置类ThymeleafAutoConfiguration,相关的配置属性在ThymeleafProperties类中,ThymeleafProperties部分源码如下:
public class ThymeleafProperties {
    private static final Charset DEFAULT_ENCODING;
    public static final String DEFAULT_PREFIX = "classpath:/templates/";
    public static final String DEFAULT_SUFFIX = ".html";
    private boolean checkTemplate = true;
    private boolean checkTemplateLocation = true;
    private String prefix = "classpath:/templates/";
    private String suffix = ".html";
    private String mode = "HTML";
    private Charset encoding;
    private boolean cache;
    private Integer templateResolverOrder;
    private String[] viewNames;
    private String[] excludedViewNames;
    private boolean enableSpringElCompiler;
    private boolean renderHiddenMarkersBeforeCheckboxes;
    private boolean enabled;
    private final ThymeleafProperties.Servlet servlet;
    private final ThymeleafProperties.Reactive reactive;

    public ThymeleafProperties() {
        this.encoding = DEFAULT_ENCODING;
        this.cache = true;
        this.renderHiddenMarkersBeforeCheckboxes = false;
        this.enabled = true;
        this.servlet = new ThymeleafProperties.Servlet();
        this.reactive = new ThymeleafProperties.Reactive();
    }
由此可知默认的模板位置为:classpath:/templates/,默认模板文件的后缀为.html,如果用开发工具idea创建springBoot项目,模板目录会自动创建
如果开发者想自定义,可以在application.properties,中配置如下:
是否开启缓存,开发时可设置成false,默认为TRUE
spring.thymeleaf.cache=true
#检验模板是否存在,默认为true
spring.thymeleaf.check-template=true
#检验模板位置是否存在,默认为TRUE
spring.thymeleaf.check-template-location=true
#模板文件编码
spring.thymeleaf.encoding=UTF-8
#模板文件地址
spring.thymeleaf.prefix=classpath:/templates/
#Content-Type 配置
spring.thymeleaf.servlet.content-type=text/html
#模板文件后缀
spring.thymeleaf.suffix=.html
(3)配置控制器
创建实体类Book,然后创建Controller中的类,然这个类的返回类型变成ModelAndView,代码如下:
import org.springframework.boot.context.properties.ConfigurationProperties;
import org.springframework.stereotype.Component;

@Component
@ConfigurationProperties(prefix = "book")
public class Book {
	private Integer id;
	private String name;
	private String author;
	private Float price;
//省略 get\set方法
}
import org.sang.model.Book;
import org.springframework.beans.factory.annotation.Autowired;
import org.springframework.stereotype.Controller;
import org.springframework.web.bind.annotation.GetMapping;
import org.springframework.web.servlet.ModelAndView;
import java.util.ArrayList;
import java.util.List;
@Controller
public class HelloController {
@Autowired
Book book;
@GetMapping("/books")
public ModelAndView hello(){
List<Book> books=new ArrayList<>();
Book book1=new Book();
book1.setId(1);
book1.setName("三国演义");
book1.setAuthor("罗贯中");
book1.setPrice(12f);
books.add(book1);
ModelAndView modelAndView=new ModelAndView();
modelAndView.addObject("books",books);//页面遍历的属性名
modelAndView.setViewName("books");//模板文件名
return modelAndView;
}
}(4)创建视图
<!DOCTYPE html>
<html lang="en" xmlns:th="http://www.thymeleaf.org"> //这是 th标签使用的关键,一定要引入
<head>
    <meta charset="UTF-8">
    <title>Title</title>
</head>
<body>
<table border="1">
    <tr>
        <th>图书编号</th>
        <th>图书名称</th>
        <th>图书作者</th>
        <th>图书价格</th>
    </tr>
    <tr th:each="book:${books}"> //books为属性名 book为别名 //th:each 为遍历 //th:text 为输出
        <td th:text="${book.id}"></td>
        <td th:text="${book.name}"></td>
        <td th:text="${book.author}"></td>
    </tr>

</table>

</body>
</html>
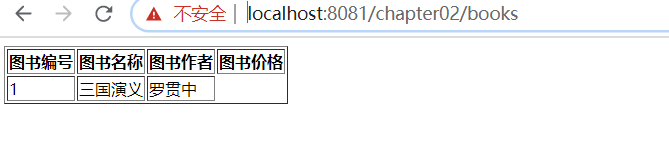
(5)运行结果
浏览器输入:https://localhost:8081/chapter02/books
关于Thymeleaf的相关信息可以https://www.thymeleaf.org 观看
1.2 整合FreeMarker
FreeMarker作为一个古老的模板引擎,可以用于web环境或者为web环境中。与Thymeleaf不同的是Freemarker需要经过解析才能在浏览器上看到数据显示。Freemarker不仅用来配置HTML页面模块,也可以用来配置电子邮件模块、配置文模板以及源码模板等。SpringBoot对FreeMarker也有很好的支持。步骤如下:
(1)在pom.xml添加项目依赖:
<dependency>
         <groupId>org.springframework.boot</groupId>
         <artifactId>spring-boot-starter-freemarker</artifactId>
</dependency>
<dependency>
         <groupId>org.springframework.boot</groupId>
         <artifactId>spring-boot-starter-web</artifactId>
</dependency>
(2)、配置FreeMarker
SpringBoot对FreeMarker也提供了自动化配置类FreeMarkerAutoConfiguration,相关的配置属性也在此类中,请看如下源码:
@ConfigurationProperties(
    prefix = "spring.freemarker"
)
public class FreeMarkerProperties extends AbstractTemplateViewResolverProperties {
    public static final String DEFAULT_TEMPLATE_LOADER_PATH = "classpath:/templates/";
    public static final String DEFAULT_PREFIX = "";
    public static final String DEFAULT_SUFFIX = ".ftlh";
    private Map<String, String> settings = new HashMap();
    private String[] templateLoaderPath = new String[]{"classpath:/templates/"};
    private boolean preferFileSystemAccess = true;

    public FreeMarkerProperties() {
        super("", ".ftlh");
    }

    public Map<String, String> getSettings() {
        return this.settings;
    }

    public void setSettings(Map<String, String> settings) {
        this.settings = settings;
    }

    public String[] getTemplateLoaderPath() {
        return this.templateLoaderPath;
    }

    public boolean isPreferFileSystemAccess() {
        return this.preferFileSystemAccess;
    }

    public void setPreferFileSystemAccess(boolean preferFileSystemAccess) {
        this.preferFileSystemAccess = preferFileSystemAccess;
    }

    public void setTemplateLoaderPath(String... templateLoaderPaths) {
        this.templateLoaderPath = templateLoaderPaths;
    }
}
从源码上可以看出FreeMarker默认的模板文件地址和Thymeleaf一样,都是classpath:/template/,但是模板文件的后缀确实.ftlh;如果开发者想自定义配置可以在application.propertie中配置,配置如下:
#HttpServletRequest的属性是否可以考虑覆盖controller中model的同名项
spring.freemarker.allow-request-override=false
#HttpSession的属性是否可以覆盖controller中model的同名项
spring.freemarker.allow-session-override=false
#是否开启缓存
spring.freemarker.cache=false

#检验模板位置是否存在,默认为TRUE
spring.freemarker.check-template-location=true
#模板文件编码
spring.freemarker.encoding=UTF-8
#Content-Type 配置
spring.freemarker.servlet.content-type=text/html
#是否将HttpServletRequest中的属性添加到model中
spring.freemarker.expose-request-attributes=false
#是否将HttpSession中的属性添加到model中
spring.freemarker.expose-session-attributes=false
#模板文件后缀
spring.freemarker.suffix=.ftl
#模板文件地址
spring.freemarker.template-loader-path=classpath:/templates/
(3)配置控制器
控制器和thymeleaf一样,这里就不重复写
(4)创建视图
在模块目录下创建books.ftl,内容如下:
<!DOCTYPE html>
<html lang="en">
<head>
    <meta charset="UTF-8">
    <title>Title</title>
</head>
<body>
<table border="1">
    <tr>
        <th>图书编号</th>
        <th>图书名称</th>
        <th>图书作者</th>
        <th>图书价格</th>
    </tr>
    <#if books ??&& (books?size>0)> //判断集合是否为空
    <#list books as book> //给集合取别名
   <tr>
        <td >${book.id}</td> //集合属性
        <td >${book.name}</td>
        <td >${book.author}</td>
    </tr>
    </#list>
</#if>
</table>

</body>
</html>
(5)运行和thymeleaf一样
2、SpringBoot整合Web开发
2.1、返回JSON数据
(1)默认实现
目前JSON方式是最流行的的前后端数据传输方式,SpringMvc中使用消息转换器HttpMessageConverter对JSON的转换器提供了很好的支持,SpringBoot对相关的配置做了更一步的简化,web依赖,pom.xml如下:
<dependency>
            <groupId>org.springframework.boot</groupId>
            <artifactId>spring-boot-starter-web</artifactId>
 </dependency>
这个依赖中默认加入了jackson-databind作为JSON处理器,此时不需要添加格外的JSON处理器,就可以返回一段JSON,创建实体类:
import com.fasterxml.jackson.annotation.JsonFormat;
import com.fasterxml.jackson.annotation.JsonIgnore;
import org.springframework.boot.context.properties.ConfigurationProperties;
import org.springframework.stereotype.Component;

import java.util.Date;

@Component
@ConfigurationProperties(prefix = "book")
public class Book {
	private Integer id;
	private String name;
	private String author;
	@JsonIgnore
	private Float price;

	@JsonFormat(pattern = "yyyy-MM-dd")
	private Date publicationDate;

//省略 set 、get方法
}
创建Controller,创建类执行方法,返回结果:
import org.sang.model.Book;
import org.springframework.beans.factory.annotation.Autowired;
import org.springframework.stereotype.Controller;
import org.springframework.web.bind.annotation.GetMapping;
import org.springframework.web.bind.annotation.ResponseBody;
import org.springframework.web.servlet.ModelAndView;
import java.util.Date;
import java.util.ArrayList;
import java.util.List;
@Controller
public class HelloController {
@Autowired
Book book;
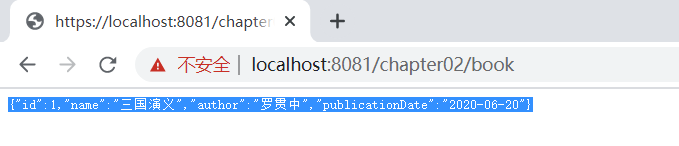
@GetMapping("/book")
@ResponseBody
public Book Book(){
Book book1=new Book();
book1.setId(1);
book1.setName("三国演义");
book1.setAuthor("罗贯中");
book1.setPrice(12f);
book1.setPublicationDate(new Date());
return book1;
}
}
注意:如果频繁使用@ResponseBody注解,可以采用@RestController组合注解代替@Controller和@ResponseBody
这是SpringBoot自带的处理方式,如果采用这种方式,对于字段忽略、日期格式化等常见问题都可以用注解解决
这就是通过Spring中提供的默认的MappingJackson2HttpMessageConverter来实现的,当然开发者也可以根据需求自定义JSON转换器,常见的JSON处理器除了jackson-databind之外,还有Gson和fastjson
(2)自定义转换器(Gson)
Gson是谷歌的一个开源的JSON解析框架。使用Gson,需要先去除默认的jackson-databind,依赖如下:
<dependency>
            <groupId>org.springframework.boot</groupId>
            <artifactId>spring-boot-starter-web</artifactId>

            <exclusions>
                <exclusion>
                    <groupId>com.fasterxml.jackson.core</groupId>
                    <artifactId>jackson-databind</artifactId>
                </exclusion>
            </exclusions>
        </dependency>
<dependency>
            <groupId>com.google.code.gson</groupId>
            <artifactId>gson</artifactId>
            <version>2.6.2</version>
        </dependency>
由于SpringBoot中默认提供了Gson的自动转换类GsonHttpMessageConvertersConfiguration,所以使用Gson就需要把jackson-databing去掉,如果对日期数据进行格式化,那就需要开发者自定义 HttpMessageConverter
首次看GsonHttpMessageConverterConfiguration源码:
@Bean
@ConditionalOnMessingBean
public GsonHttpMessageConverter gsonHttpMessageConverter(Gson gson){
    GsonHttpMessageConverter converter=new GsonHttpMessageConverter();
    converter.setGson(gson);
    return converter;
}
@ConditionalOnMissingBean 注解表示该项目中没有提供GsonHttpMessageConverter时才会使用默认的GsonHttpMessageConverter,所以开发者只需要提供一个GsonHttpMessageConverter即可,代码如下:
import com.google.gson.Gson;
import com.google.gson.GsonBuilder;
import org.springframework.context.annotation.Bean;
import org.springframework.context.annotation.Configuration;
import org.springframework.http.converter.json.GsonHttpMessageConverter;

import java.lang.reflect.Modifier;

@Configuration
public class GsonConfig {

	@Bean
	GsonHttpMessageConverter gsonHttpMessageConverter(){
		GsonHttpMessageConverter converter=new GsonHttpMessageConverter();
		GsonBuilder builder=new GsonBuilder();
		builder.setDateFormat("yyyy-MM-dd");
		builder.excludeFieldsWithModifiers(Modifier.PROTECTED);
		Gson gson=builder.create();
		converter.setGson(gson);
		return converter
	}
}
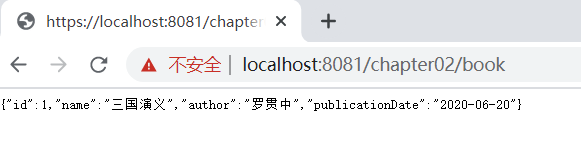
结果:
(3)自定义转换器(fastjson)
fastjson是阿里巴巴中的一个开源JSON解析框架,是目前JSON解析速度最快的开源框架,该框架也可以集成到SpringBoot中,不同于Gson、fastjson继承完成之后并不能马上使用,需要开发者提供相应的HttpMessageConverter后才能使用,集成fastjson步骤如下:
除去jackson-databind依赖,引入fastjson依赖:
 <dependency>
            <groupId>org.springframework.boot</groupId>
            <artifactId>spring-boot-starter-web</artifactId>

            <exclusions>
                <exclusion>
                    <groupId>com.fasterxml.jackson.core</groupId>
                    <artifactId>jackson-databind</artifactId>
                </exclusion>
            </exclusions>
        </dependency>
        <dependency>
            <groupId>com.alibaba</groupId>
            <artifactId>gson</artifactId>
            <version>2.6.2</version>
        </dependency>
然后配置fastjson的HttpMessageConverter
import com.alibaba.fastjson.serializer.SerializerFeature;
import com.alibaba.fastjson.support.config.FastJsonConfig;
import com.alibaba.fastjson.support.spring.FastJsonHttpMessageConverter;
import org.springframework.context.annotation.Bean;
import org.springframework.context.annotation.Configuration;
import org.springframework.http.converter.json.GsonHttpMessageConverter;

import java.lang.reflect.Modifier;
import java.nio.charset.Charset;

@Configuration
public class GsonConfig {
	@Bean
	FastJsonHttpMessageConverter fastJsonHttpMessageConverter(){
		FastJsonHttpMessageConverter converter=new FastJsonHttpMessageConverter();
		FastJsonConfig fastJsonConfig=new FastJsonConfig();
		fastJsonConfig.setDateFormat("yyyy-MM-dd"); //配置日期格式
		fastJsonConfig.setCharset(Charset.forName("UTF-8")); //数据格式
		fastJsonConfig.setSerializerFeatures(
				SerializerFeature.WriteClassName, //是否在生成的JSon中输出类名
				SerializerFeature.WriteMapNullValue, //是否输出value为null的数据
				SerializerFeature.PrettyFormat, //生成的JSON格式化
				SerializerFeature.WriteNullListAsEmpty, //空集合输出,而非null
				SerializerFeature.WriteNullStringAsEmpty //空字符串“”而为null
		);
		converter.setFastJsonConfig(fastJsonConfig);
		return converter;
	}
}
除了GsonConfig配置的,还需要配置一下响应编码,否则返回的JSON中文会乱码,需要在application.properties添加如下配置:
spring.http.encoding.force-response=true结果:
对于FastJsonHttpMessageConverter的配置,除了上面的方式,下面还有一种方式:
项目还是需要引入spring-boot-starter-web依赖,还需要引入spring-boot-autoconfigure,在这个自动化配置中,有一个WebMvcAutoConfiguration类提供了对SpringMVC最基础的配置,如果自动化配置不满开发需求,开发者可以自定义配置,只需要实现WebMvcConfigurer接口即可在(在Spring5之前通过继承WebMvcConfigurerAdapter类实现的),源码如下:
import com.alibaba.fastjson.serializer.SerializerFeature;
import com.alibaba.fastjson.support.config.FastJsonConfig;
import com.alibaba.fastjson.support.spring.FastJsonHttpMessageConverter;
import org.springframework.boot.autoconfigure.web.servlet.WebMvcAutoConfiguration;
import org.springframework.context.annotation.Configuration;
import org.springframework.http.converter.HttpMessageConverter;
import org.springframework.web.servlet.config.annotation.WebMvcConfigurer;
import org.springframework.web.servlet.config.annotation.WebMvcConfigurerAdapter;

import java.nio.charset.Charset;
import java.util.List;

@Configuration
public class MyWebMvcConfig implements WebMvcConfigurer {

	public void configureMessageConverter(List<HttpMessageConverter<?> > converters){
		FastJsonHttpMessageConverter converter=new FastJsonHttpMessageConverter();
		FastJsonConfig config=new FastJsonConfig();
		config.setDateFormat("yyyy-MM-dd");
		config.setCharset(Charset.forName("UTF-8"));
		config.setSerializerFeatures(
				SerializerFeature.WriteClassName,
				SerializerFeature.WriteMapNullValue,
				SerializerFeature.PrettyFormat,
				SerializerFeature.WriteNullListAsEmpty,
				SerializerFeature.WriteNullStringAsEmpty
		);
		converter.setFastJsonConfig(config);
		converters.add(converter);
	}
}
代码解析:
自定义MyWebMvcConfig 类并实现WebMvcConfigurer接口中的configureMessageConverters方法
将自定义FastJsonHttpMessageConverter加入converters中
注意:
Gson也采用这种方式,但不推荐。因为当项目中没有GsonHttpMessageConverter时,SpringBoot自己提供一个GsonHttpMessageConverter,此时重写configureMessageConverters方法,参数converters中已经有GsonHttpMessageConverter的实例了,需要替换已有的GsonHttpMessageConverter实例,操作比较麻烦,所以对于Gson,推荐直接提供GsonHttpMessageConverter
2.2、静态资源访问
对于静态资源访问,SpringBoot提供了自动化配置,可以简化静态资源过滤配置
(1)默认策略
SpringBoot对于SpringMVC的自动化配置都在WebMvcAutoConfiguration类中,因此对于默认的静态资源过滤策略可以从这个类中一探究竟
在WebMVCAutoConfiguration类中有个静态内部类WebMvcAutoConfigurationAdapter,实现了WebMvcConfigurer接口。WebMvcConfigurer接口中有个方法addResourceHandlers,是用来配置静态资源过滤的。方法在WebMvcAutoConfigurationAdapter类中得到了实现,部分代码如下:
 public void addResourceHandlers(ResourceHandlerRegistry registry) {
            if (!this.resourceProperties.isAddMappings()) {
                logger.debug("Default resource handling disabled");
            } else {
                Duration cachePeriod = this.resourceProperties.getCache().getPeriod();
                CacheControl cacheControl = this.resourceProperties.getCache().getCachecontrol().toHttpCacheControl();
                if (!registry.hasMappingForPattern("/webjars/**")) {
                    this.customizeResourceHandlerRegistration(registry.addResourceHandler(new String[]{"/webjars/**"}).addResourceLocations(new String[]{"classpath:/META-INF/resources/webjars/"}).setCachePeriod(this.getSeconds(cachePeriod)).setCacheControl(cacheControl));
                }

                String staticPathPattern = this.mvcProperties.getStaticPathPattern();
                if (!registry.hasMappingForPattern(staticPathPattern)) {
                    this.customizeResourceHandlerRegistration(registry.addResourceHandler(new String[]{staticPathPattern}).addResourceLocations(WebMvcAutoConfiguration.getResourceLocations(this.resourceProperties.getStaticLocations())).setCachePeriod(this.getSeconds(cachePeriod)).setCacheControl(cacheControl));
                }

            }
        }
SpringBoot在这里进行了默认的静态资源的过滤配置,其中staticPathPattern默认定义在WebMvcProperties中,内容如下:
private String staticPathPattern="/**"this.resourceProperties.getStaticLocations():获取默认静态资源地址定义在ResourceProperties中
private static final String[] CLASSPATH_RESOURCE_LOCATIONS = new String[]{"classpath:/META-INF/resources/", "classpath:/resources/", "classpath:/static/", "classpath:/public/"};
在getResourceLocations方法中,对于4个静态资源地址做了扩充:
static String[] getResourceLocations(String[] staticLocations){
    String[] locations=new String[staticLocations.length+SERVLET_LOCATIONS.length];
    System.arraycopy(staticLocations,0,locations,0,staticLocations.length);
    System.arraycody(SERVLET_LOCATIONS,0,locations,staticLocations.length,
    SERVLET_LOCATIONS.length);
    return locations;
}
其中,SERVLET_LOCATIONS定义就是{"/"}
综上而已:SpringBoot默认过滤所有的静态资源,一般静态资源地址分为:"classpath:/META-INF/resources/","classpath:/resources/","classpath:/static/","classpath:/public/"、"/",优先级依次降低
(2)自定义策略
1、在配置文件(application.properties)中配置(过滤规则:/static/** 静态资源地址:classpath:/static/)
spring.mvc.static-path-pattern=/static/**
spring.resources.static-locations=classpath:/static/
2、java编码定义:
import com.alibaba.fastjson.serializer.SerializerFeature;
import com.alibaba.fastjson.support.config.FastJsonConfig;
import com.alibaba.fastjson.support.spring.FastJsonHttpMessageConverter;
import org.springframework.boot.autoconfigure.web.servlet.WebMvcAutoConfiguration;
import org.springframework.context.annotation.Configuration;
import org.springframework.http.converter.HttpMessageConverter;
import org.springframework.web.servlet.config.annotation.ResourceHandlerRegistration;
import org.springframework.web.servlet.config.annotation.ResourceHandlerRegistry;
import org.springframework.web.servlet.config.annotation.WebMvcConfigurer;
import org.springframework.web.servlet.config.annotation.WebMvcConfigurerAdapter;

import java.nio.charset.Charset;
import java.util.List;

@Configuration
public class MyWebMvcConfig implements WebMvcConfigurer {

	@Override
	public void addResourceHandlers(ResourceHandlerRegistry registration){
		registration.addResourceHandler("/static/**")
				.addResourceLocations("classpath:/static/");
	}
}
为开发者提供学习成长、分享交流、生态实践、资源工具等服务,帮助开发者快速成长。
更多推荐


 0
0 0
0- 0


 已为社区贡献2条内容

所有评论(0)