
Pointnet++代码详解(一):farthest_point_sample函数
初入Pointnet++,看相关源码感觉很费力,想着把自己学到的记下来,避免后面忘记要用到又得重新思考,本系列主要讲解Pointnet++代码,其理论部分大家可以在网上自行搜索相关资料。本系列分析的源码来自:https://github.com/yanx27/Pointnet_Pointnet2_pytorch...
初入Pointnet++,看相关源码感觉很费力,想着把自己学到的记下来,避免后面忘记要用到又得重新思考,本系列主要讲解Pointnet++代码,其理论部分大家可以在网上自行搜索相关资料。本系列分析的源码来自:https://github.com/yanx27/Pointnet_Pointnet2_pytorch
farthest_point_sample函数是来自于Pointnet++的FPS(Farthest Point Sampling) 最远点采样法,该方法比随机采样的优势在于它可以尽可能的覆盖空间中的所有点。
最远点采样是Set Abstraction模块中较为核心的步骤,其目的是从一个输入点云中按照所需要的点的个数npoint采样出足够多的点,并且点与点之间的距离要足够远。最后的返回结果是npoint个采样点在原始点云中的索引。
FPS的逻辑如下:
假设一共有n个点,整个点集为N = {f1, f2,…,fn}, 目标是选取n1个起始点做为下一步的中心点:
- 随机选取一个点fi为起始点,并写入起始点集 B = {fi};
- 选取剩余n-1个点计算和fi点的距离,选择最远点fj写入起始点集B={fi,fj};
- 选取剩余n-2个点计算和点集B中每个点的距离, 将最短的那个距离作为该点到点集的距离, 这样得到n-2个到点集的距离,选取最远的那个点写入起始点B = {fi, fj ,fk},同时剩下n-3个点, 如果n1=3 则到此选择完毕;
- 如果n1 > 3则重复上面步骤直到选取n1个起始点为止.
具体实现步骤如下:
- 先随机初始化一个centroids矩阵,后面用于存储npoint个采样点的索引位置,大小为B×npoint,其中B为BatchSize的个数,即B个样本;
- 利用distance矩阵记录某个样本中所有点到某一个点的距离,初始化为B×N矩阵,初值给个比较大的值,后面会迭代更新;
- 利用farthest表示当前最远的点,也是随机初始化,范围为0~N,初始化B个,对应到每个样本都随机有一个初始最远点;
- batch_indices初始化为0~(B-1)的数组;
- 直到采样点达到npoint,否则进行如下迭代:
- (1)设当前的采样点centroids为当前的最远点farthest;
- (2)取出这个中心点centroid的坐标;
- (3)求出所有点到这个farthest点的欧式距离,存在dist矩阵中;
- (4) 建立一个mask,如果dist中的元素小于distance矩阵中保存的距离值,则更新distance中的对应值,随着迭代的继续distance矩阵中的值会慢慢变小,其相当于记录着某个样本中每个点距离所有已出现的采样点的最小距离;
- (5)最后从distance矩阵取出最远的点为farthest,继续下一轮迭代.
def farthest_point_sample(xyz, npoint):
    """
    Input:
        xyz: pointcloud data, [B, N, 3]
        npoint: number of samples
    Return:
        centroids: sampled pointcloud index, [B, npoint]
    """
    device = xyz.device
    batchsize, ndataset, dimension = xyz.shape
    #to方法Tensors和Modules可用于容易地将对象移动到不同的设备(代替以前的cpu()或cuda()方法)
    # 如果他们已经在目标设备上则不会执行复制操作
    centroids = torch.zeros(batchsize, npoint, dtype=torch.long).to(device)
    distance = torch.ones(batchsize, ndataset).to(device) * 1e10
    #randint(low, high, size, dtype)
    # torch.randint(3, 5, (3,))->tensor([4, 3, 4])
    farthest =  torch.randint(0, ndataset, (batchsize,), dtype=torch.long).to(device)
    #batch_indices=[0,1,...,batchsize-1]
    batch_indices = torch.arange(batchsize, dtype=torch.long).to(device)
    for i in range(npoint):
        # 更新第i个最远点
        centroids[:,i] = farthest
        # 取出这个最远点的xyz坐标
        centroid = xyz[batch_indices, farthest, :].view(batchsize, 1, 3)
        # 计算点集中的所有点到这个最远点的欧式距离
        #等价于torch.sum((xyz - centroid) ** 2, 2)
        dist = torch.sum((xyz - centroid) ** 2, -1)
        # 更新distances,记录样本中每个点距离所有已出现的采样点的最小距离
        mask = dist < distance
        distance[mask] = dist[mask]
        # 从更新后的distances矩阵中找出距离最远的点,作为最远点用于下一轮迭代
        #取出每一行的最大值构成列向量,等价于torch.max(x,2)
        farthest = torch.max(distance, -1)[1]
    return centroids
1、xyz是点云的坐标数据,其维度为[B,N,3], B代表Batchsize,即有多少样本, N代表每个样本的总点数,3代表点云的x,y,z坐标;
npoint代表采样点数,centroids代表采样点的索引,其维度为[B, N]。
2、关于device

device = xyz.device因此,这句代码说的就是将xyz的device属性赋给device,这是为了后续操作所采用的。
3、shape

可以看出shape与size()是一样的,而dim()返回的是Tensor的维度(秩)
4、to(device)

centroids = torch.zeros(batchsize, npoint, dtype=torch.long).to(device)
    distance = torch.ones(batchsize, ndataset).to(device) * 1e10
to方法Tensors和Modules可用于容易地将对象移动到不同的设备(代替以前的cpu()或cuda()方法)
注意:如果数据已经在目标设备上则不会执行复制操作
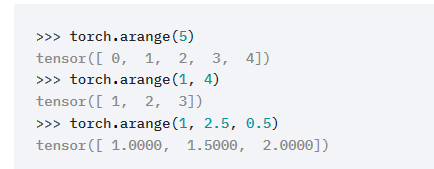
5、torch.randint和torch.arange
torch.randint(low=0, high, size):size是元组,产生从low到high之间的随机整数,大小为size。

torch.arange(start, end, step) # 不包括end, step是两个点间距,start默认为0,step默认为1
   #randint(low, high, size, dtype)
    # torch.randint(3, 5, (3,))->tensor([4, 3, 4])
    farthest =  torch.randint(0, ndataset, (batchsize,), dtype=torch.long).to(device)
    #batch_indices=[0,1,...,batchsize-1]
batch_indices = torch.arange(batchsize, dtype=torch.long).to(device)常用函数:https://www.jianshu.com/p/46a8ad87d238
6、
for i in range(npoint):
# 更新第i个最远点,centroids:[B,npoint],farthest是最远点的索引
centroids[:,i] = farthest
# 取出batchsize的每个样本这个最远点的xyz坐标,xyz:[B,N,3]
centroid = xyz[batch_indices, farthest, :].view(batchsize, 1, 3)
# 计算点集中的所有点到这个最远点的欧式距离
#等价于torch.sum((xyz - centroid) ** 2, 2)
dist = torch.sum((xyz - centroid) ** 2, -1)
# 更新distances,记录样本中每个点距离所有已出现的采样点的最小距离
mask = dist < distance
distance[mask] = dist[mask]
# 从更新后的distances矩阵中找出距离最远的点,作为最远点用于下一轮迭代
#torch.max(distance, -1)取出每一行的最大值构成列向量,等价于torch.max(x,2)
#torch.max(distance, -1)[1]是取列向量的索引,若torch.max(distance, -1)[0]则是取列向量
farthest = torch.max(distance, -1)[1]torch.sum(input, dim, out=None) → Tensor
- input (Tensor) – 输入张量
- dim (int) – 缩减的维度
- out (Tensor, optional) – 结果张量
import torch
x = torch.randn(4, 5)

print(x)

print(x.sum(0)) #按列求和
print(x.sum(1)) #按行求和
print(torch.sum(x))   #按列求和
print(torch.sum(x, 0))#按列求和
print(torch.sum(x, 1))#按行求和

#结果:
tensor([[ 0.2210,  1.8035,  0.7671, -0.1836, -0.2794],
        [-0.7922, -1.0881, -2.0180,  1.0981,  0.2320],
        [-0.4681,  0.1820,  0.0502,  0.0067,  1.3218],
        [ 0.4785,  1.0799,  1.6197,  0.6642,  0.6915]])
tensor([-0.5608,  1.9773,  0.4190,  1.5854,  1.9660])
tensor([ 2.3287, -2.5682,  1.0926,  4.5338])
tensor(5.3868)
tensor([-0.5608,  1.9773,  0.4190,  1.5854,  1.9660])
tensor([ 2.3287, -2.5682,  1.0926,  4.5338])
对于三维而言,
import torch
xyz = torch.tensor([[[3,7,9],[10,5,2]],[[5,4,2],[1,6,9]]])

dist0 = torch.sum(xyz, -1)
dist1 = torch.sum(xyz, 2)
dist2 = torch.sum(xyz, 1)
dist3 = torch.sum(xyz)
print("xyz:",xyz)
print("sum-1:",dist0)
print("sum2:", dist1)
print("sum1:",dist2)
print("sum:", dist3)

结果:
xyz: tensor([[[ 3,  7,  9],
         [10,  5,  2]],

        [[ 5,  4,  2],
         [ 1,  6,  9]]])
sum-1: tensor([[19, 17],
        [11, 16]])
sum2: tensor([[19, 17],
        [11, 16]])
sum1: tensor([[13, 12, 11],
        [ 6, 10, 11]])
sum: tensor(63)
更多sum用法详见:https://blog.csdn.net/qq_39463274/article/details/105145029
torch.max:
对于tensorA和tensorB:
- torch.max(tensorA):返回tensor中的最大值。
- torch.max(tensorA,dim):dim表示指定的维度,返回指定维度的最大数和对应下标
- torch.max(tensorA,tensorB):比较tensorA和tensorB相对较大的元素。

若为三阶张量,则结果如下:
import torch
x= torch.tensor([[[3,7,9],[10,5,2]],[[5,4,2],[1,6,9]]])
k0=torch.max(x,0)
k1=torch.max(x,1)
k2=torch.max(x,2)
k3=torch.max(x,-1)
print("x:",x)
print("k0:",k0)
print("k1:",k1)
print("k2:",k2)
print("k-1:",k3)

结果:
x: tensor([[[ 3,  7,  9],
         [10,  5,  2]],

        [[ 5,  4,  2],
         [ 1,  6,  9]]])
k0: (tensor([[ 5,  7,  9],
        [10,  6,  9]]), tensor([[1, 0, 0],
        [0, 1, 1]]))
k1: (tensor([[10,  7,  9],
        [ 5,  6,  9]]), tensor([[1, 0, 0],
        [0, 1, 1]]))
k2: (tensor([[ 9, 10],
        [ 5,  9]]), tensor([[2, 0],
        [0, 2]]))
k-1: (tensor([[ 9, 10],
        [ 5,  9]]), tensor([[2, 0],
        [0, 2]]))
详细请见:https://blog.csdn.net/Linux_bin/article/details/95599849

旨在为数千万中国开发者提供一个无缝且高效的云端环境,以支持学习、使用和贡献开源项目。
更多推荐


 31
31 0
0- 0


 已为社区贡献1条内容

所有评论(0)