iOS仿苹果原生天气app总结
天气app总结改了一下整体的项目框架主要由三个页面以及一个widget组成第三方框架BMKLocationKit百度定位API官方文档Masonry布局API需要先添加控件到视图,再执行类似这种代码。[self.jumpToChoseCityViewBtn mas_makeConstraints:^(MASConstraintMaker *make) {ma...
文章目录
天气app总结
改了一下整体的项目框架


主要由三个页面以及一个widget组成
第三方框架
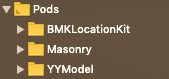
BMKLocationKit百度定位API
Masonry布局API
需要先添加控件到视图,再执行类似这种代码。
[self.jumpToChoseCityViewBtn mas_makeConstraints:^(MASConstraintMaker *make) {
        make.size.mas_equalTo(CGSizeMake(25, 25));
        make.centerY.equalTo(self).multipliedBy(1.2);
        make.right.mas_equalTo(-20);
}];
YYModel初始化model
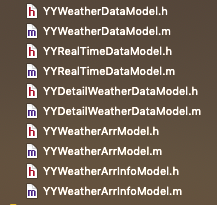
用于json数据的解析,自动转化为model,当然你要构建好你的model,然后调用
YYWeatherDataModel *model = [YYWeatherDataModel yy_modelWithDictionary:dataDic];
如果由嵌套model的话,需要这样构建model⬇️
//.h文件
#import <Foundation/Foundation.h>
#import <YYModel/YYModel.h>
#import "YYWeatherArrModel.h"
#import "YYRealTimeDataModel.h"

NS_ASSUME_NONNULL_BEGIN

@interface YYWeatherDataModel : NSObject

//该model是array类型的需要这样创建
@property (nonatomic, strong) NSArray <YYWeatherArrModel *> *weather;

@property (nonatomic, strong) YYRealTimeDataModel *realtime;

@end

NS_ASSUME_NONNULL_END
//.m文件
#import "YYWeatherDataModel.h"

@implementation YYWeatherDataModel

+ (NSDictionary *)modelContainerPropertyGenericClass {
    return @{@"weather" : [YYWeatherArrModel class],
             @"realtime" : [YYRealTimeDataModel class]};
}

@end
沙盒系统filemanager&filehandle操作文件流
包括沙盒lib地址、在该地址下创建新文件夹地址、其中文件(本地自定义数据储存位置)地址、数据转换data转array等
@property (nonatomic, strong) NSString *libPath;
@property (nonatomic, strong) NSString *dataPath;
@property (nonatomic, strong) NSString *cityDataPath;
@property (nonatomic, strong) NSFileManager *fileManager;
@property (nonatomic, strong) NSFileHandle *fileHandle;
@property (nonatomic, strong) NSData* data;
@property (nonatomic, strong) NSString *dataStr;
@property (nonatomic, strong) NSArray *array;
寻找沙盒lib地址之后确定新建文件夹以及文件地址
self.libPath = [NSSearchPathForDirectoriesInDomains(NSLibraryDirectory,NSUserDomainMask,YES) lastObject];
self.dataPath = [self.libPath stringByAppendingPathComponent:@"CityData"];
self.cityDataPath = [self.dataPath stringByAppendingPathComponent:@"cityData"];
初始化filemanager&filehandle
self.fileManager = [NSFileManager defaultManager];//用来判断文件夹或文件是否创建成功
self.fileHandle = [NSFileHandle fileHandleForReadingAtPath:self.cityDataPath];//文件流操作
创建文件
- (void)createFile{
    if (![self.fileManager fileExistsAtPath:self.dataPath]) {
        NSError *creatError;
        [self.fileManager createDirectoryAtPath:self.dataPath withIntermediateDirectories:YES attributes:nil error:&creatError];
    }
    if (![self.fileManager fileExistsAtPath:self.cityDataPath]) {
        //创建文件
        [self.fileManager createFileAtPath:self.cityDataPath contents:nil attributes:nil];
    }
}
初始化数据,读取文件数据,并转化为数组
- (void)initData{
    self.data = [[NSData alloc] init];
}

- (void)getData{
    self.data = [self.fileHandle readDataToEndOfFile];
    self.dataStr = [[NSString alloc] initWithData:self.data encoding:NSUTF8StringEncoding];
    //去掉结尾/n
    self.dataStr = [self.dataStr stringByReplacingOccurrencesOfString:@"\n" withString:@""];
    self.array = [self.dataStr componentsSeparatedByString:@","];
}
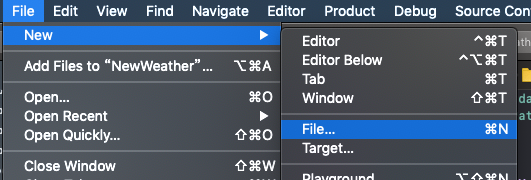
widget小部件
小部件是一个和app独立开的个体,虽然两个工程在同一个project里,但是其沙盒是不同的,也就是不能互相访问数据和代码。
创建方法⬇️

共享数据
为了数据共享我们需要创建一个App Groups,在这里添加并创建,两个target都要设置好哦!

共享数据⬇️
//发送共享数据
NSUserDefaults *shareWeatherData = [[NSUserDefaults alloc] initWithSuiteName:@"group.******"];
        NSDictionary *shareDataDic = @{@"cityName":self.locWeather.cityName};
        [shareWeatherData setObject:shareDataDic forKey:@"DataDic"];
        [shareWeatherData synchronize];
widget里直接接收即可⬇️
NSUserDefaults *shareWeatherData = [[NSUserDefaults alloc] initWithSuiteName:@"group.******"];
    self.todayModel = [TodayModel alloc];
    NSDictionary *dataDic = [shareWeatherData objectForKey:@"DataDic"];

    self.todayModel.todayCityName = [dataDic objectForKey:@"cityName"];
点击widget跳转到app
给viewcontroller添加点击手势事件
UITapGestureRecognizer *tapGesture = [[UITapGestureRecognizer alloc] initWithTarget:self action:@selector(jumpToApp)];
    [self.view addGestureRecognizer:tapGesture];
调用
- (void)jumpToApp{
    NSURL *url = [NSURL URLWithString:@"NewWeatherWidget://"];
    [self.extensionContext openURL:url completionHandler:^(BOOL success) {
        if (success) {
            NSLog(@"打开成功");
        }
    }];
}
MVC
个人理解:
model是需要的数据的模型
view里只是setUpUI,layout的自定义,显示数据
viewcontroller里是负责把数据放到model里,把model给view,再将view addSubview到主页面上显示出来
property
如NSArray,NSDictionary等不想要被更改的数据需要深拷贝,关键词用copy;而NSMultableArray等可变数组或字典,需要动态去更新里面的数据的对象需要使用strong,不然在进增删改等操作时会出现unrecognized selector sent to instance等错误。
在动态数组中,需要增加或者更新数据时可以这样做⬇️
利用中间商完成操作
	self.locoalCityName = locCityName;
    NSMutableArray *newArray = [self.allCityArr mutableCopy];
    [newArray replaceObjectAtIndex:0 withObject:locCityName];
    self.allCityArr = newArray;
tableviewcell的复用
个人理解最好就是将所有cell里的要用的数据在外面封装好,处理好,然后简单的传入cell,在cell里去操作,实现赋值等。
例如⬇️
这里dataSource数组里装的是许多个天气信息,封装好,传进去。
- (UICollectionViewCell *)collectionView:(UICollectionView *)collectionView cellForItemAtIndexPath:(NSIndexPath *)indexPath {
    HomeCollectionViewCell *cell = [collectionView dequeueReusableCellWithReuseIdentifier:@"pageCell" forIndexPath:indexPath];
    MyWeather *weather = self.dataSource[indexPath.row];
    cell.homePageView.weather = weather;
    return cell;
}
在cell里面实现赋值并刷新页面,因为我是collectionview里面嵌套了tableview所以是这样的。
- (void)setWeather:(MyWeather *)weather {
    if (_weather != weather) {
        _weather = weather;
        self.headerView.weather = weather;
        [self.tableView reloadData];
    }else{
        [self.tableView reloadData];
    }
}
代理实现页面反向传值
正向传值
正向跳转页面传值可以直接传,即⬇️
创建下一个页面,然后直接给该页面的对象传递值,然后跳转即可。
-(IBAction)choseCityBtnClick:(id)sender{
    ChoseCityViewController *choseCityViewController = [[ChoseCityViewController alloc] init];
    choseCityViewController.modalPresentationStyle = UIModalPresentationFullScreen;
    choseCityViewController.city = self.city;
    choseCityViewController.dataSource = self.dataSource;
    choseCityViewController.delegate = self;
    [self presentViewController:choseCityViewController animated:YES completion:nil];
}
反向dismiss传值
利用代理
A present-> B,B dimiss-> A
在B中声明一个代理协议和方法
@protocol ChoseCityViewDelegate <NSObject>

- (void)currentPageFromChoseCityView:(NSInteger)page;

@end
然后在B接口里添加B的代理对象
@interface ChoseCityViewController : UIViewController

@property (nonatomic, weak) id <ChoseCityViewDelegate> delegate;

@end
然后在b.m中实现dismiss,并判断如果A中实现了该代理方法就传值过去,并调用A中方法
[self dismissViewControllerAnimated:YES completion:^{
        if ([self.delegate respondsToSelector:@selector(currentPageFromChoseCityView:)]) {
            [self.delegate currentPageFromChoseCityView:3];
        }
    }];
在A.h中继承B的代理
@interface ViewController : UIViewController<ChoseCityViewDelegate>
在A.m中实现代理方法
- (void)currentPageFromChoseCityView:(NSInteger)page{
    self.buttomView.pageControl.currentPage = page;
    [self.buttomView.pageControl updateCurrentPageDisplay];
}

CSDN联合极客时间,共同打造面向开发者的精品内容学习社区,助力成长!
更多推荐


 2
2 0
0- 0


 已为社区贡献1条内容

所有评论(0)