How To Install an ERPNext Stack on Ubuntu 18.04
The author selected Software in the Public Interest to receive a donation as part of the Write for DOnations program. Introduction ERPNext is an Enterprise Resource Planning (ERP) suite that leverages
The author selected Software in the Public Interest to receive a donation as part of the Write for DOnations program.
Introduction
ERPNext is an Enterprise Resource Planning (ERP) suite that leverages the power and flexibility of open-source technologies. It excels at managing core business processes such as finance, sales, human resources, manufacturing, purchases, services, helpdesk needs, and more. Among the benefits of implementing a system like ERPNext are:
- Better productivity by automating repetitive business processes
- Improved IT efficiency by sharing a database for all departments within the company
- Better decision-making thanks to an integral vision of how business units relate to each other
ERPNext is based on Frappe, a full-stack web application framework written in Python that takes full advantage of the Node/JavaScript runtime environment and uses MariaDB as its database backend. One of the many advantages of Frappe-based applications, like ERPNext, is the bench command-line utility. The bench CLI saves administrators time by automating tasks such as installing, updating, configuring, and managing multiple Frappe/ERPNext sites.
In this tutorial you will install and configure an ERPNext stack on one server running Ubuntu 18.04. This will allow you to configure your stack for various development or production environments depending on your needs, and it will prepare you to build a more complex, fault-tolerant architecture.
Prerequisites
- One Ubuntu 18.04 server with at least 4 GB of RAM and a non-root
sudouser. You can set up your server and user by following the Ubuntu 18.04 initial server setup guide.
Note: When choosing your server’s specifications, keep in mind that ERP systems are resource-intensive. This guide calls for one server with 4 GB of RAM, which will be sufficient for basic use cases, but specific hardware requirements may vary depending on the number of users as well as your business size.
- A fully registered domain name with an A record pointed to your server. If you are using a DigitalOcean Droplet then you can follow this guide to properly set up your DNS. This tutorial will use
your_domainthroughout.
Step 1 — Configuring the Firewall
Although configuring a firewall for development is optional, for production it is a mandatory security practice.
You will need to open the following ports on your ERPNext server:
80/tcpand443/tcpfor HTTP and HTTPS respectively3306/tcpfor MariaDB connection (recommended only if you need remote access to database)143/tcpand25/tcpfor IMAP and STMP respectively22/tcpfor SSH (if you have not already enabledOpenSSH)8000/tcpfor development testing before deploying your site
To open multiple ports at once you can use the following command:
- sudo ufw allow 22,25,143,80,443,3306,8000/tcp
Alternatively, you can allow connections from specific IP addresses on specific ports using this command:
- sudo ufw allow from server_IP to any port port_number
After opening all necessary ports enable the firewall:
- sudo ufw enable
After enabling the firewall, confirm the status of your open ports:
- sudo ufw status
For more information regarding the firewall setup please read our guide How To Set Up a Firewall with UFW on Ubuntu 18.04.
Setting up a proper firewall is the first of two preliminary steps. Now you will configure keyboard mapping and character encoding on your server.
Step 2 — Configuring Locales
It’s highly recommended that you configure keyboard mapping for the console as well as the language and the character encoding on your host. This is necessary to avoid possible issues during the ERPNext 12 installation process. Take note that this configuration has nothing to do with the UI language on your actual ERPNext platform, but with the system locale configuration.
First, update your server:
- sudo apt update
Now configure keymap, language, and character encoding:
- sudo localectl set-keymap us && sudo localectl set-locale LANG=en_US.utf8
The localectl utility is used by Ubuntu 18.04 and other Linux distributions to control and change system-wide locale and keyboard layout settings before the user logs in, which is exactly what ERPNext 12 requires.
You will also need to add the following lines to your /etc/environment file. Use nano or your preferred text editor to open the file:
- sudo nano /etc/environment
Now add the following content:
LC_ALL=en_US.UTF-8
LC_CTYPE=en_US.UTF-8
LANG=en_US.UTF-8
Save and close the file.
Reboot your server to apply all changes:
- sudo reboot
Give your server a few minutes to reboot and then ssh back inside. You are now ready to install your database.
Step 3 — Installing MariaDB 10.4
Now you will add MariaDB to your server stack. ERPNext 12 requires MariaDB 10.2+, but the version included in Ubuntu 18.04’s official repository is 10.1, which means that you will need to install a higher version. For the purposes of this guide, you will use the latest stable release of MariaDB, which, at the time of this writing, is version 10.4.
To install MariaDB 10.4 on Ubuntu 18.04 you will need to add the appropriate signature key and repository. You can find this information on the MariaDB Foundation’s repository wizard. Visit this URL in your web browser. Now, under 1. Choose a Distro, click Ubuntu. A second column titled 2. Choose a Release will appear. Beneath this title click 18.04 LTS “bionic”. A third column titled 3.Choose a Version will then appear. Beneath this click 10.4 stable. A third column titled 4.Choose a Mirror will then appear. Choose a mirror based on your location, and then MariaDB will populate the appropriate commands for your custom installation.
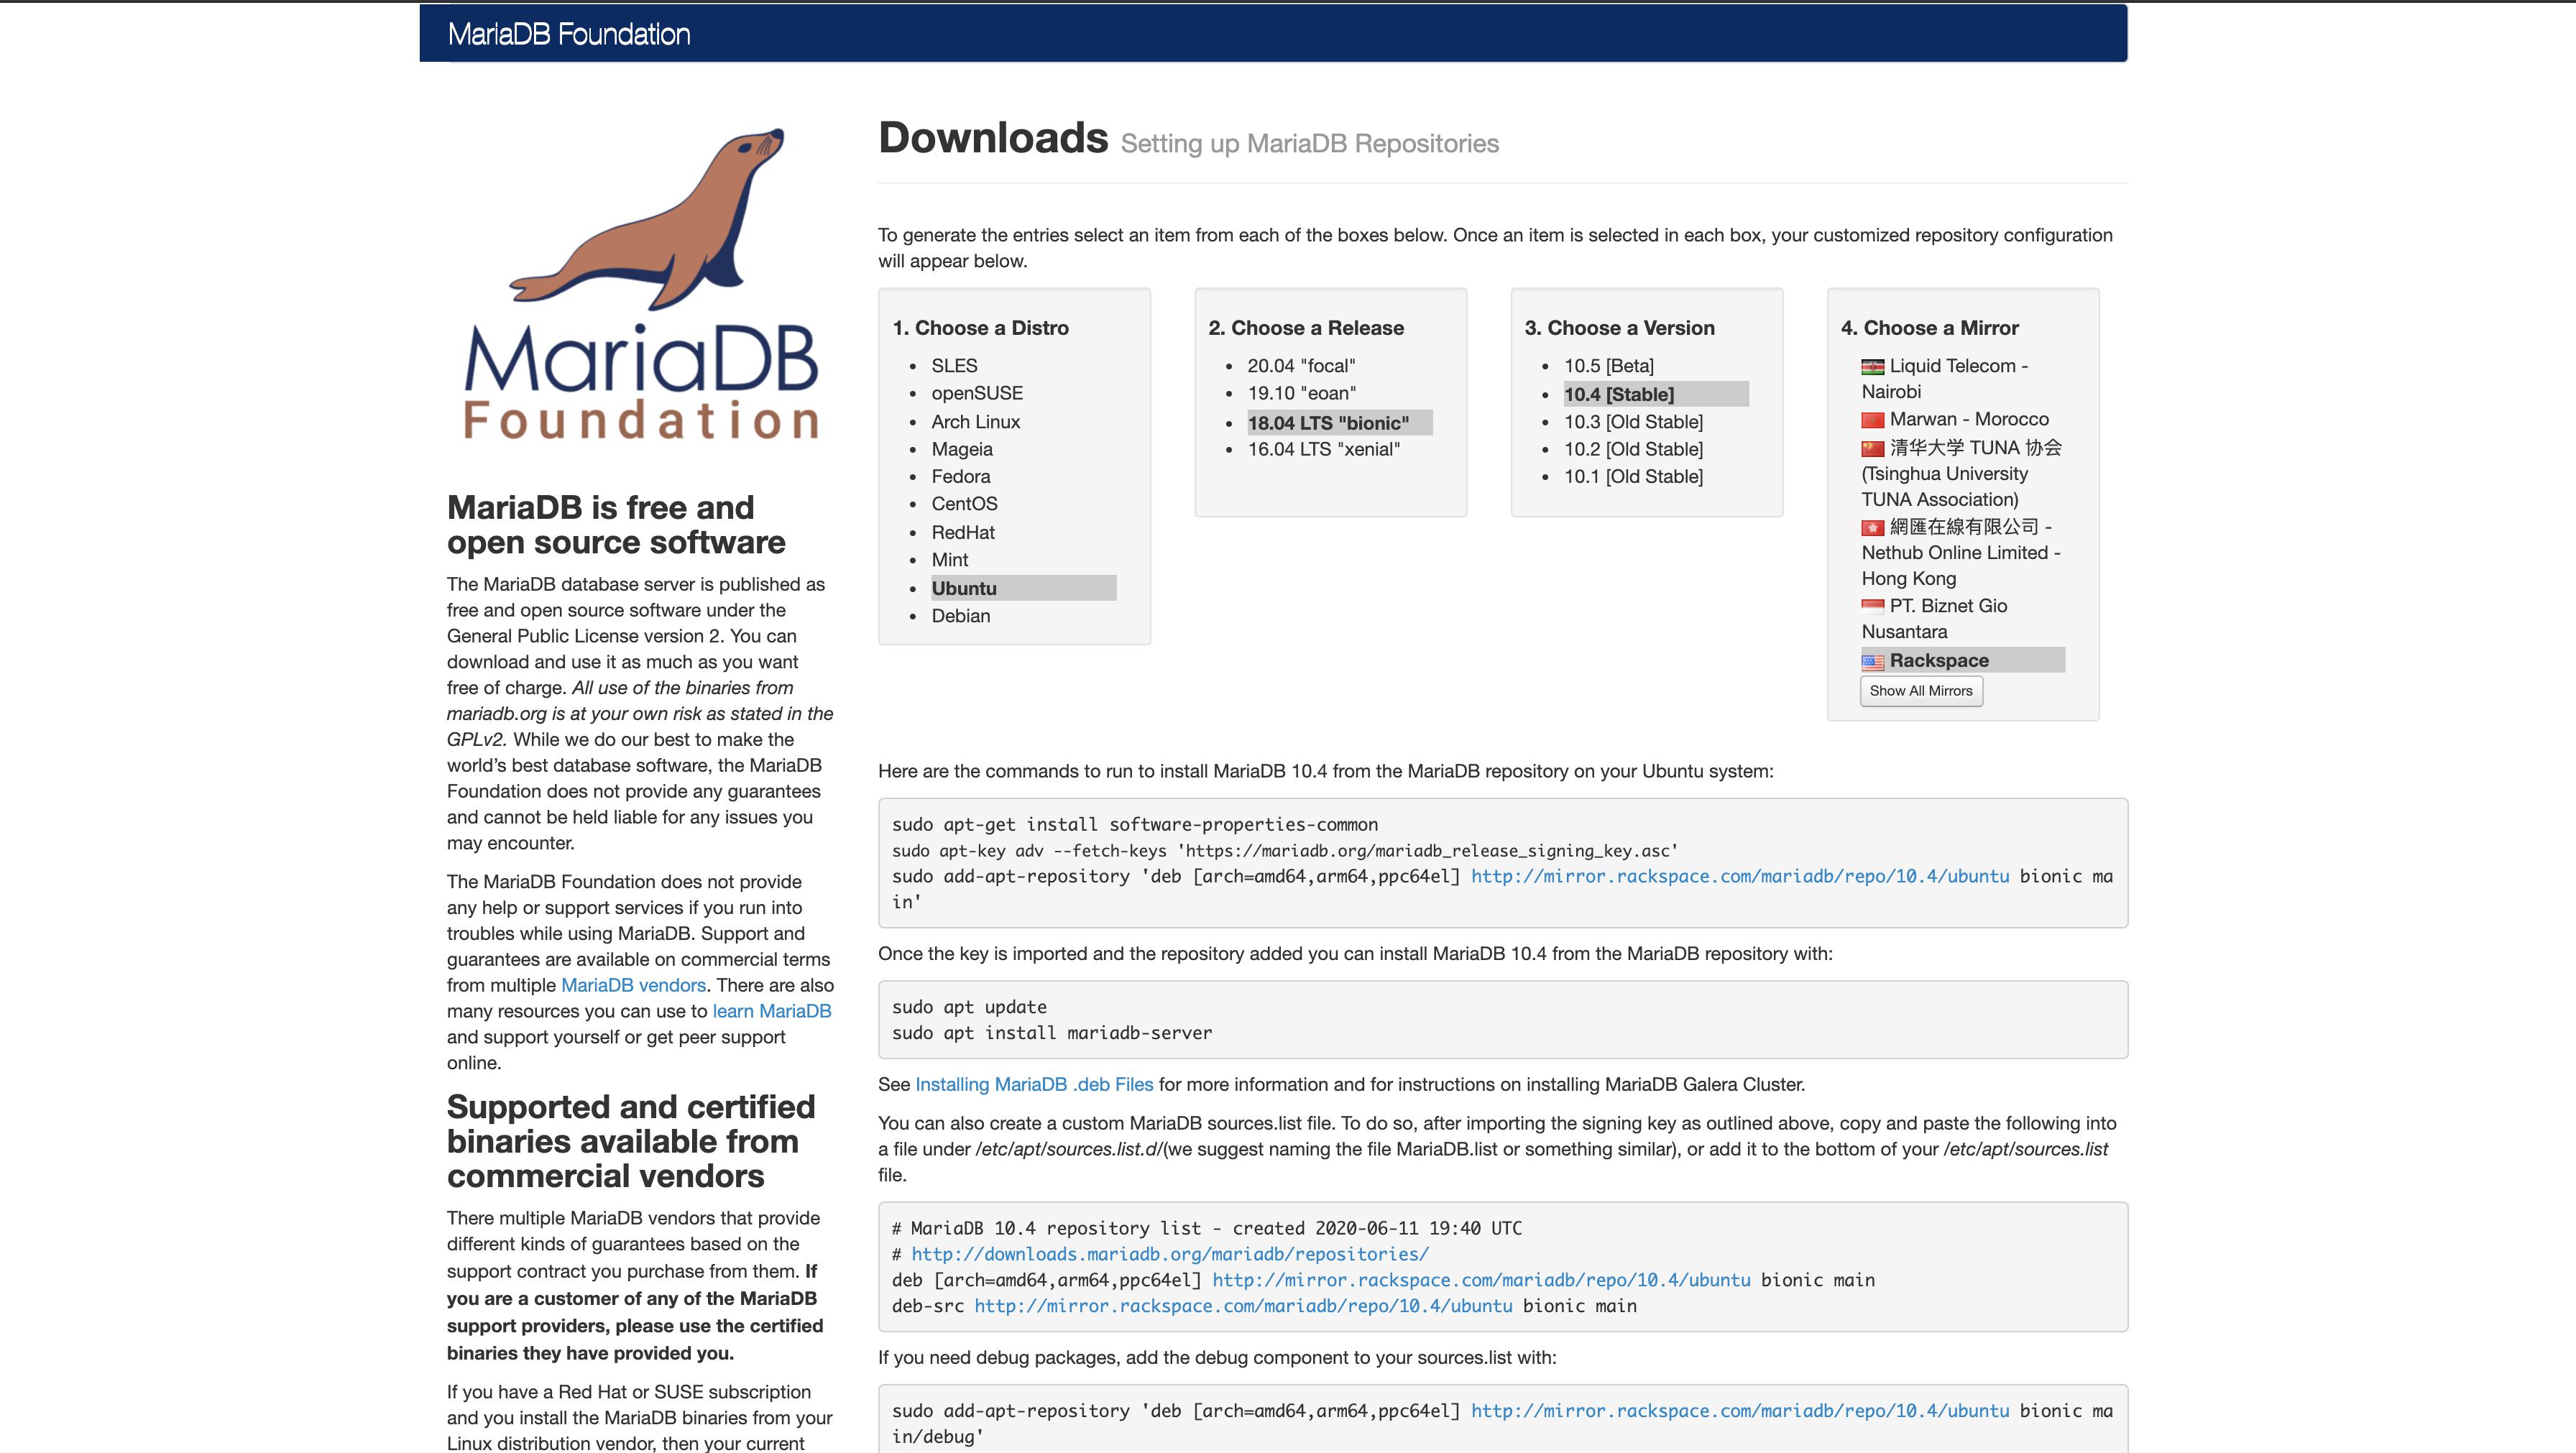
Run the three populated commands, which will properly add the MariaDB repository and key. Your own commands will look something like this:
- sudo apt-get install software-properties-common && sudo apt-key adv --fetch-keys 'https://mariadb.org/mariadb_release_signing_key.asc' && sudo add-apt-repository 'deb [arch=amd64,arm64,ppc64el] http://mirror.klaus-uwe.me/mariadb/repo/10.4/ubuntu bionic main'
Once you have finished adding the repository, install MariaDB:
- sudo apt install mariadb-server
After installing mariadb-server, install the following packages:
- sudo apt install libmysqlclient-dev python3-mysqldb
ERPNext 12 is a Python application and thus it requires the python3-mysqldb library for database management. Concerning libmysqlclient-dev, mariadb-client, and libmariadbclient18: those packages let users communicate with the MariaDB service. ntpdate and libdate-manip-perl are used by ERPNext for server time synchronization.
Next, add a basic layer of security to the MariaDB server by running the mysql_secure_installation script:
- sudo mysql_secure_installation
The mysql_secure_installation script will prompt you with several questions:
- The first prompt will ask you about the root password, but since there is no password configured yet, press
ENTER. - Next, you will have to decide on using Unix authentication or not. Answer
Yto accept this authentication method. - When asked about changing the MariaDB root password, answer
N. Using the default password along with Unix authentication is the recommended setup for Ubuntu-based systems because the root account is closely related to automated system maintenance tasks. - The remaining questions have to do with removing the anonymous database user, restricting the root account to log in remotely on localhost, removing the test database, and reloading privilege tables. It is safe to answer
Yto all those questions.
After completing the mysql_secure_installation script, MariaDB will start running using its default configuration. The standard ERPNext installation uses MariaDB’s root user for all database operations. While that approach may be convenient on single server setups, it is not considered a good security practice. Therefore, in the next section you will learn how to avoid this issue by creating a new user with special privileges.
Creating a MariaDB Super Admin User
ERPNext expects to use MariaDB’s root user for managing database connections, but this is not always ideal. To overcome this limitation and let a non-root user manage MariaDB you will have to manually create a database named after the user. Then you will be able to assign special privileges to the new user to drive ERPNext database operations.
Open up the MariaDB prompt:
- sudo mysql
Now create a new database named after the user you want to assign for MariaDB connections. This tutorial will use sammy but you are free to choose your own name:
- CREATE DATABASE sammy;
Confirm that the database was created using this SQL statement:
- SHOW DATABASES;
You will see an output similar to this:
Output+--------------------+
| Database           |
+--------------------+
| information_schema |
| mysql              |
| performance_schema |
| sammy             |
+--------------------+
Now create the MariaDB user sammy with similar privileges as root and then give the user a strong password of your choice. Keep the password in a secure place; you will need it later:
- GRANT ALL PRIVILEGES ON *.* TO 'sammy'@'%' IDENTIFIED BY 'mariadb_password' WITH GRANT OPTION;
Now confirm both the user creation and the new user’s privileges:
- SELECT host, user, Super_priv FROM mysql.user;
You will see an output like this:
Output+-----------+-------+------------+
| Host      | User  | Super_priv |
+-----------+-------+------------+
| localhost | root  | Y          |
| localhost | mysql | Y          |
| %         | sammy | Y          |
+-----------+-------+------------+
3 rows in set (0.001 sec)
Now flush privileges to apply all changes:
- FLUSH PRIVILEGES;
Once you finish, exit the session:
- exit
Now that you have created a database user you only need to fine-tune MariaDB to ensure proper ERPNext 12 operation. Fortunately, the ERPNext team provides an excellent configuration template that you will use as a starting point for your implementation. In the next section, you will learn how to properly configure the MariaDB database using that template.
Step 4 — Configuring MariaDB for ERPNext
With MariaDB installed and secured it’s time to fine-tune it for ERPNext connections.
First, stop mariadb.service:
- sudo systemctl stop mariadb
Now use nano or your favorite text editor to create a MariaDB configuration file called settings.cnf:
- sudo nano /etc/mysql/conf.d/settings.cnf
Now add ERPNext’s configuration template:
[mysqld]

# GENERAL #
user                           = mysql
default-storage-engine         = InnoDB
socket                         = /var/lib/mysql/mysql.sock
pid-file                       = /var/lib/mysql/mysql.pid

# MyISAM #
key-buffer-size                = 32M
myisam-recover                 = FORCE,BACKUP

# SAFETY #
max-allowed-packet             = 256M
max-connect-errors             = 1000000
innodb                         = FORCE

# DATA STORAGE #
datadir                        = /var/lib/mysql/

# BINARY LOGGING #
log-bin                        = /var/lib/mysql/mysql-bin
expire-logs-days               = 14
sync-binlog                    = 1

# REPLICATION #
server-id                      = 1

# CACHES AND LIMITS #
tmp-table-size                 = 32M
max-heap-table-size            = 32M
query-cache-type               = 0
query-cache-size               = 0
max-connections                = 500
thread-cache-size              = 50
open-files-limit               = 65535
table-definition-cache         = 4096
table-open-cache               = 10240

# INNODB #
innodb-flush-method            = O_DIRECT
innodb-log-files-in-group      = 2
innodb-log-file-size           = 512M
innodb-flush-log-at-trx-commit = 1
innodb-file-per-table          = 1
innodb-buffer-pool-size        = 5462M
innodb-file-format             = barracuda
innodb-large-prefix            = 1
collation-server               = utf8mb4_unicode_ci
character-set-server           = utf8mb4
character-set-client-handshake = FALSE
max_allowed_packet             = 256M

# LOGGING #
log-error                      = /var/lib/mysql/mysql-error.log
log-queries-not-using-indexes  = 0
slow-query-log                 = 1
slow-query-log-file            = /var/lib/mysql/mysql-slow.log

[mysql]
default-character-set = utf8mb4

[mysqldump]
max_allowed_packet=256M

!includedir /etc/mysql/mariadb.conf.d/
Save and close the file. For more detailed information about these configurations, review this template file on ERPNext’s Github repo. This is a useful starting point for exploring these options.
Next, create another file called erpnext.cnf:
- sudo nano /etc/mysql/mariadb.conf.d/erpnext.cnf
Add the following content to the file:
[mysqld]
pid-file        = /var/run/mysqld/mysqld.pid
socket          = /var/run/mysqld/mysqld.sock
bind-address    = 0.0.0.0
The first file, /etc/mysql/conf.d/settings.cnf, complements and also overrides a few values included in the default MariaDB configuration located at /etc/mysql/my.cnf. This file gives you a curated template that greatly enhances database performance for ERPNext. Keep in mind though that while this template is a great starting point, nothing prevents you from improving MariaDB’s performance even further by adjusting these parameters to fit your needs.
The second file, /etc/mysql/mariadb.conf.d/erpnext.cnf, also overrides some values by introducing specific information regarding your database connection.
Testing the MariaDB Connection
Since ERPNext relies on the database connection for almost all its internal operations, it’s a good idea to test the connection before continuing.
Start mariadb.service:
- sudo systemctl start mariadb
To test the connection you can use the following command. Remember to replace sammy and mariadb_password with your own credentials:
- mysql --user sammy --password mariadb_password --host=localhost --protocol=tcp --port=3306 test
You will see an output showing MariaDB’s basic help content and several parameters. This means your connection was successful:
Outputmysql  Ver 15.1 Distrib 10.4.13-MariaDB, for debian-linux-gnu (x86_64) using readline 5.2
Copyright (c) 2000, 2018, Oracle, MariaDB Corporation Ab and others.

Usage: mysql [OPTIONS] [database]

Default options are read from the following files in the given order:
/etc/my.cnf /etc/mysql/my.cnf ~/.my.cnf

...

  --ssl-verify-server-cert
                      Verify server's "Common Name" in its cert against
                      hostname used when connecting. This option is disabled by
                      default.
  -t, --table         Output in table format.
  --tee=name          Append everything into outfile. See interactive help (\h)
                      also. Does not work in batch mode. Disable with
                      --disable-tee. This option is disabled by default.
  -u, --user=name     User for login if not current user.
  -U, --safe-updates  Only allow UPDATE and DELETE that uses keys.
  -U, --i-am-a-dummy  Synonym for option --safe-updates, -U.
  -v, --verbose       Write more. (-v -v -v gives the table output format).

...

max-join-size                     1000000
secure-auth                       FALSE
show-warnings                     FALSE
plugin-dir                        (No default value)
default-auth                      (No default value)
binary-mode                       FALSE
connect-expired-password          FALSE
If you need to make any adjustments to MariaDB’s settings or fix any errors, remember to reload the service using the following command:
- sudo systemctl restart mariadb
Once you are done, enable MariaDB:
- sudo systemctl enable mariadb
Now that you have tested the database connection, you can continue with the installation of your ERPNext application.
Step 5 — Setting Up ERPNext 12
Now that your database backend is ready you can continue setting up your ERPNext web application. In this section, you will learn how to install and configure all components required by ERPNext 12 and then install the application itself.
Start by preparing the server with all the system packages required by ERPNext 12. Install system-wide dependencies using the following command:
- sudo DEBIAN_FRONTEND=noninteractive apt install -y curl build-essential mariadb-client python3-setuptools python3-dev libffi-dev python3-pip libcurl4 dnsmasq fontconfig git htop libcrypto++-dev libfreetype6-dev liblcms2-dev libwebp-dev libxext6 libxrender1 libxslt1-dev libxslt1.1 libffi-dev ntpdate postfix python3-dev python-tk screen vim xfonts-75dpi xfonts-base zlib1g-dev apt-transport-https libsasl2-dev libldap2-dev libcups2-dev pv libjpeg8-dev libtiff5-dev tcl8.6-dev tk8.6-dev libssl1.0-dev python3-mysqldb libdate-manip-perl logwatch
The DEBIAN_FRONTEND=noninteractive variable has been passed to the installation command in order to avoid Postfix prompts. For detailed information regarding Postfix configuration please read our guide on How To Install and Configure Postfix on Ubuntu 18.04
Next, update pip3 and then install the latest versions of three additional Python modules required by ERPNext:
- sudo -H python3 -m pip install --upgrade setuptools cryptography psutil
Now that you have installed all necessary global dependencies, you will now install all the services and libraries required by ERPNext 12.
Setting Up Node.js and Yarn
ERPNext 12 can work with version 8+ of the Node.js server environment. In fact, at the time of this writing, the official ERPNext easy_install script uses Node 8. But from a security perspective it’s advisable to install a newer version because Node 8 reached its End Of Life (EOL) in 2020 and thus will not receive any more security patches. For the purpose of this guide, Node.js version 12 LTS will be installed along with the corresponding npm and yarn package managers. Please note that the Frappe framework uses yarn to install dependencies. If you decide to use an alternative installation method then make sure that you end up with version 1.12+ of yarn running in your system.
Add the NodeSource repository to your system:
- curl -sL https://deb.nodesource.com/setup_12.x -o nodesource_setup.sh
Now you can inspect the contents of the downloaded script:
- sudo nano nodesurce_setup.sh
Once you are satisfied you can run the script:
- sudo bash nodesource_setup.sh
This script will automatically update the apt list. Now you can install nodejs on your server:
- sudo apt install nodejs
Next, install yarn globally using the included npm package:
- sudo npm install -g yarn
Now that you have installed Node you can continue to configure wkhtmltopdf for your platform.
ERPNext uses the wkhtmltopdf open source tool to convert HTML content into PDF using the Qt WebKit rendering engine. This feature is mostly used for printing invoices, quotations, and other reports. In the case of ERPNext 12, a specific version of wkhtmltopdf is required, 0.12.5 with patched Qt.
To install wkhtmltopdf, start by switching to a suitable directory to download the package, in this case /tmp:
- cd /tmp
Download the appropriate wkhtmltopdf version and package for Ubuntu 18.04 from the project’s page:
- wget https://github.com/wkhtmltopdf/wkhtmltopdf/releases/download/0.12.5/wkhtmltox_0.12.5-1.bionic_amd64.deb
Now install the package using the dpkg tool:
- sudo dpkg -i wkhtmltox_0.12.5-1.bionic_amd64.deb
Next, copy all relevant executables to your /usr/bin/ directory:
- sudo cp /usr/local/bin/wkhtmlto* /usr/bin/
Once the files are in place, change their permissions to make them executable:
- sudo chmod a+x /usr/bin/wk*
Now that wkhtmltopdf is properly installed we will add Redis to our database stack.
Installing Redis
ERPNext 12 uses Redis to enhance MariaDB’s performance. Specifically, it assists with caching.
First, install Redis from the official Ubuntu 18.04 repository:
- sudo apt install redis-server
Then enable Redis on startup:
- sudo systemctl enable redis-server
Now that you have added Redis to your stack, let’s take a moment to summarize what you have accomplished so far. Up to this point you have installed all the major components needed by ERPNext 12, which include:
- A MariaDB database backend
- The Node.js JavaScript server environment
- The Yarn package manager
- A Redis database cache
- The
wkhtmltopdfPDF documents generator
Whether you are installing the ERP system for development or for production, you are now ready for the next step, which is installing the Frappe full-stack framework and the actual ERPNext 12 web application.
Step 6 — Installing Frappe Bench CLI
Now that you have installed all of ERPNext’s stack requirements you can unleash the flexibility of Frappe’s bench command-line utility. The bench CLI was designed with the purpose of assisting users in the process of installing, setting up, and managing applications like ERPNext that are based on the Frappe Framework. In the coming sections, you will install the bench CLI and then use it to complete the process of setting up ERPNext 12.
Make sure that the Frappe user (in this case sammy) has the proper rights on its home directory:
- sudo chown sammy -R /home/sammy
Now clone the frappe/bench repository to your home directory. Remember to replace sammy with your system username:
- git clone https://github.com/frappe/bench /home/sammy/.bench --depth 1 --branch master
Install the bench CLI:
- sudo pip3 install -e /home/sammy/.bench
This guide is assuming that you are installing ERPNext 12 for testing/production scenarios and thus that you are using the master branch. But if your intention is to develop applications or custom ERPNext modules, then the develop branch might be a better option. In either case, you are now prepared to install the Frappe Framework. This will be your final step before installing ERPNext itself.
Setting Up Frappe Framework Environment
In this section, you will create a Frappe environment using the bench CLI.
During Frappe’s installation you may exceed Ubuntu’s file watch limit, which by default is set to 8192. To avoid this issue set a higher limit using the following command:
- echo fs.inotify.max_user_watches=524288 | sudo tee -a /etc/sysctl.conf && sudo sysctl -p
Next, initialize Frappe Framework 12. Replace Sammy with your system username:
- bench init /home/sammy/frappe-bench --frappe-path https://github.com/frappe/frappe --frappe-branch version-12 --python python3
During execution you may see one error about your path, along with several warnings. Let the process continue until the end. Once it’s finished, you will see an output similar to the following one, indicating that your environment was successfully created:
Output...
Done in 82.23s.
INFO:bench.utils:setting up backups
no crontab for sammy
SUCCESS: Bench /home/sammy/frappe-bench initialized
Note: The bench init process could halt if a spawn ENOMEM error is encountered. This error is caused when your system runs out of memory. You must fix the issue before continuing, either by installing more physical memory or allocating SWAP space.
Let’s take a closer look at the command used to create the environment:
/home/sammy/frappe-benchis the path where the Frappe Framework, the websites, and associated applications will be installed. A new directory, calledfrappe-benchin this example, will be created to accommodate all necessary files.--frappe-pathpoints to Frappe repository, which in this case is the official Github repository.--frappe-branchis the Frappe version to be installed. Because you want to install ERPNext 12, the chosen version is Frappe 12.--pythonis the Python version that will be used. ERPNext 12 requires Python 3.6+. Prior versions, however, still use Python 2.7.
For more information regarding bench CLI commands please refer to the Bench Commands Cheatsheet.
The flexibility offered by the Frappe framework goes way beyond using isolated environments. You can also create different websites and install applications into them.
Step 7 — Installing the ERPNext 12 Web Application
In this section, you will set up a Frappe-based site and then install the ERPNext 12 application on it.
Change to the directory where Frappe was initialized.
- cd /home/sammy/frappe-bench
Now download ERPNext 12 from its repository using the bench CLI:
- bench get-app erpnext https://github.com/frappe/erpnext --branch version-12
Next, create the new site, replacing your_domain with the domain that you have associated with this server’s IP:
- bench new-site your_domain --admin-password 'erpnext_admin_password' --mariadb-root-username sammy --mariadb-root-password 'mariadb_password'
Let’s take a moment to review the options used in the command above:
bench new-sitecreates a new site based on the Frappe Framework.your_domainis the name for the new site. Make sure that your domain’s DNS has an A record pointing at your server’s IP.erpnext_admin_passwordis the desired password for ERPNext’s Administrator user. Keep this password in a safe place—you will need it shortly.mariadb_passwordis the password that you created at the beginning of the guide for the MariaDB usersammy.
Following this, install the ERPNext application onto the site:
- bench --site your_domain install-app erpnext
Once the installation completes you will have a working ERPNext 12 application. Now let’s test it using a bench command:
- bench start
The above will initiate a real-time monitoring console showing you various messages regarding the webserver and other services. Open a web browser and navigate to localhost:8000 (for local installations) or your_domain:8000 (if you are using a remote server). You will see the ERPNext login screen (we will proceed with login and setup in a later step, once we have made our site production-ready).
After visiting your test deployment, return to your terminal and press CTRL+C. This will stop ERPNext and exit the monitoring console.
If your main goal is creating modules or modifying ERPNext 12, then you could stop at this point. No more components are needed for development purposes. However, if what you need is a production-ready system that does not require a manual initialization, then you will need to install and configure a few additional components. This is your next step.
Step 8 — Setting Up ERPNext 12 For Production
Although ERPNext 12 application is ready, the system as a whole it’s not completely prepared for production yet. To ensure ERPNext reliability and security you will need to enable a few additional services:
- Fail2ban provides an extra layer of protection against brute force attempts from malicious users and bots.
- Nginx will be mainly used as a web proxy, redirecting all traffic from port
8000to port80(HTTP) or port443(HTTPS) - Supervisor this service ensures that ERPNext key processes are constantly up and running, restarting them as necessary.
Up to this point, you have installed and configured ERPNext 12 manually, which has allowed you to customize the process to match any particular use case. Nevertheless, for the rest of the production setup, you can leverage the convenience of the bench CLI and let it automate the installation and configuration of these remaining services.
Ensure you are in the Frappe working directory:
- cd /home/sammy/frappe-bench
Now use the following command to finish setting up ERPNext 12 for production:
- sudo bench setup production sammy --yes
The above will install and configure Nginx, Supervisor, and Fail2Ban and set sammy as the production environment owner.
The configuration files created by the bench command are:
- Two Nginx configuration files located at
/etc/nginx/nginx.confand/etc/nginx/conf.d/frappe-bench.conf - One Fail2Ban proxy jail located at
/etc/fail2ban/jail.d/nginx-proxy.confand one filter located at/etc/fail2ban/filter.d/nginx-proxy.conf
These default configurations will suffice for this tutorial, but you should feel free to explore and adjust these files to match your own requirements. You can stop all services by running:
- sudo supervisorctl stop all
And then, once you are ready, you can restart your services:
- sudo supervisorctl start all
Now you are ready to test your installation.
Testing Your ERPNext 12 Installation
First of all, verify that key production services are running by using the following systemctl command and then piping it to grep:
- systemctl list-unit-files | grep 'fail2ban\|nginx\|supervisor'
You will see an output like this:
Outputfail2ban.service                       enabled
nginx.service                          enabled
supervisor.service                     enabled
After confirming that everything is working as expected, you can test ERPNext 12 live on your server. Open your favorite browser and navigate to the domain where you are hosting your ERPNext 12 application.
After a few seconds, you should see the ERPNext 12 login screen. Use Administrator for the username and the erpnext_admin_password you created previously for the password.
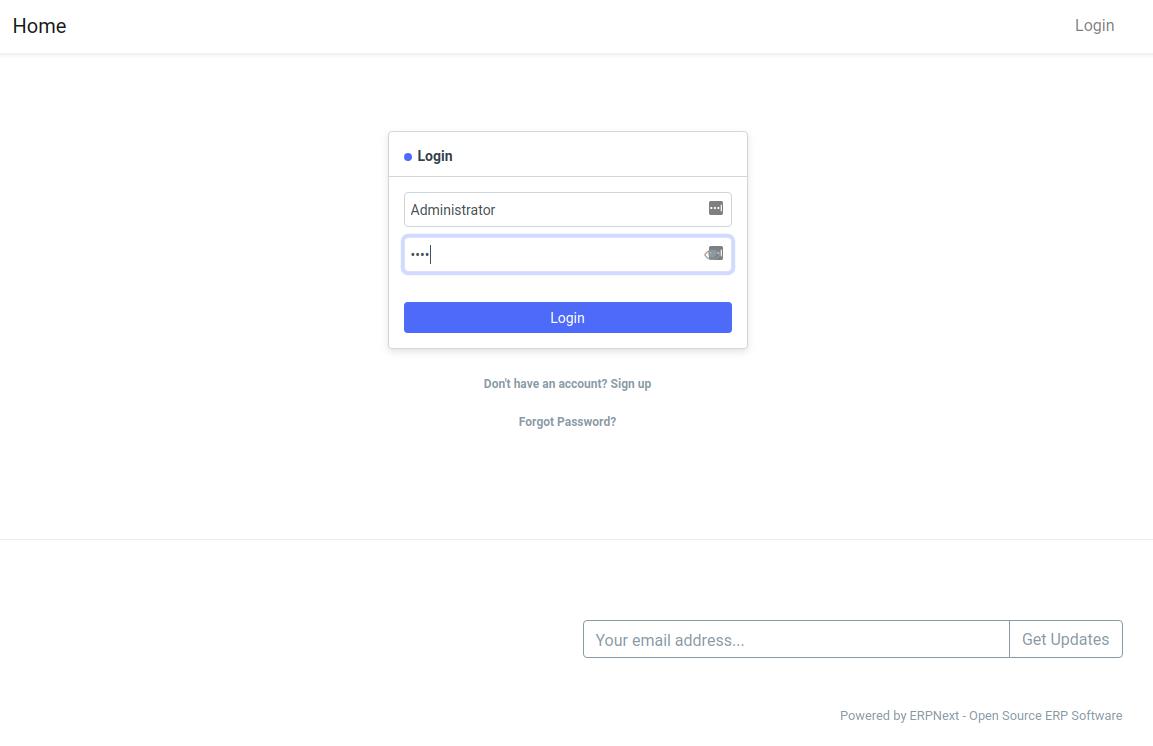
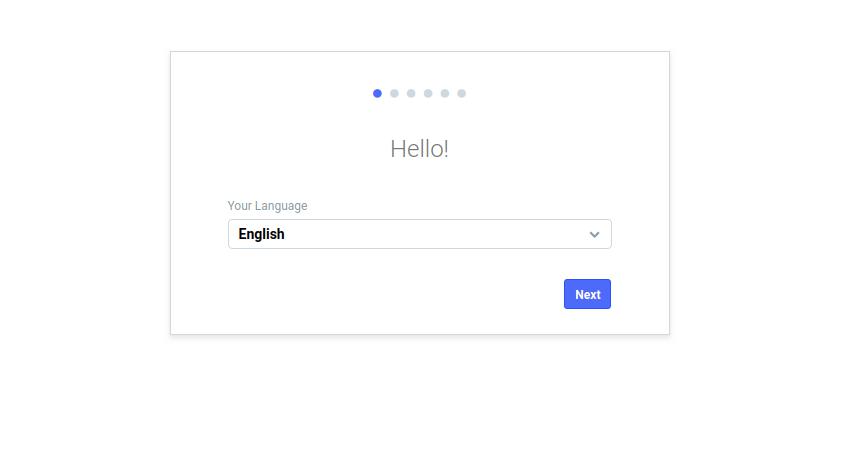
In the next screen you will see a dropdown menu where you can select the UI language for the application:
Following language selection, ERPNext will prompt you about your country, timezone, and currency:
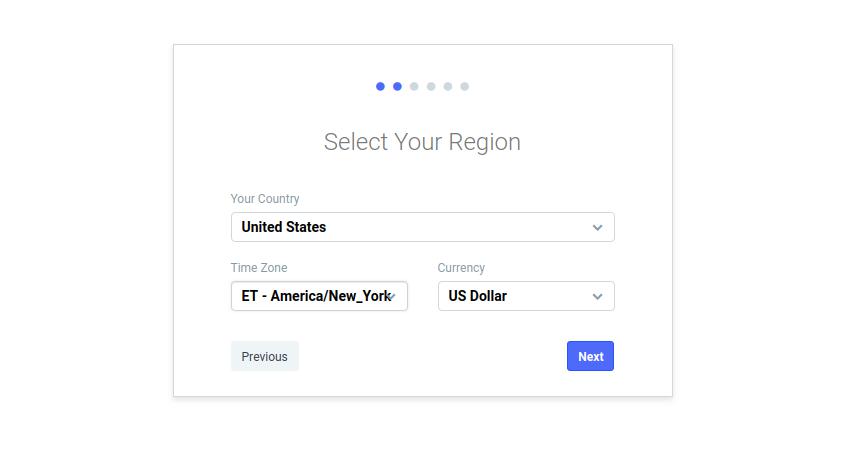
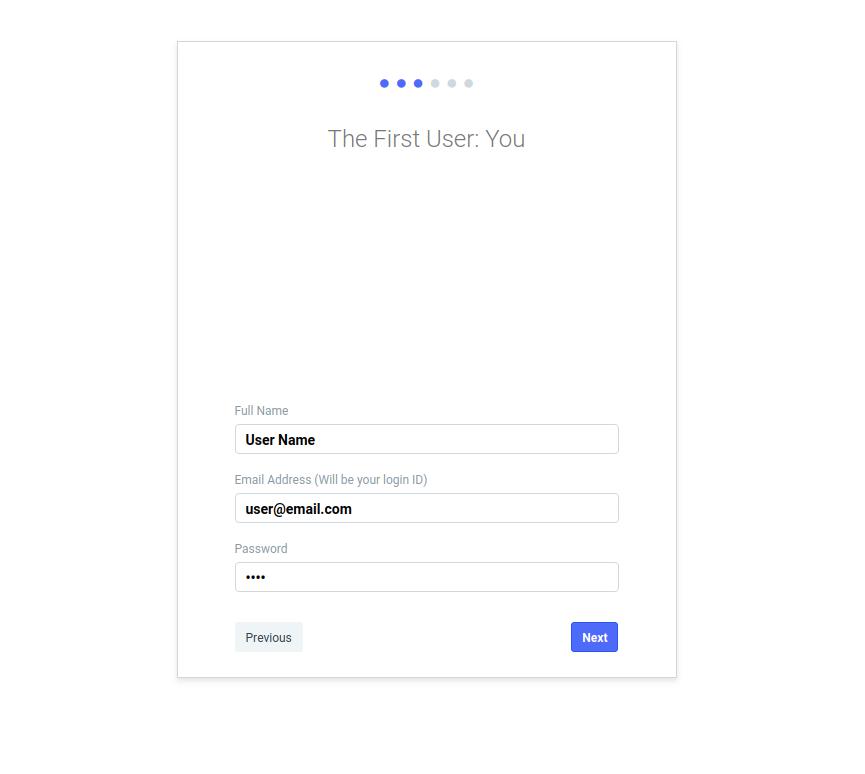
Once you complete your region information, you will be able to create the first ERPNext user. The information you provide will be used as the user’s login credentials.
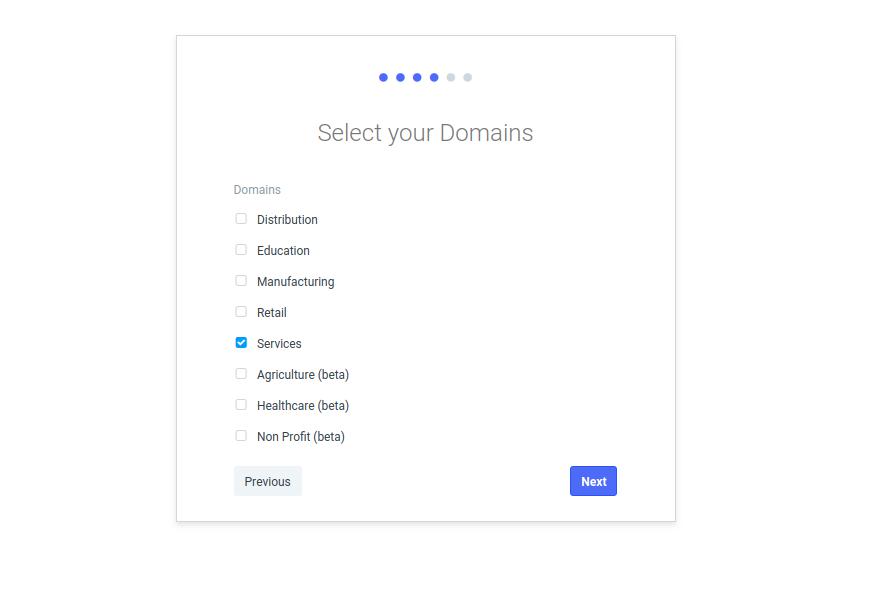
In the next screen, you will be asked about what ERPNext calls Domains. If you are not sure what your domain is, then select Distribution and click the Next button.
Next, you will need to provide a company name and abbreviation.

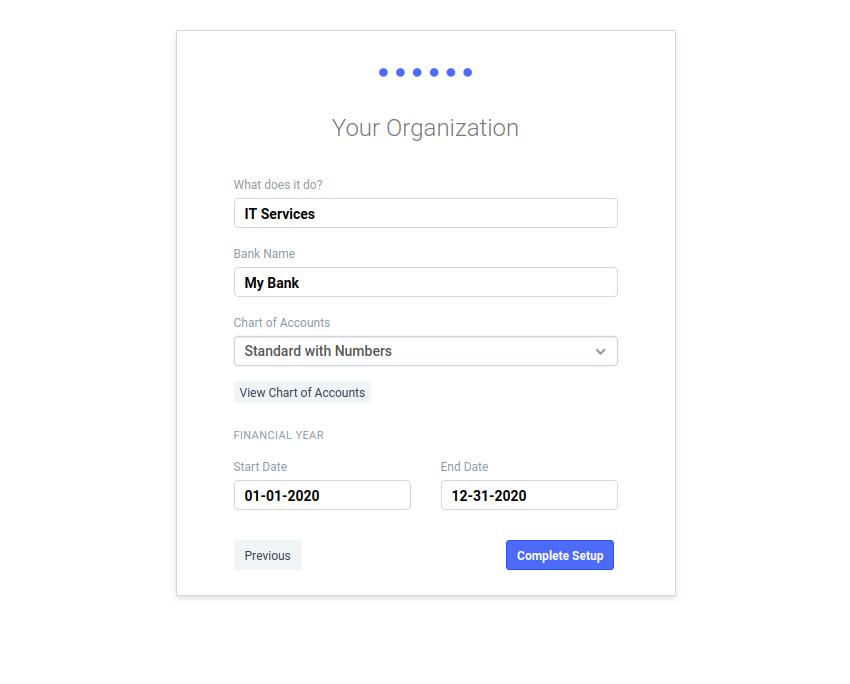
On the last screen, ERPNext will ask you what your company does, its bank name, the type of charts of accounts, and the fiscal year period. You will be able to enter additional banks later. For now, fill in all the fields as you like and then click the Complete Setup button.
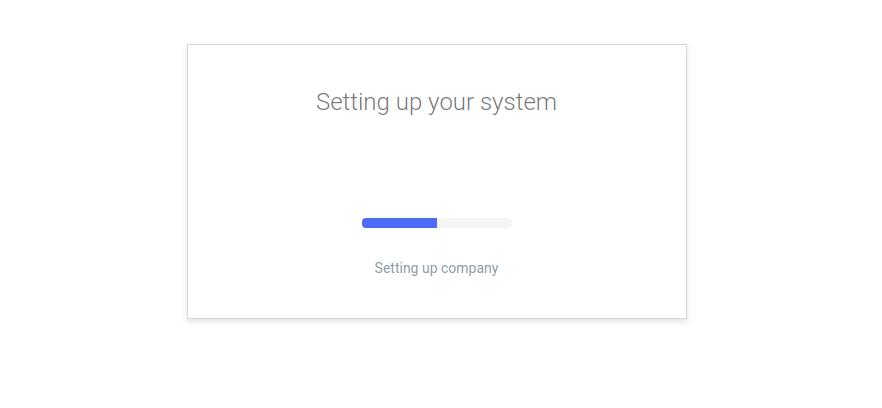
Next, you will see a progress bar.
Once the setup process completes, the ERPNext 12 main Dashboard will appear.
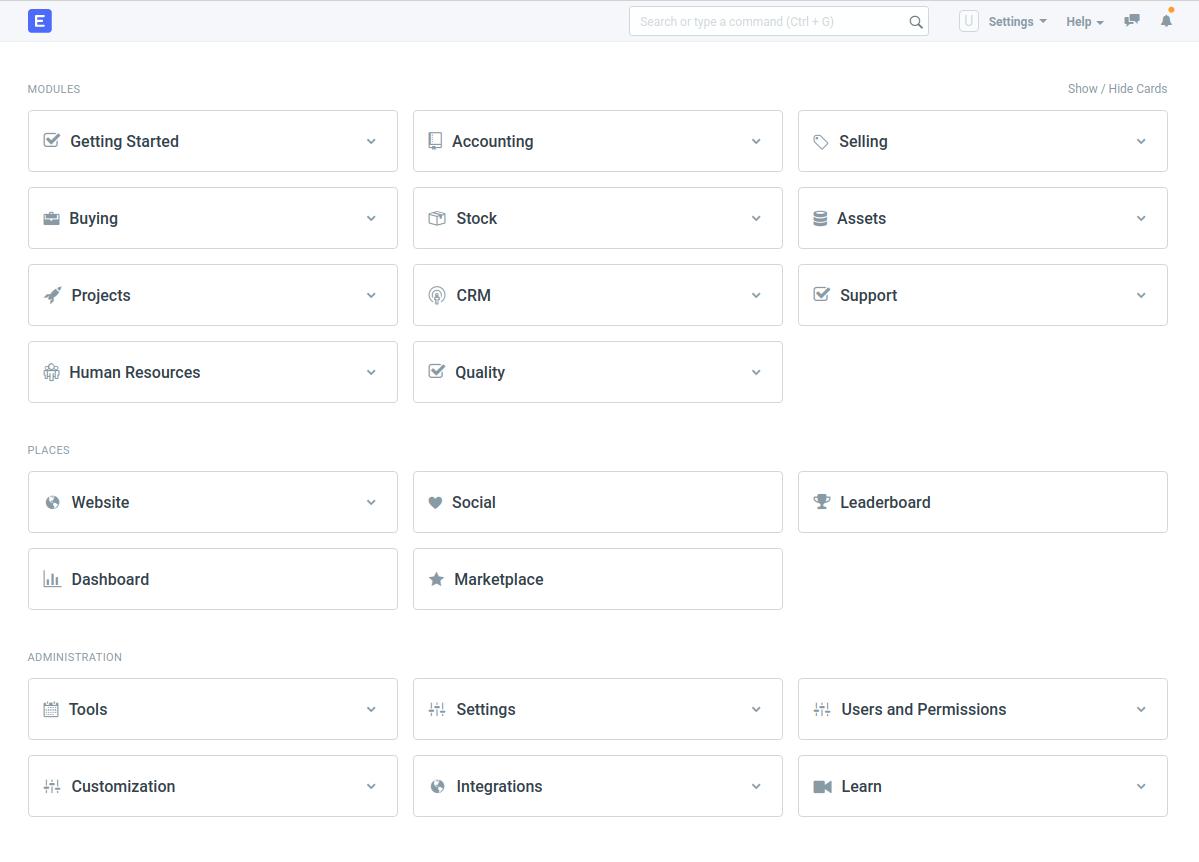
You now have fully installed and configured an ERPNext 12 application.
Conclusion
Now that you have properly installed your ERPNext 12 application, you might want to start implementing the system for your business needs. A good starting point is clicking the Getting Started button on the ERPNext Dashboard. ERPNext will then help you configure the platform for all your business and e-commerce needs.
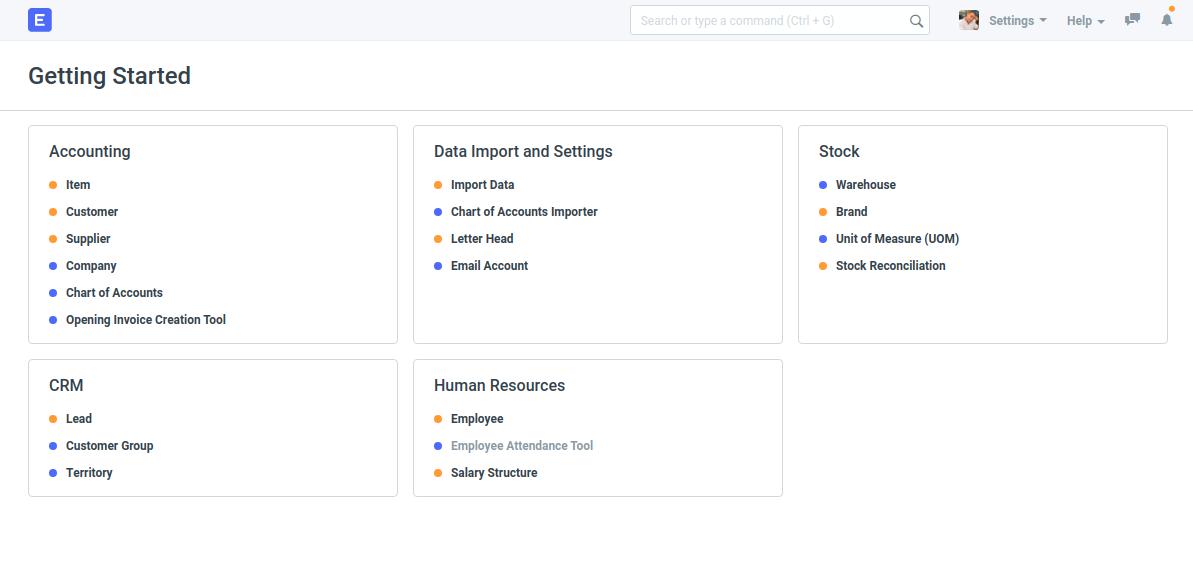
You may also wish to enhance ERPNext’s speed. If that is the case, then you can read ERPNext Performance Tuning, which will guide you through best practices and how to debug performance-related issues.
更多推荐
 已为社区贡献23584条内容


所有评论(0)