
Today I am going to show how we can use Openshift MySQL Template to create a full fledge database instance for development by deploying it in local Openshift cluster.
As a prerequisite you should have Red Hat Openshift software running locally on your personal laptop. You can follow this website on how to install Red Hat Openshift cluster on your personal laptop.
You should have minimum windows 10 pro and at least 4 cores machine to install and run Openshift on your local machine. Use PowerShell or Openshift web console to build your MySQL image and interact with it. Now we will start creating a new project by name mysql-project.
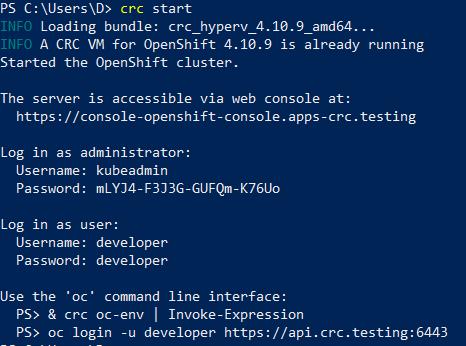
Open PowerShell and type crc start. You will get the details about the local cluster installed on Openshift as below.
Copy and run this command (& crc oc-env | Invoke-Expression) as shown below. Now run the oc login command to login using kubeadmin. This will show you total no of projects in cluster and the current project.

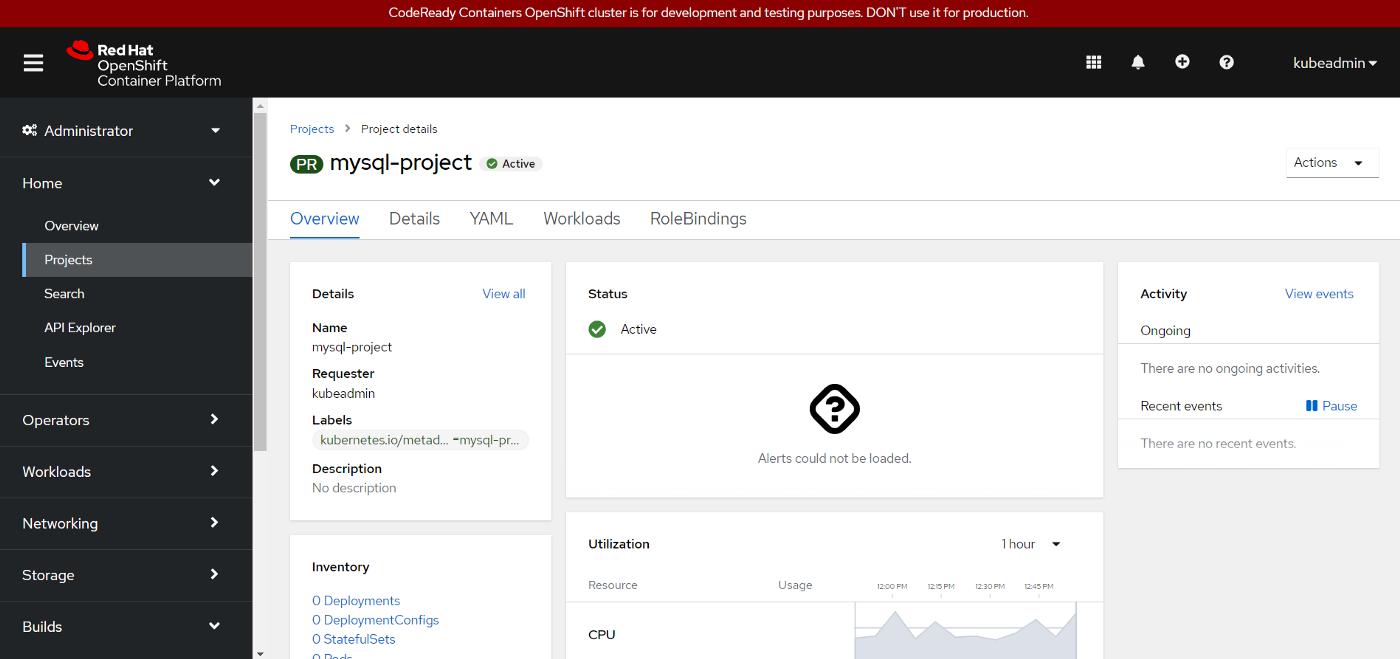
Create a new project by name mysql-project as shown below

Login to web console and navigate to projects to see mysql-project details.
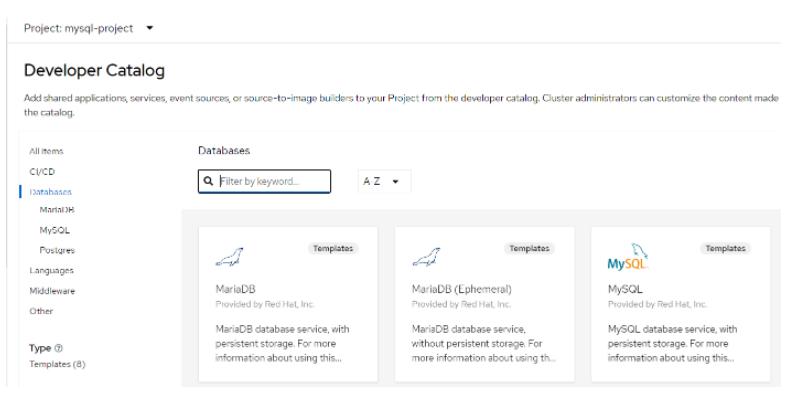
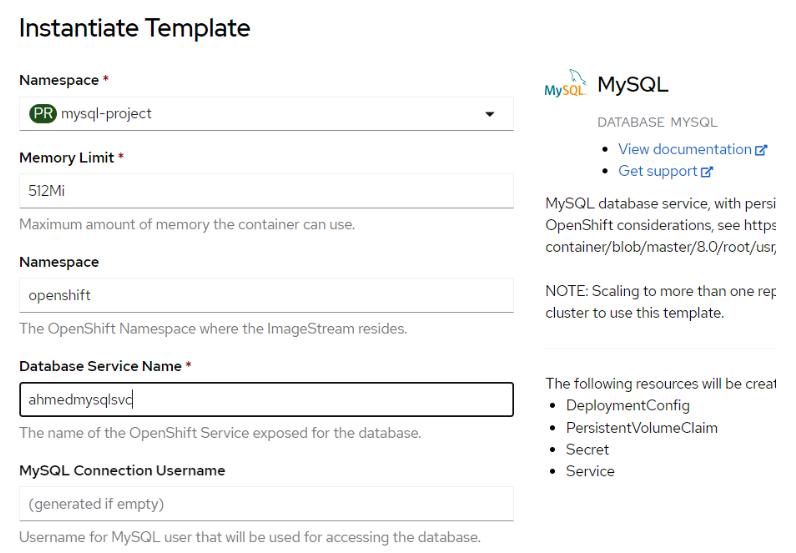
Click on workloads, click visit Add page, click database and select MySQL template. Don't select MySQL ephemeral as its not a persistent Database.
Click install to install the MySQL template, once you click install it will ask for all details like Database service name, username, password, MySQL Database Name. Provide those required details, save it some where and click create.
This will create a deployment config file which in turn create mysql pods and replication controllers. Deployment config object is same as deployment object in Kubernetes except few changes.
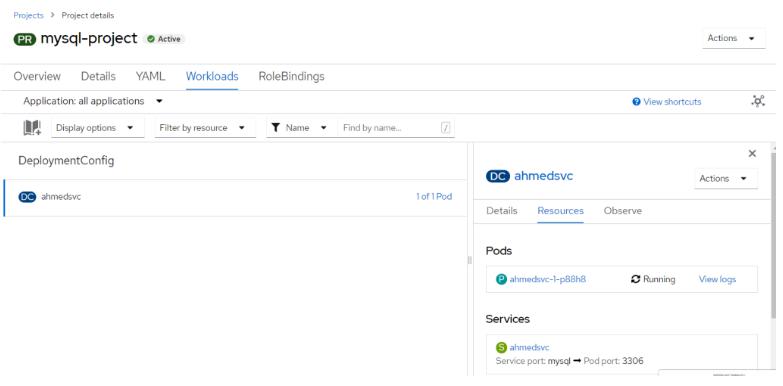
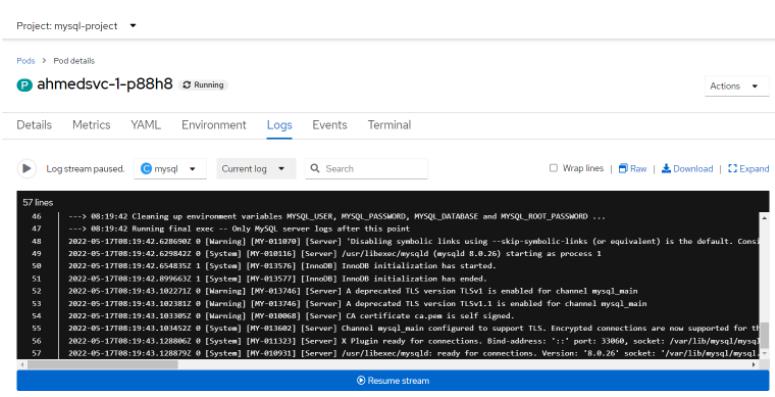
click on pods and check view logs to check what have happened while mysql pod was getting built. Alternatively you can check from cli using oc commands.
To get the list of pods type below command in PowerShell
PS C:\Users\D> oc get pods

To get logs of running pod type below command
PS C:\Users\D> oc logs ahmeddbsvc-1-r6jrb

To check where our secrets are stored run below cmd.
PS C:\Users\D> oc set env pod ahmeddbsvc-1-r6jrb — list

To access the pod run below cmd where ahmeddbsvc-1-r6jrb is pod name
PS C:\Users\D> oc rsh ahmeddbsvc-1-r6jrb
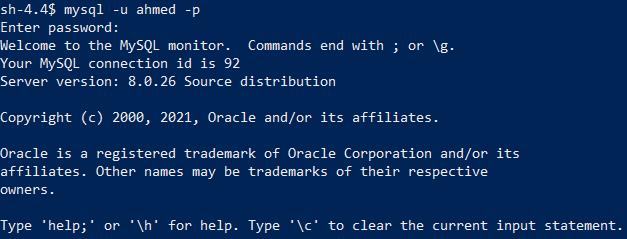
Provide username and password as shown below and enter password when prompt asks for it.
sh-4.4$ mysql -u ahmed -p
Now you can create a table and insert some data in it. Lets create a sample table with name Customer.
mysql> USE ahmeddb; DROP TABLE IF EXISTS customer; CREATE TABLE IF NOT EXISTS customer ( id INT AUTO_INCREMENT NOT NULL PRIMARY KEY, customerName VARCHAR( 255 ) NOT NULL, effectiveDate VARCHAR( 255 ), description TEXT, status VARCHAR( 255));
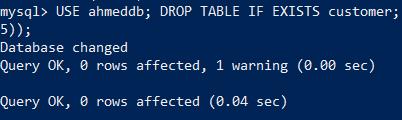
Table is created Successfully, Now lets insert some data to it.
mysql> USE ahmeddb; INSERT INTO customer VALUES (1,’Testers Inc.’,’20200401',’Testers are who we hire to test our software’,’active’), (2,’Deployers CO’,’20190601',’Deployers co. deploy our software’,’active’), (3,’DJ John Doe’,’20191201',’John provides the music for our annual holiday party.’,”active”), (4,’Doe Hypermarket’,’20190605',’Doe is where we purchase all food supply.’,”active”);
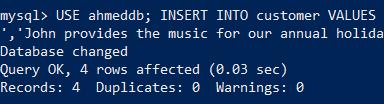
Check if the data exists in table or not.
mysql> select * from ahmeddb.customer;

So here I have shown how to access database and create a connection to it inside pod, create and insert data in database table.
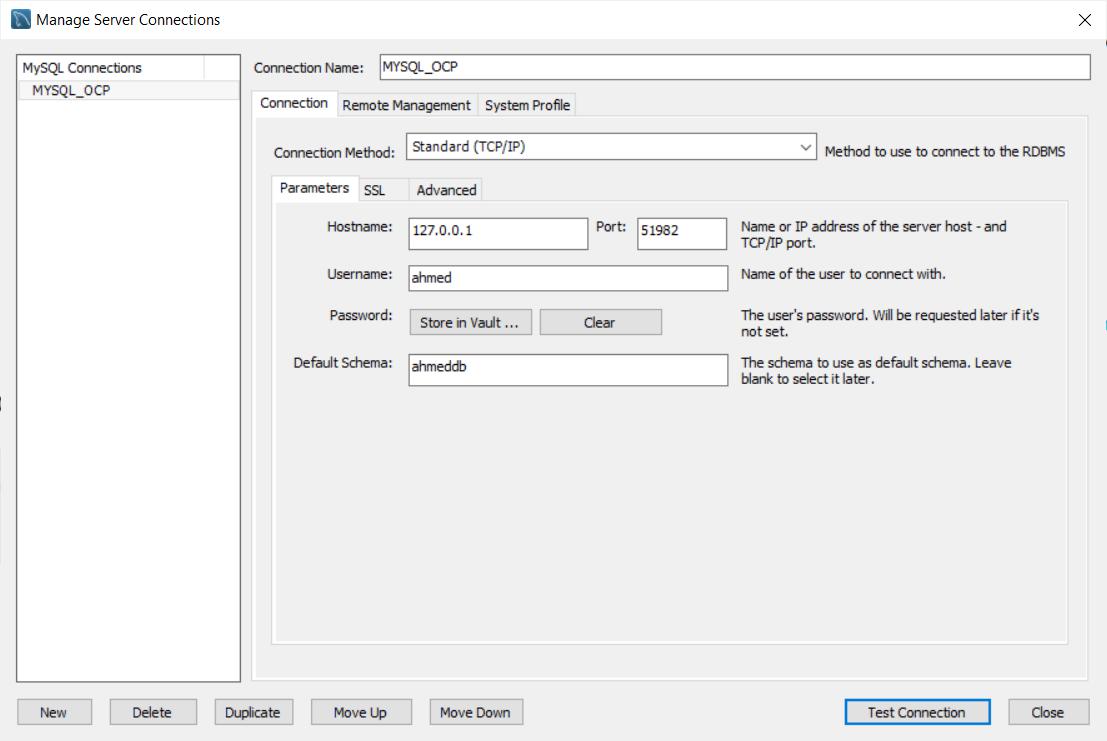
Now lets try to access this Database and Table from MYSQL workbench (SQL Client). Install MySQL workbench from this website. In order to access any pod from outside the cluster you need to expose it to outside world by using port forwarding feature of kubernetes. we use oc command as below.
PS C:\Users\D> oc port-forward ahmeddbsvc-1-r6jrb :3306

Now your MYSQL DB is accessible on 51982, Don't close this window else you cant access this instance from outside. Other way to expose the MySQL instance is by creating a route feature of Openshift. For this we need to expose our service as node port. Find it out how we can do it?
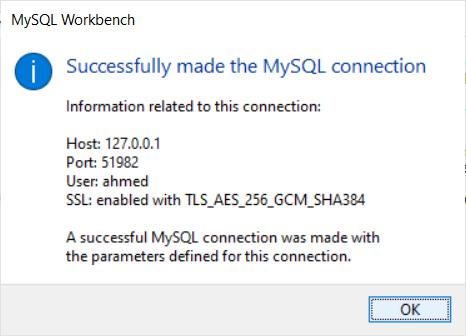
Now open MySQL work bench and connect to this database as shown below, Once connection is established successfully it will popup below screen.
Now try to access the database Table which we have created before using CLI.
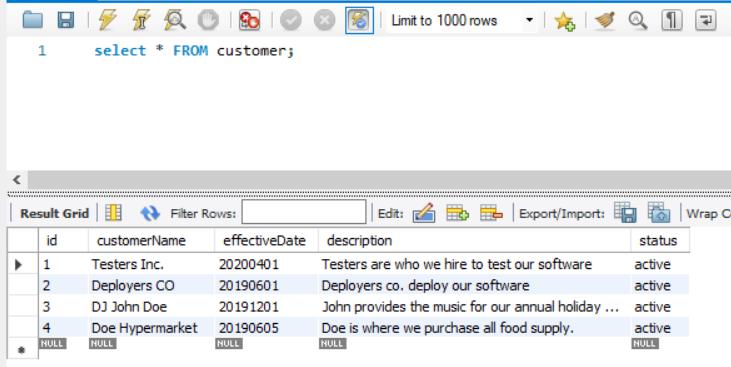
As shown above, I am able to connect to MYSQL DB instance on Red Hat Openshift and access the tables successfully. Similarly you can create as many tables, procedures and use this database instance for all your development purpose. If you face any challenges please comment and let me know.


 已为社区贡献23582条内容

所有评论(0)