How To Set Up SSL Certificates With PhpMyAdmin On An Ubuntu 12.04 VPS
Status: Deprecated
This article covers a version of Ubuntu that is no longer supported. If you are currently operate a server running Ubuntu 12.04, we highly recommend upgrading or migrating to a supported version of Ubuntu:
- Upgrade to Ubuntu 14.04.
- Upgrade from Ubuntu 14.04 to Ubuntu 16.04
- Migrate the server data to a supported version
Reason: Ubuntu 12.04 reached end of life (EOL) on April 28, 2017 and no longer receives security patches or updates. This guide is no longer maintained.
See Instead:
This guide might still be useful as a reference, but may not work on other Ubuntu releases. If available, we strongly recommend using a guide written for the version of Ubuntu you are using. You can use the search functionality at the top of the page to find a more recent version.
Introduction
PhpMyAdmin is a web-based frontend used to easily administer MySQL databases in a visually friendly way. You can set up this software to manage the data on your VPS remotely without shell access.
Although phpMyAdmin is useful, it can also be insecure if not configured correctly. This guide will cover how to install phpMyAdmin on a LAMP (Linux, Apache, MySQL, and PHP5) stack on an Ubuntu 12.04 machine using SSL and access restrictions.
Initial Setup
This guide assumes that you have root access to an Ubuntu 12.04 server, and that you have already configured LAMP. Follow this guide to install Apache, MySQL, and PHP on Ubuntu 12.04 if you haven't already set this up.
Log into your server and continue when ready.
How to Set up PhpMyAdmin on Ubuntu
Ubuntu 12.04 includes phpMyAdmin in its default repositories. Install using this command:
sudo apt-get install phpmyadmin
Select "Apache2" as the server to configure during installation. Select "Yes" to allow the phpMyAdmin database to be configured automatically.
Enter the password you set up for the root MySQL user during installation, and then assign a password for the phpMyAdmin process to use to log in.
Configure Apache to Load PhpMyAdmin
Tell Apache to source the phpMyAdmin configuration in order to allow access to the application.
Edit the main Apache configuration file with root privileges:
sudo nano /etc/apache2/apache2.conf
Scroll to the bottom of the file and type the following directive to make Apache read the phpMyAdmin specific configuration file:
Include /etc/phpmyadmin/apache.conf
Restart the server for the changes to take affect:
sudo service apache2 restart
You may get a message that reads:
[warn] The Alias directive in /etc/phpmyadmin/apache.conf at line 3 will probably never match because it overlaps an earlier Alias.
apache2: Could not reliably determine the server's fully qualified domain name, using 127.0.0.1 for ServerName
These are just warnings and can be safely ignored.
How to Set Up .htaccess for PhpMyAdmin
The first step in securing phpMyAdmin is to set up .htaccess restrictions. This will require a password login prior to accessing the phpMyAdmin interface.
First, configure phpMyAdmin apache configuration to allow the use of .htaccess files. Open the phpMyAdmin apache configuration file with root privileges:
sudo nano /etc/phpmyadmin/apache.conf
Under the line that reads "DirectoryIndex index.php", insert a line that reads "AllowOverride All":
<Directory /usr/share/phpmyadmin>
	Options FollowSymLinks
	DirectoryIndex index.php
	AllowOverride All
	. . .
Save and close the file.
Now, create a phpMyAdmin-specific .htaccess file:
sudo nano /usr/share/phpmyadmin/.htaccess
Insert the following text into the file:
AuthType Basic
AuthName "Restricted Files"
AuthUserFile /etc/phpmyadmin/.htpasswd
Require valid-user
Save and close the file.
This change makes our site look in "/etc/phpmyadmin/.htpasswd" for a list of valid login credentials.
We can create that file and a login account with the following command. Substitute the username you would like to use:
sudo htpasswd -c /etc/phpmyadmin/.htpasswd user_name
You will be asked to choose a password for the new user.
Now, restart Apache to enable the access restrictions:
sudo service apache2 restart
How to Set Up SSL with PhpMyAdmin
We are going to be passing sensitive data between the web interface and the server, so we need to set up SSL in order to make sure our data is not sent in plain text.
First, tell Apache to enable SSL support and restart the server to implement the change with the following commands:
sudo a2enmod ssl
sudo service apache2 restart
Create a directory to store our SSL certificates, and then create a key and cert with the following commands:
sudo mkdir /etc/apache2/ssl
sudo openssl req -x509 -nodes -days 365 -newkey rsa:2048 -keyout /etc/apache2/ssl/apache.key -out /etc/apache2/ssl/apache.crt
This will create a certificate that will be valid for 365 days. You will be asked a number of questions. Fill them out as best as you can.
The question that you must answer correctly is the "Common Name". Use your domain name or Server IP Address for this field.
You are about to be asked to enter information that will be incorporated
into your certificate request.
What you are about to enter is what is called a Distinguished Name or a DN.
There are quite a few fields but you can leave some blank
For some fields there will be a default value,
If you enter '.', the field will be left blank.
-----
Country Name (2 letter code) [AU]:US
State or Province Name (full name) [Some-State]:New York
Locality Name (eg, city) []:NYC
Organization Name (eg, company) [Internet Widgits Pty Ltd]:Awesome Inc
Organizational Unit Name (eg, section) []:Dept of Merriment
Common Name (e.g. server FQDN or YOUR name) []:example.com
Email Address []:webmaster@awesomeinc.com
Configure Apache to Use SSL Certificates
Now that you have created an SSL certificate, you need to tell Apache to use SSL. Open the default virtual host config file with root privileges:
sudo nano /etc/apache2/sites-available/default
Begin by changing the "<VirtualHost *:80>" declaration to "<VirtualHost *:443>", which is the default SSL port.
After that change, add a "ServerName" section within the VirtualHost definition that specifies the domain name or IP address you used when creating your SSL certificate, followed by ":443":
<VirtualHost *:443>
	ServerAdmin webmaster@localhost
	ServerName example.com:443
	. . .
Before closing the file, add the following lines just prior to the "</VirtualHost>" closing tag:
SSLEngine on
SSLCertificateFile /etc/apache2/ssl/apache.crt
SSLCertificateKeyFile /etc/apache2/ssl/apache.key
Save and close the file.
Force SSL Within PhpMyAdmin
We now have to tell phpMyAdmin that SSL must be used whenever a connection is made.
We will do this within a phpMyAdmin configuration file. Open the file with root privileges for editing:
sudo nano /etc/phpmyadmin/config.inc.php
Scroll to the bottom of the file and add the following line:
$cfg['ForceSSL'] = true;
This is the only line needed to require SSL for phpMyAdmin.
Save and close the file.
Enabling SSL Changes
If it is not already enabled, enable the site with the following command:
sudo a2ensite default
Restart the Apache service to implement the changes:
sudo service apache2 restart
Viewing the Results
To access the phpMyAdmin interface, navigate to your domain name or server IP address followed by "/phpmyadmin" with your browser:
example.com/phpmyadmin
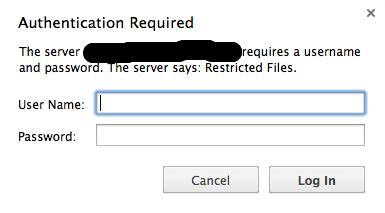
You will be asked for the username and password you set up with the .htaccess file.
You will then probably see a screen complaining about the SSL certificate not being trusted.
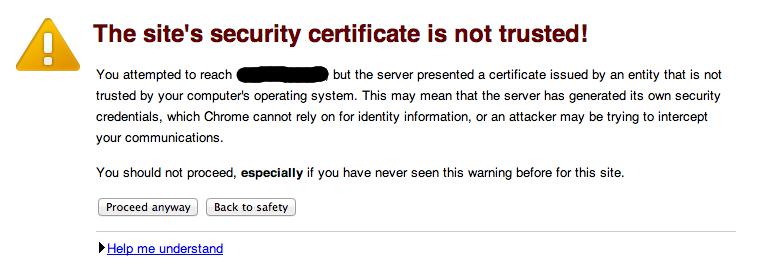
This is expected because we created the SSL certificate ourselves and did not go through an SSL certification authority. This is fine for our purposes.
Click "proceed" or "continue" to move on. You will be asked for the .htaccess password again since we are now trying to access the site through SSL.
You will now be presented with the phpMyAdmin login page where you can enter your credentials you set up during installation.
Username: root
Password: your_phpmyadmin_password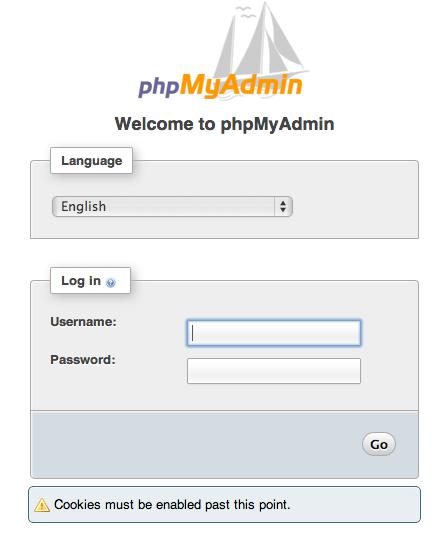
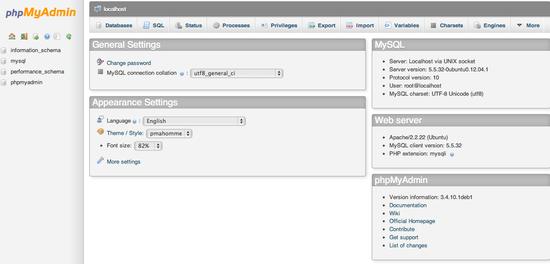
You will now be dropped into the main phpMyConfig administration page:
更多推荐
 已为社区贡献23584条内容




所有评论(0)