
LSP、Treesitter、Neovim 的 Nvim-cmp 配置
在上一篇文章中,我讨论了如何使用 Lua 设置基本的 Neovim 配置。如果你错过了这里是链接。在本文中,我将讨论我使用 Tree-sitter 进行语法高亮以及使用 nvim-cmp 和 lsp-config 进行代码补全的 Neovim 设置。
树人:
为了解释 tree-sitter,让我们来探讨一下什么是解析器和解析器生成器。
解析器是一种接受输入(通常是文本)并构建数据结构的工具,在检查语法是否正确的同时给出输入的结构表示。简单来说,它识别输入的文本是否属于特定语言。
解析器生成器是将输入作为语法并可以自动生成可以使用语法解析字符流的源代码的工具。
tree-sitter 插件是一个解析器生成器工具和一个增量库。这意味着它可以为源代码创建语法树,并在编辑源代码时有效地更新语法树。它可以实时显示正在编辑的源代码的警告和语法错误。
为了安装 tree-sitter,首先去 treesitter githubrepo,然后滚动到安装部分。
Plug 'nvim-treesitter/nvim-treesitter', {'do': ':TSUpdate'}
然后将安装插件的命令复制到nvim目录下的packages.lua中
 use
      {
          'nvim-treesitter/nvim-treesitter',
       }
完成这些步骤后,使用以下命令安装插件
:PackerSync
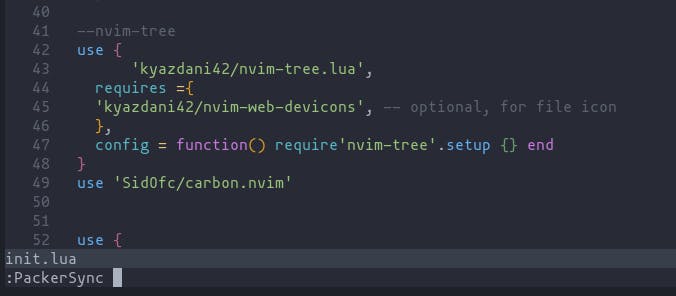
到目前为止,我们已经安装了使用 lua 包管理器的插件。但是,它尚未配置。为此,我们需要在 packages 文件夹中创建一个配置 lua 文件并将这些代码行添加到其中
require(nvim-treesitter.configs).setup
{
   -- add languages required within the curly braces
  ensure_installed = { "c", "lua", "rust" },

  -- Install parsers synchronously (only applied to `ensure_installed`)
  sync_install = false,

  -- List of parsers to ignore installing (for "all")
  ignore_install = { "javascript" },

  highlight = {
    -- `false` will disable the whole extension
    enable = true,

    -- NOTE: these are the names of the parsers and not the filetype. (for example if you want to
    -- disable highlighting for the `tex` filetype, you need to include `latex` in this list as this is
    -- the name of the parser)
    -- list of language that will be disabled
    disable = { "c", "rust" },

    -- Setting this to true will run `:h syntax` and tree-sitter at the same time.
    -- Set this to `true` if you depend on 'syntax' being enabled (like for indentation).
    -- Using this option may slow down your editor, and you may see some duplicate highlights.
    -- Instead of true it can also be a list of languages
    additional_vim_regex_highlighting = false,
  },
}
完成这些步骤后,使用 source 命令刷新 neovim
:source %
应用更改。
LSP
语言服务器协议(又名 LSP)允许我们使用编程语言的自动完成、转到定义或悬停文档等功能。它允许我们在 Neovim 中实现类似于自动完成的 Visual Studio Code。
为了设置 LSP,我们首先需要从安装 lsp-config 插件以及 nvim-lsp-安装程序(安装说明在 github 页面中提供)。安装插件后,需要在 packages 目录中创建 lsp-installer 插件的 lua 文件,并将以下代码行添加到其中。
local lsp_installer = require("nvim-lsp-installer")

-- Register a handler that will be called for each installed server when it's ready (i.e. when installation is finished
-- or if the server is already installed).
lsp_installer.on_server_ready(function(server)
    local opts = {}

    -- (optional) Customize the options passed to the server
    -- if server.name == "tsserver" then
    --     opts.root_dir = function() ... end
    -- end

    -- This setup() function will take the provided server configuration and decorate it with the necessary properties
    -- before passing it onwards to lspconfig.
    -- Refer to https://github.com/neovim/nvim-lspconfig/blob/master/doc/server_configurations.md
    server:setup(opts)
end)
为了下载 LSP 服务器,使用该命令
:LspInstall <server_name>
虽然我们为 LSP 安装了必要的插件,但需要一个额外的插件来启用自动完成。
完成引擎
为了启用完成功能,使用了诸如 nvim-cmp 之类的完成引擎。为了安装nvim-cmp,首先到github页面安装前6个插件。完成后,我们可以从那里给定的片段引擎中选择我们偏好的片段引擎。
在安装了代码片段引擎后,需要将 nvim-cmp 所需的配置复制并粘贴到为 nvim-cmp 创建的配置 lua 文件中。
call plug#begin(s:plug_dir)
Plug 'neovim/nvim-lspconfig'
Plug 'hrsh7th/cmp-nvim-lsp'
Plug 'hrsh7th/cmp-buffer'
Plug 'hrsh7th/cmp-path'
Plug 'hrsh7th/cmp-cmdline'
Plug 'hrsh7th/nvim-cmp' -- all the plugins in this group are mandatory

" For vsnip users.
Plug 'hrsh7th/cmp-vsnip'
Plug 'hrsh7th/vim-vsnip'

" For luasnip users.
" Plug 'L3MON4D3/LuaSnip'
" Plug 'saadparwaiz1/cmp_luasnip'

" For ultisnips users.
" Plug 'SirVer/ultisnips'
" Plug 'quangnguyen30192/cmp-nvim-ultisnips'

" For snippy users.
" Plug 'dcampos/nvim-snippy'
" Plug 'dcampos/cmp-snippy'

call plug#end()

set completeopt=menu,menuone,noselect

lua <<EOF
  -- Setup nvim-cmp.
  local cmp = require'cmp'

  cmp.setup({
    snippet = {
      -- REQUIRED - you must specify a snippet engine
      expand = function(args)
        vim.fn["vsnip#anonymous"](args.body) -- For `vsnip` users.
        -- require('luasnip').lsp_expand(args.body) -- For `luasnip` users.
        -- require('snippy').expand_snippet(args.body) -- For `snippy` users.
        -- vim.fn["UltiSnips#Anon"](args.body) -- For `ultisnips` users.
      end,
    },
    window = {
      -- completion = cmp.config.window.bordered(),
      -- documentation = cmp.config.window.bordered(),
    },
    mapping = cmp.mapping.preset.insert({
      ['<C-b>'] = cmp.mapping.scroll_docs(-4),
      ['<C-f>'] = cmp.mapping.scroll_docs(4),
      ['<C-Space>'] = cmp.mapping.complete(),
      ['<C-e>'] = cmp.mapping.abort(),
      ['<CR>'] = cmp.mapping.confirm({ select = true }), -- Accept currently selected item. Set `select` to `false` to only confirm explicitly selected items.
    }),
    sources = cmp.config.sources({
      { name = 'nvim_lsp' },
      { name = 'vsnip' }, -- For vsnip users.
      -- { name = 'luasnip' }, -- For luasnip users.
      -- { name = 'ultisnips' }, -- For ultisnips users.
      -- { name = 'snippy' }, -- For snippy users.
    }, {
      { name = 'buffer' },
    })
  })

  -- Set configuration for specific filetype.
  cmp.setup.filetype('gitcommit', {
    sources = cmp.config.sources({
      { name = 'cmp_git' }, -- You can specify the `cmp_git` source if you were installed it.
    }, {
      { name = 'buffer' },
    })
  })

  -- Use buffer source for `/` (if you enabled `native_menu`, this won't work anymore).
  cmp.setup.cmdline('/', {
    mapping = cmp.mapping.preset.cmdline(),
    sources = {
      { name = 'buffer' }
    }
  })

  -- Use cmdline & path source for ':' (if you enabled `native_menu`, this won't work anymore).
  cmp.setup.cmdline(':', {
    mapping = cmp.mapping.preset.cmdline(),
    sources = cmp.config.sources({
      { name = 'path' }
    }, {
      { name = 'cmdline' }
    })
  })

  -- Setup lspconfig.
  local capabilities = require('cmp_nvim_lsp').update_capabilities(vim.lsp.protocol.make_client_capabilities())
  -- Replace <YOUR_LSP_SERVER> with each lsp server you've enabled.
  require('lspconfig')['<YOUR_LSP_SERVER>'].setup {
    capabilities = capabilities
  }
EOF
除了您可能已经安装的代码片段引擎,如果您愿意,您还可以安装一个称为友好代码片段的附加代码片段引擎,
use "rafamadriz/friendly-snippets"
并将以下行添加到 nvim-cmp 配置文件中以激活代码段
require'luasnip'.filetype_extend("ruby", {"rails"})
安装并配置所有插件后,您可能会注意到文本完成不起作用。这主要是由于语言服务器中预配置的设置。在这个github 页面中,是支持的语言服务器及其默认配置的列表。
如果您检查每个服务器的默认配置,您会注意到所有服务器都有一个名为 root_dir 的部分。
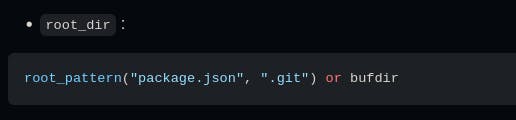
为了在文件夹中打开 neovim 时自动启动补全功能,项目需要有一个可以被 neovim 识别的根目录。为了自动启动服务器(通常是 .git),需要任何一个必需的根目录。
这涵盖了为 Neovim 启用解析和自动完成的基本设置。我希望读到这篇文章的人会发现这篇文章很有用。
更多推荐
 0
0 0
0- 0


 已为社区贡献12493条内容

所有评论(0)