

I’ve came a long way to figure out, how to run a Laravel application in a docker container on my synology. In the end it wasn’t that difficult and worked without SSH.
Prerequisites
The following packages should be installed and working on Synology:
- Docker
- MariaDB
- phpMyAdmin
First step is to create a folder on your Synology File Station to map your Laravel app to, e.g. Folder <Docker> with subfolder <api>. This way you can easily mount the project on your computer.
Log in to phpMyAdmin, create a new database with a customized user and grant the necessary rights. In any case, write down credential that way:
- DB_HOST: <your sinology ip>
- DB_DATABASE: <your database>
- DB_USERNAME: <your user>
- DB_PASSWORD: <your password>
- DB_PORT: <your port — per default is it 3306>
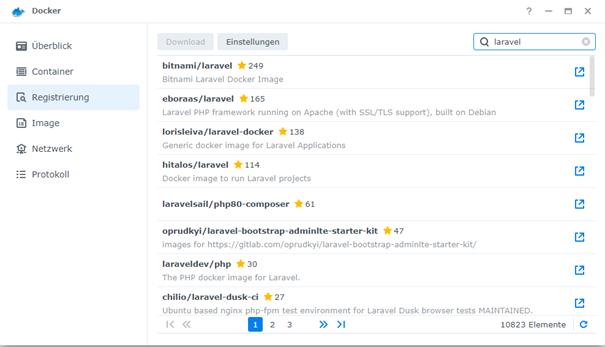
Open Docker on Synology, go to Registration to find bitnami/laravel image and hit Download:
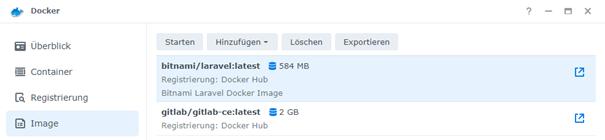
Once the image is downloaded go to the Image section, select bitnami/laravel and hit Start:
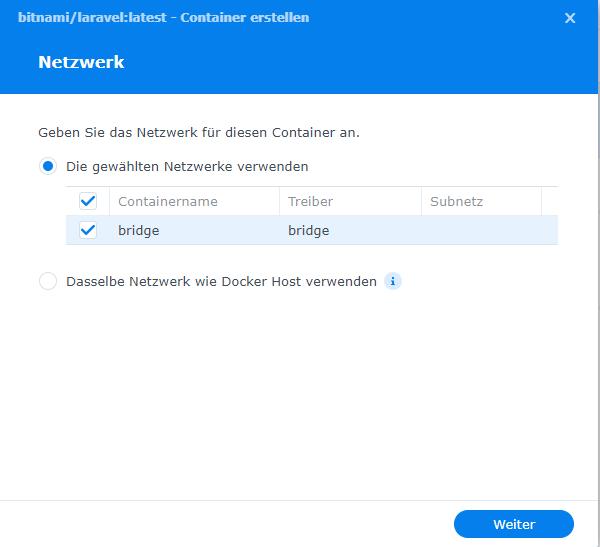
In the window that opens, select your network and click Next:
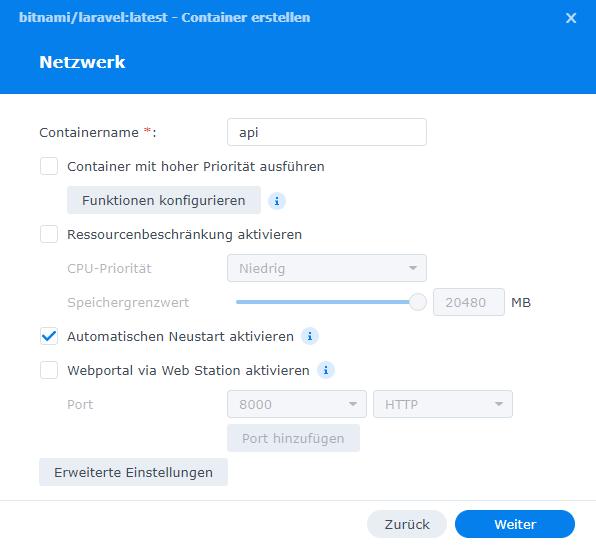
Adjust container name and enable automatic restart:
Click to Advanced Settings to add the database credentials to environment variables. Hit 5 times on Add to get placeholders for our 5 database values:

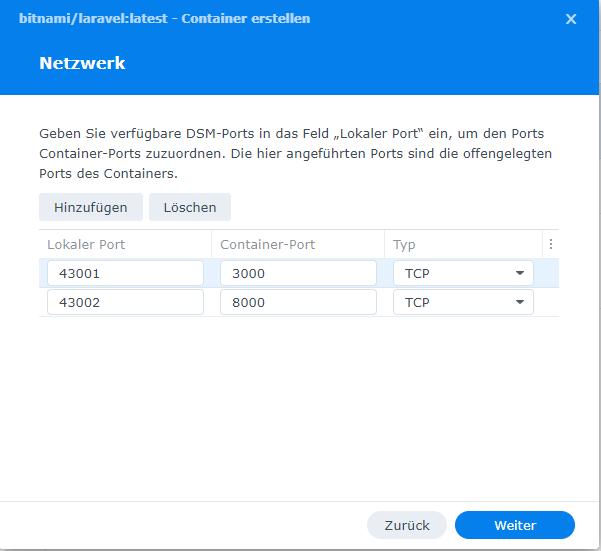
After Saving you can customize your network ports, e.g. as follows, and click on Next:
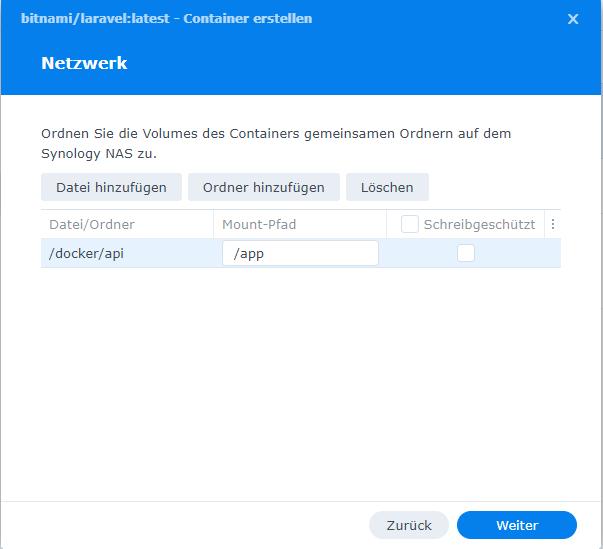
In this screen click Add folder and mount it to your docker folder. Select your in first step configured folder on File Station, click Select and mount it to path /app.
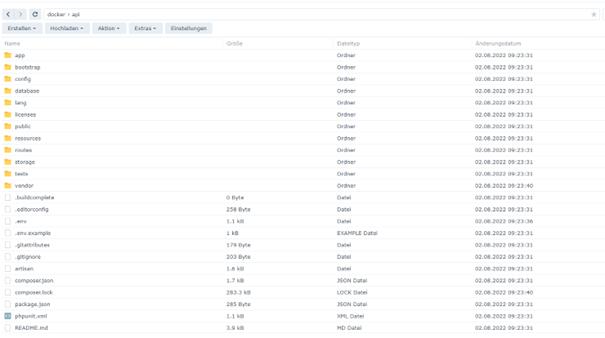
Now: start your container. It takes a few minutes and the following things should have happened:
- In your folder on File Station should now be visible the default Laravel folder structure
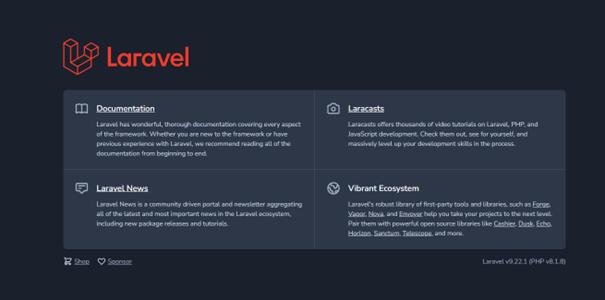
- On webbrowser ip:port should now the default Laravel start page be displayed
Now go to Docker on Synology, section Container and select your Laravel container. Click on Details. In the Protocol section you can check, whether your server is up and running. Next click on Terminal and hit Create

Now we use the console to setup our application. Run the following commands
- composer install
- npm install
- npm run build
I like to work with Jetstream and Livewire, so let’s install this together with some other packages:
- composer require laravel/jetstream
- php artisan jetstream:install livewire
- php artisan vendor:publish — tag=jetstream-views
- php artisan migrate
- php artisan storage:link
- composer require barryvdh/laravel-debugbar — dev
- composer require tabuna/breadcrumbs
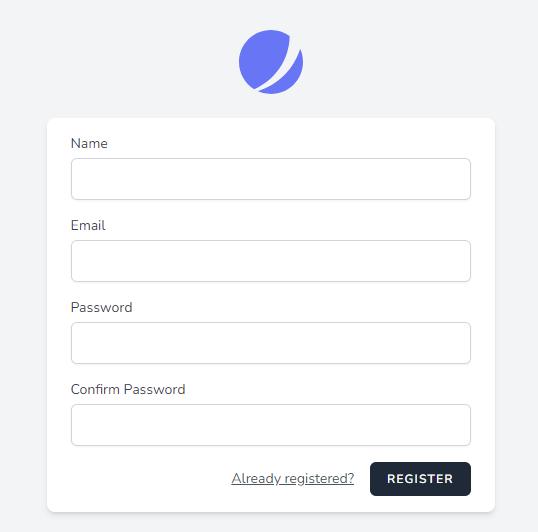
If you now go to your page on <ip:port> and click Login, the template is a bit broken 😊. Go to your File Station, open .env File and adjust the APP_URL to http://<your ip>:<your port>.
Run on your console npm run build again and clear the cache with php artisan cache:clear. Now all should be fine:
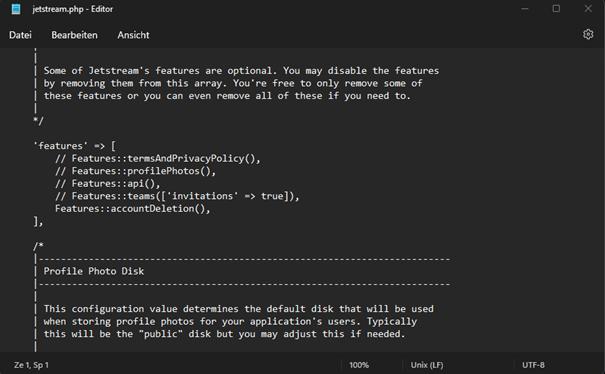
If you would like to use the API and Profile Photo feature of Jetstream don’t forget to enable them in config/jetstream.php (uncomment 2. and 3. entry)
In one of my next tutorials, I’ll show you how to get the current status from your Git or Docker Git container on Synology at the push of a button.
Happy coding!


 已为社区贡献35526条内容

所有评论(0)