

We will build a sample application on security, one of the most important issues in the microservice world. We will simulate a scenario using IdentityServer4, Ocelot Api Gateway and Angular in .Net environment. In our demo, we will focus more on implementation, keeping the design very limited. You can find the source code here.
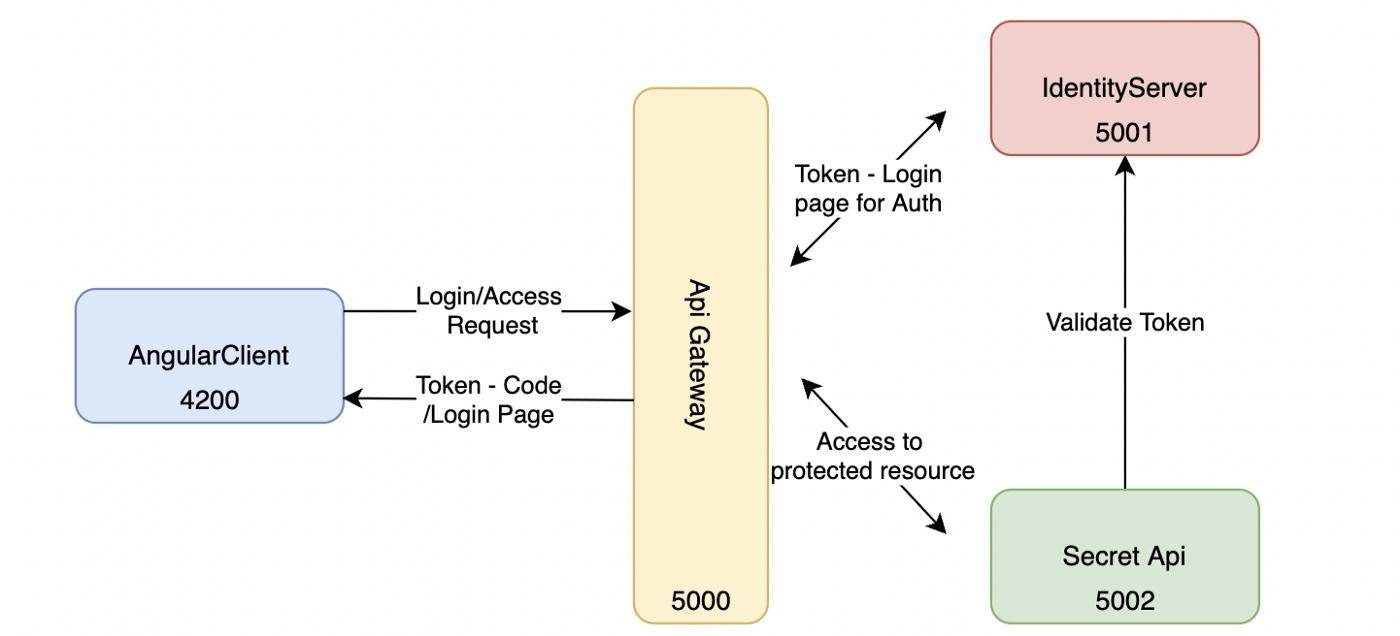
Project Structure


IdentityServer → localhost:5001
Our Auth service, which is built on IdentityServer4 and OAuth2, has simple MVC login, logout and register pages and will perform these operations by setting server-side cookies with AspNetCore.Identity and will work as the Identity Service of our mictoservice architecture.
Secret Api → localhost:5002
A basic resource api. For simplicity, we will use the pre-installed Weatherforecast settings.
Api Gateway → localhost:5000
We will use Ocelot for reverse-proxy operations. It will provide access to our microservices from port 5000.
Angular Client → localhost:4200
A JavaScript Client representing the Resource-Owner that wants to access resources.
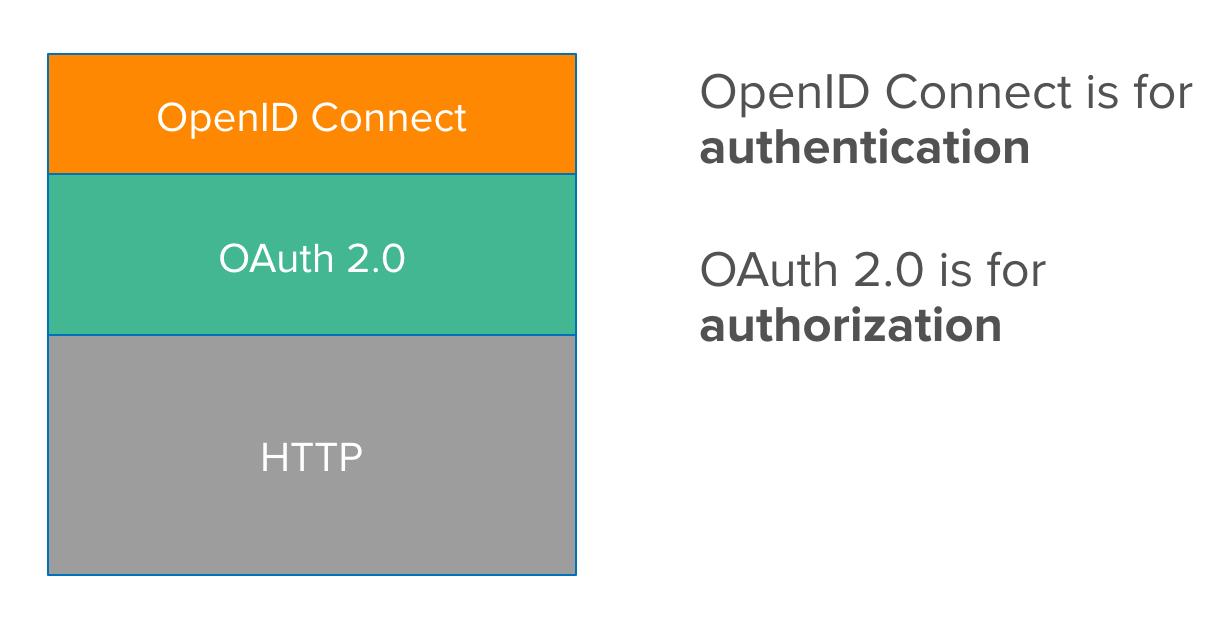
What are OAuth2 andOpenID ?
The OAuth2 protocol is an open standard authorization protocol used for authorization between multiple services or servers.
OpenID Connect is an authentication protocol running on the OAuth2 protocol.
For more boring information you can check this link :)
What is IdentityServer4 ?
IdentityServer4 is an open source framework that makes it easy for us to use OAuth2 and OpenID protocols in .Net environment.
The operation of IdentityServer4 in our project is as follows:
In the incoming authentication request, the client identifies itself and tells which resource it wants to go to. If the required credentials are provided, IdentityServer authenticates the client according to the Grant type defined for that client(returns the relevant data according to the Grant type: access token, code, id token).
Now the client uses this returned data (token) in the next resource access operations. Each resource API that the client goes to, checks the token by asking IdentityServer whether it should allow this token.
IdentityServer
First of all, we install our IdentityServer4 Nuget package to our project. Then we go to Program.cs and make the following configuration.
Here we have 4 credentials that we need to add to our extension. We do not forget to add the relevant middleware afterwards.
app.UseRouting();
app.UseIdentityServer();
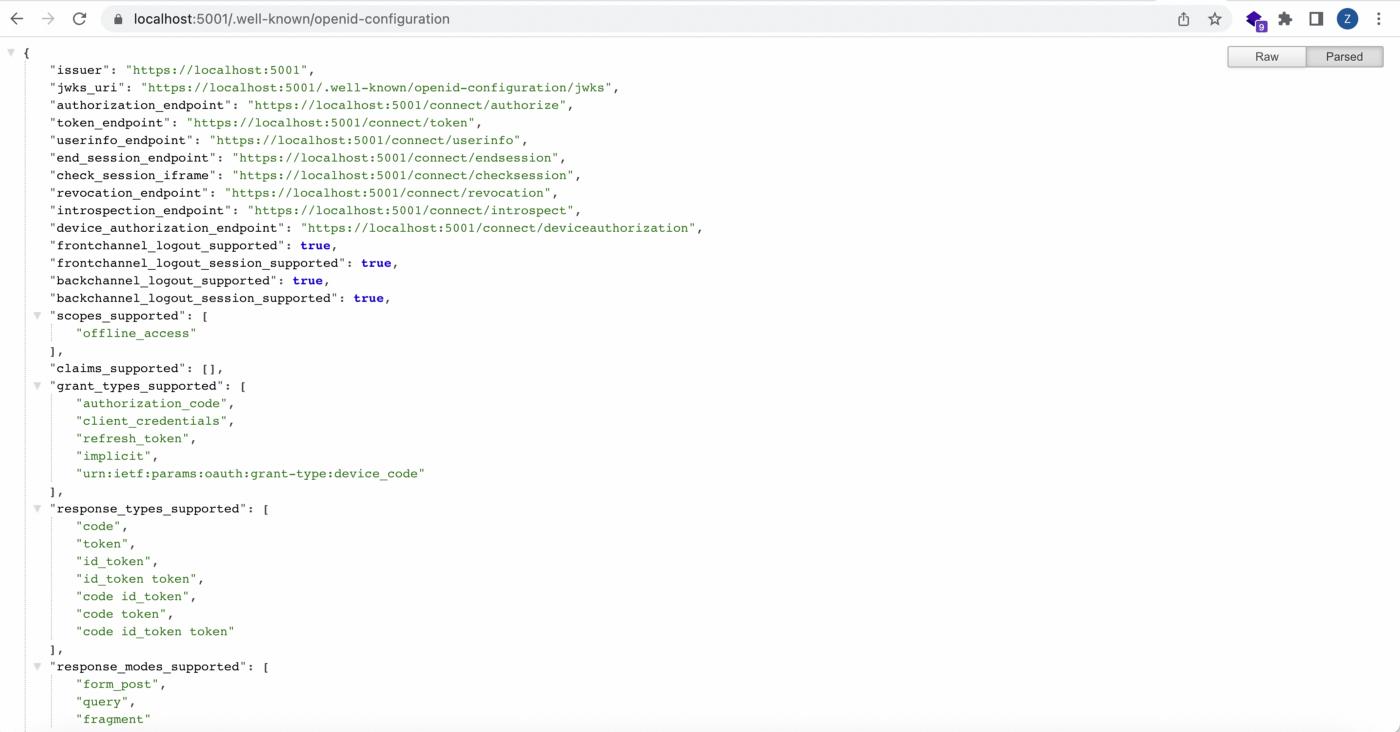
Now, let’s run the project and access the OpenID Connect Discovery Document from https://localhost:5001/.well-known/openid-configuration and check that identityServer4 is running smoothly. For more information about Discovery Document, check this link.
In order to organize the creadentials we mentioned before, we create a class named Config.cs in the project directory and define a static property for each configuration.
Now, we can use that Config class that we created
If we look at the big picture again, we have an API resource that we want to protect, and we want to access this resource with auth operations. So, let’s create a ApiScope in our Config class and a Client that can reach this scope.
GrantType will be ClientCredentials. Our secret will of course be the “secret”, which is a very secret and strong password. We are expecting IdentityServer to return us a JWT access token after we send the necessary credentials. Let's run the application and test it with Postman.
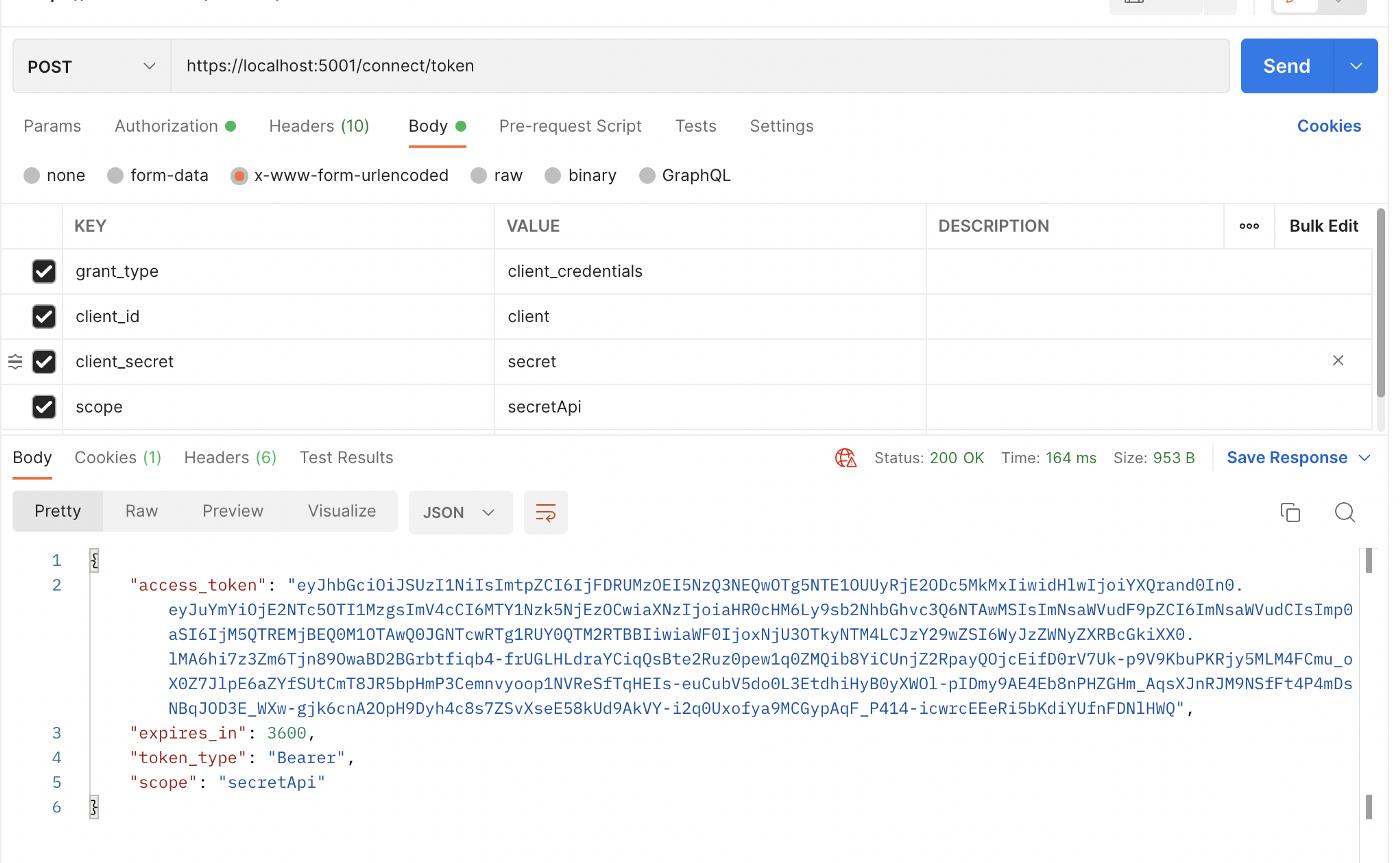
With Postman, we can obtain access tokens in two different ways. The first method is with a basic POST request operation:
→ POST https://localhost:5001/connect/token
We send requests by entering our own credentials in x-www-form-urlencoded from the Body part.
A second method is with Postman’s built-in OAuth2 feature:
→ Authorization → Type: OAuth2
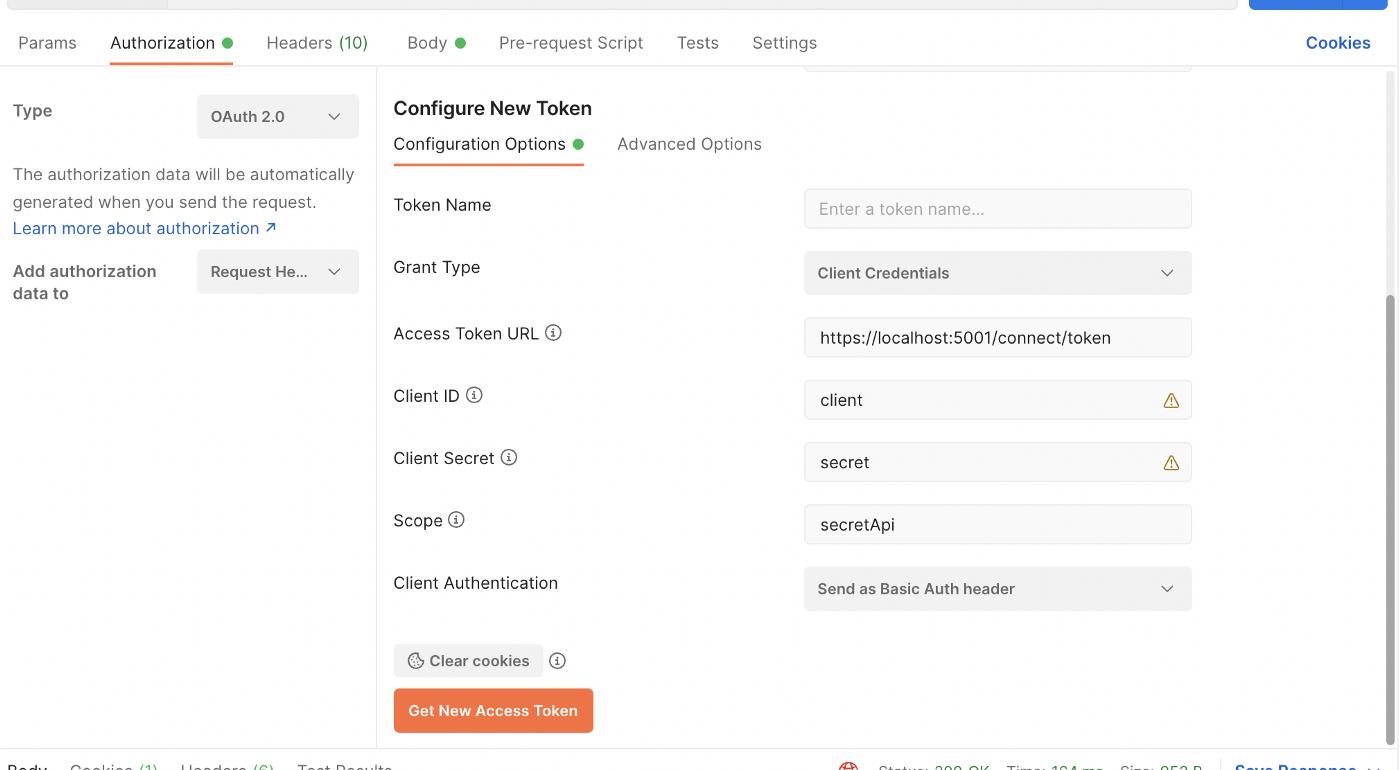
Although the first method is simpler, the second method will bring convenience for us to test other GrantTypes.
If we analyze the access token we obtained, from the jwt.io site:
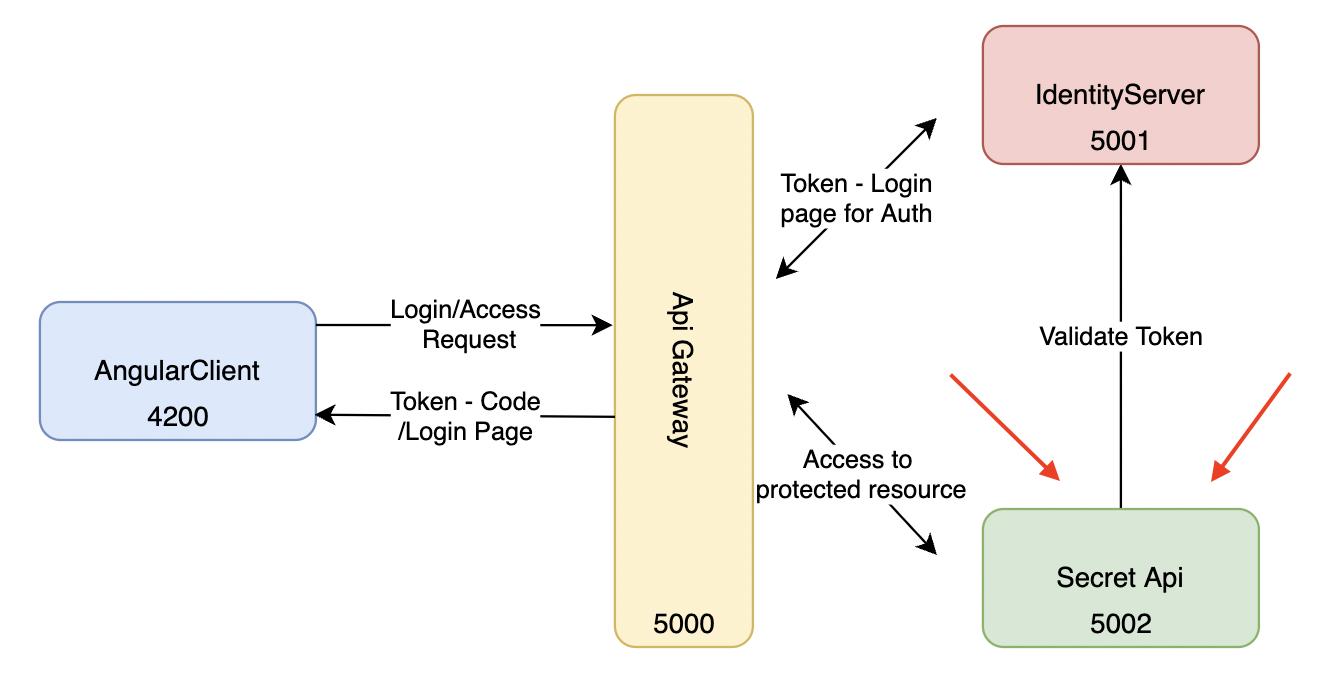
Secret Api
Now, let's implement our Secret API and handle the auth processes. First of all, we install the Microsoft.AspNetCore.Authentication.JwtBearer Nuget package. Then we make our Auth configurations in Program.cs.
We add Authentication middlewares to the pipeline
app.UseAuthentication();
app.UseAuthorization();
And Finally, we add [Authorize] attribute to our Controller. It could be added to the endpoint also.
[Authorize]
[HttpGet(Name = "GetWeatherForecast")]
public IEnumerable<WeatherForecast> Get()
{
...
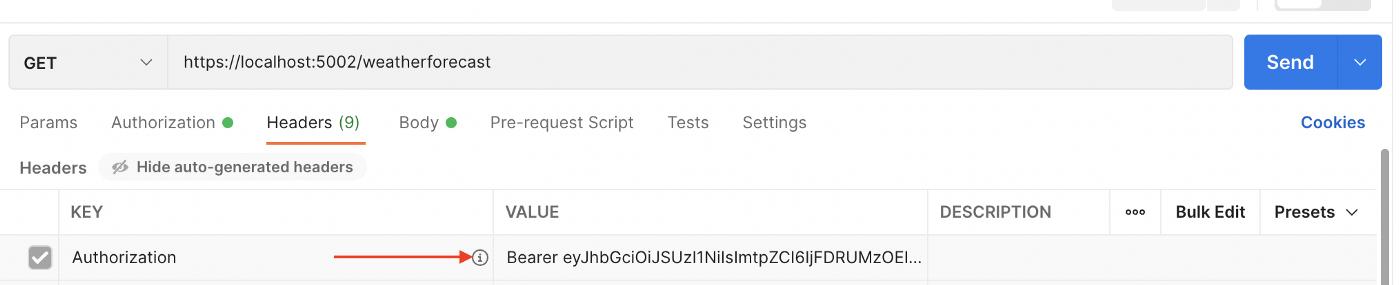
After running the project, we can see that the request we sent to https://localhost:5002/weatherforecast turns Unauthorized with the code 401. When we make a request with the access token we get from IdentityServer, we can access the resource. You can send a request by adding a bearer token to the Header section in Postman, but we will continue with the method we showed before.
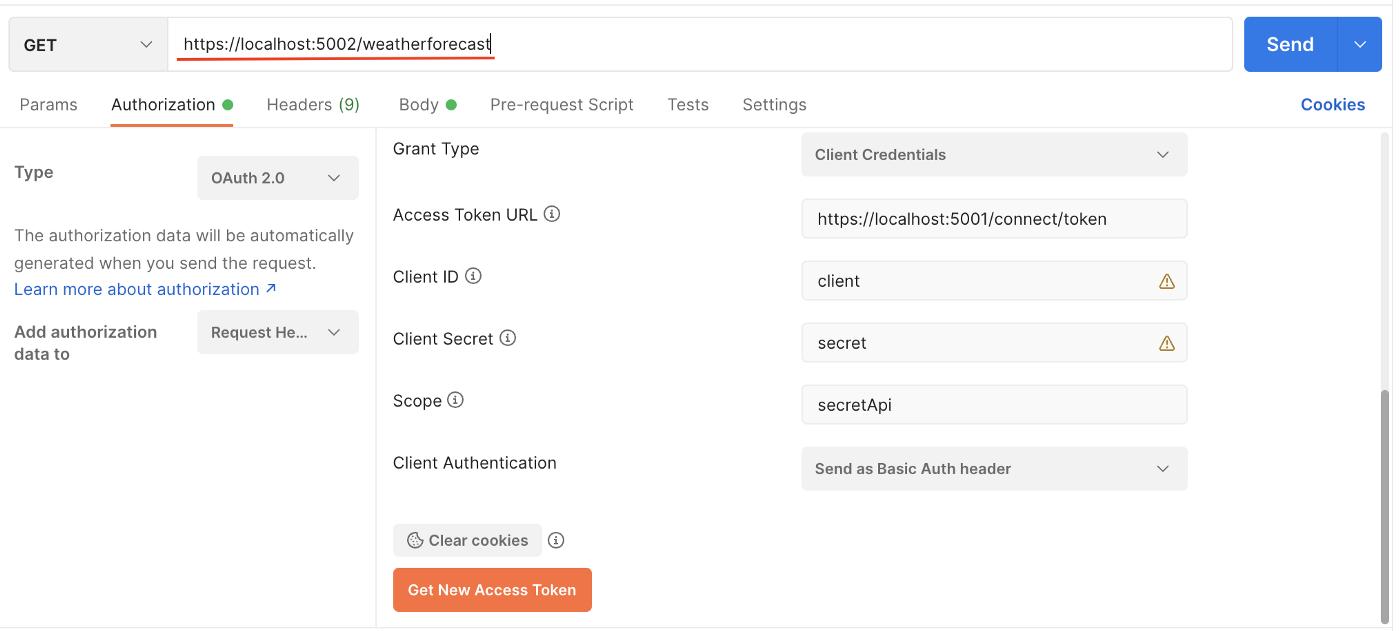
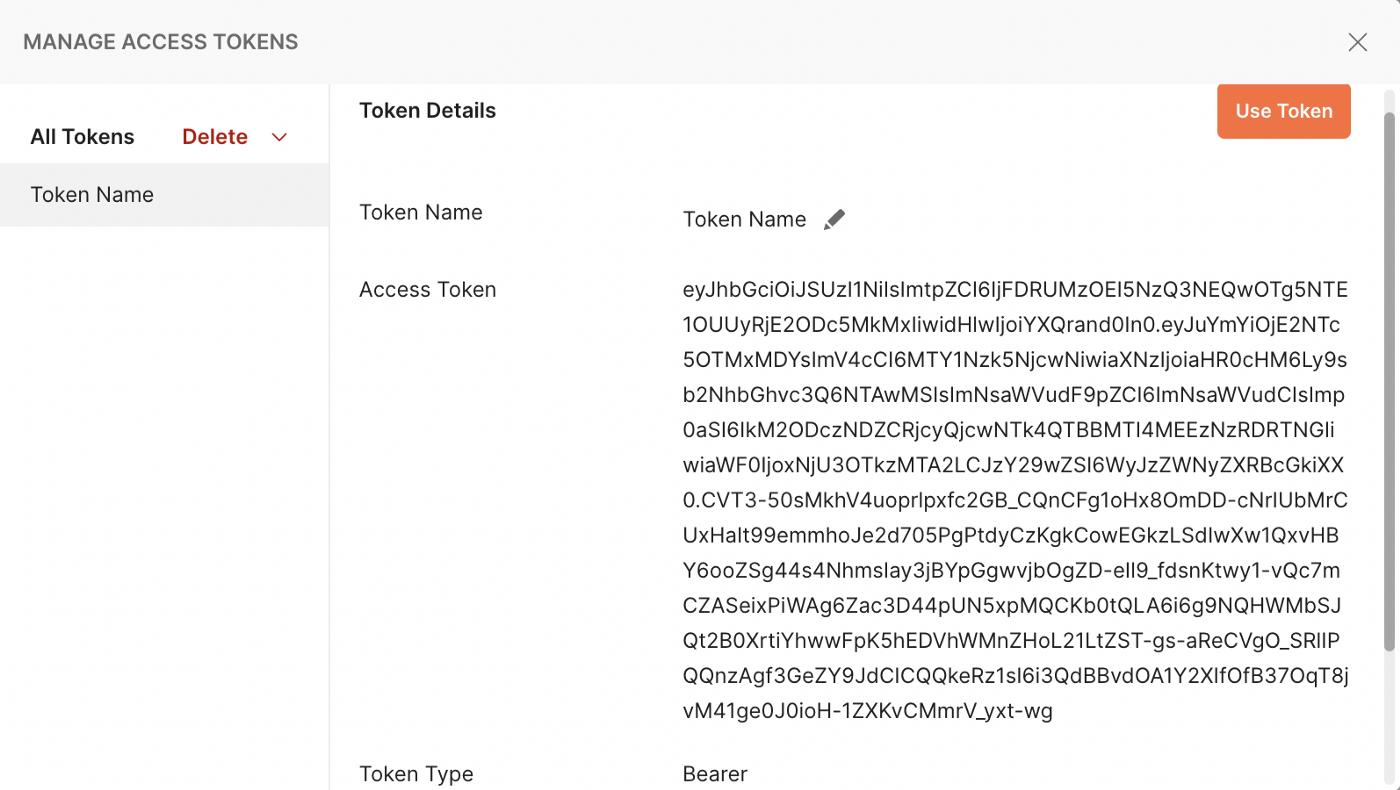
We press the Get New Access Token button. In the next window, we press the Use Token button and tadaaaa! Then you can send the request and get the answer.
Use Tokenbutton automatically sets incoming token at Headers as a Bearer token
Ocelot Api Gateway
In this article, we will implement a simple API gateway to reverse-proxy.
We open an empty Web API project and install the Ocelot Nuget package. We create the ocelot.json file in the project directory and make the following configurations to Program.cs.
Lets add Cors policy and Ocelot middleware.
ocelot.json:
Simply this is how Ocelot’s reverse proxy works:
Upstream → Downstream
localhost:5000/identity/{path} → localhost:5001/{path} — (IdentityServer)
localhost:5000/secretApi/{path} → localhost:5002/{path} — (Secret Api)
Now you can try the requests sended before, this time via Api Gateway.
User Management With EfCore
Now, to bring things closer to reality, let’s manage users with a database and perform login and logout operations. In order to achieve this, we will use AspNetCore.Identity that IdentityServer4 uses under-hood. Let’s add the following packages to our IdentityServer project.
Microsoft.EntityFrameworkCore
Microsoft.EntityFrameworkCore.InMemory
Microsoft.AspNetCore.Identity.EntityFrameworkCore
IdentityServer4.AspNetIdentity
And create our DbContext.
And update IdentityServer’s Program.cs
We have created a very basic MVC login/logout, you can check it out from the source code.
Let’s create a Client configuration to try Grant type Code with Postman.
Update IdentityResources
We go to Postman’ OAuth2 section and choose Grant Type as Authorization Code (with PKCE).
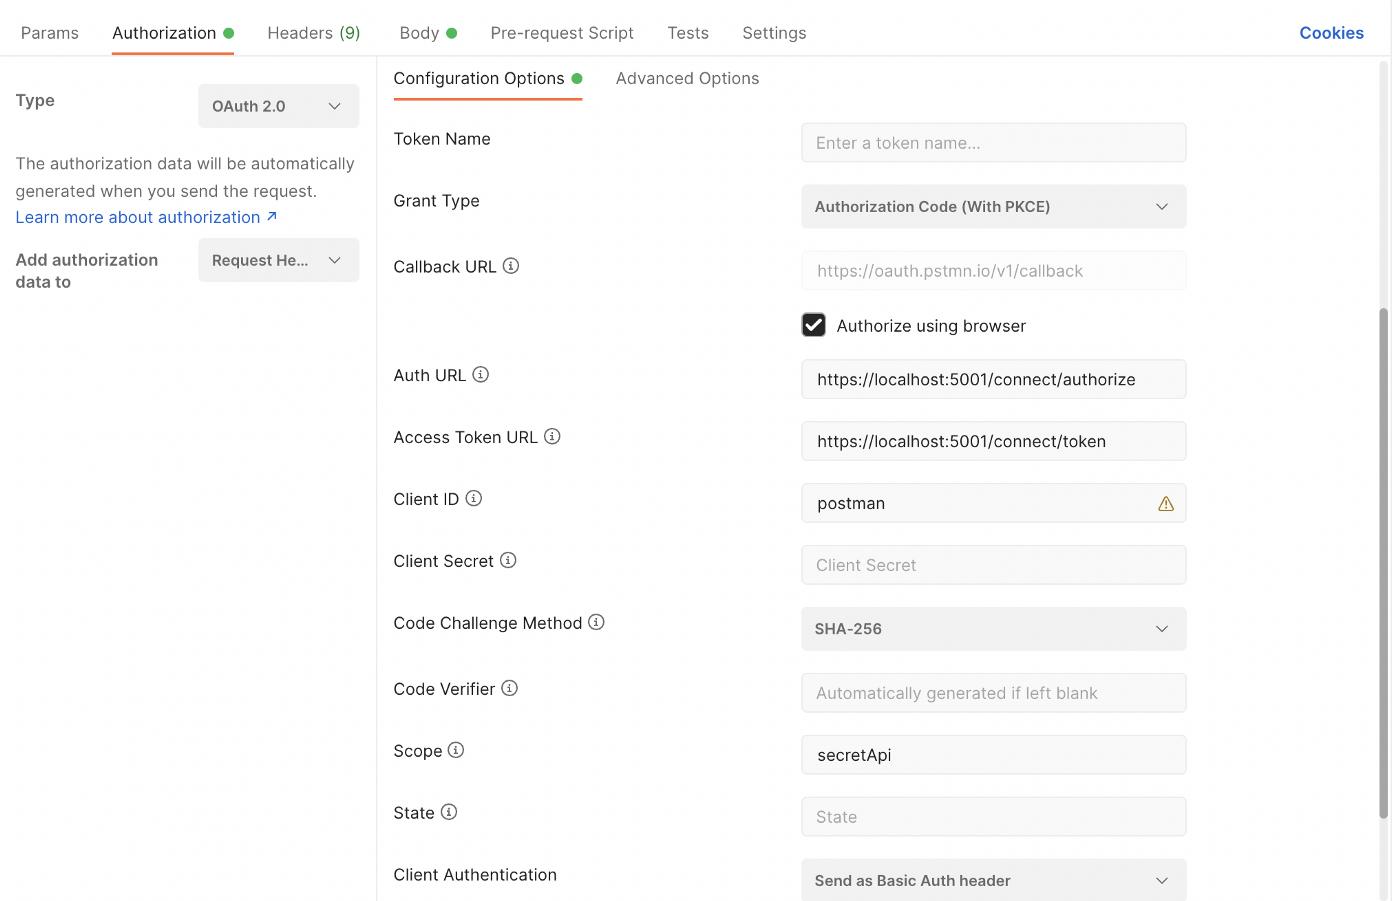
Note: Here we used localhost:5001 but it could also be set as localhost:5000/identity in order to use Api Gateway.
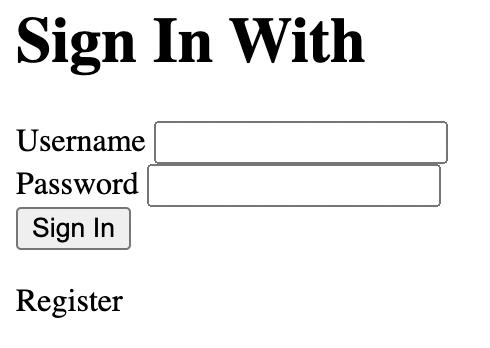
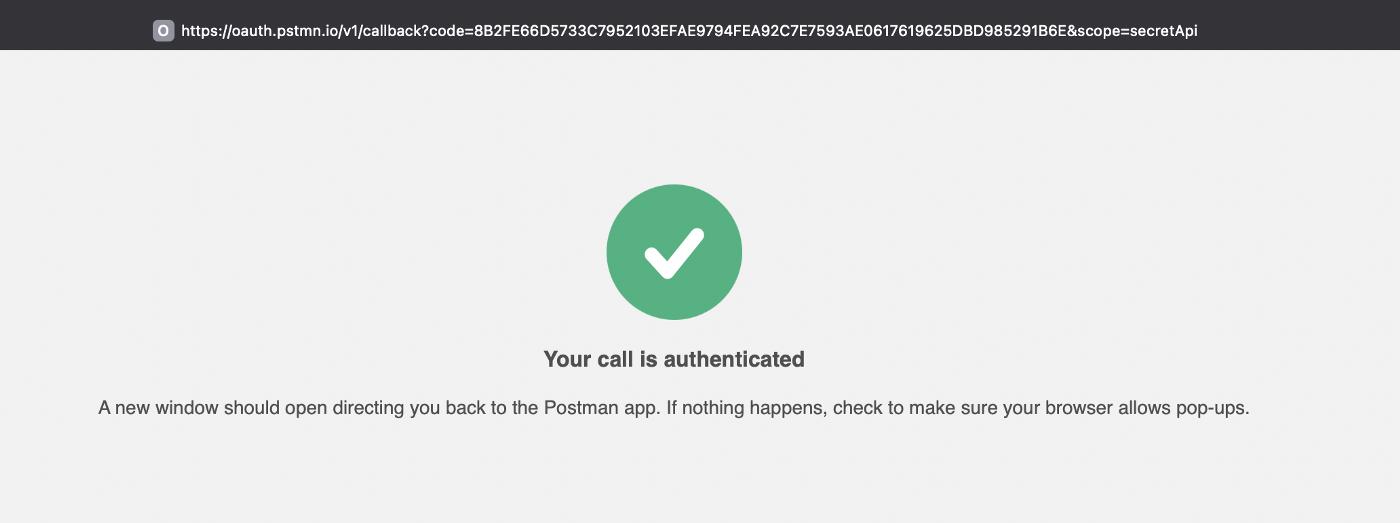
This will redirect us to our login page in the browser. Since we are using InMemory database, it is useful to remind that users will be deleted every time we restart the Project. The registration process will automatically login after the user registration.
Angular Client
We are creating a new Angular Client App using the angular-cli command.
ng new AngularClient
//Specific version(14) --> npx @angular/cli@14 new AngularClient
We are going to use angular-auth-oidc-client npm package for Oidc Client.
npm i angular-auth-oidc-client
We make neccessary configurations and imports at app.module.ts
Let’s create 3 buttons, Login, Logout and Call Api, and their functions.
app.component.html:
app.component.ts :
Let’s add our new Client configuration to the IdentityServer Config class for Angular client
Let’s run our client and test it.
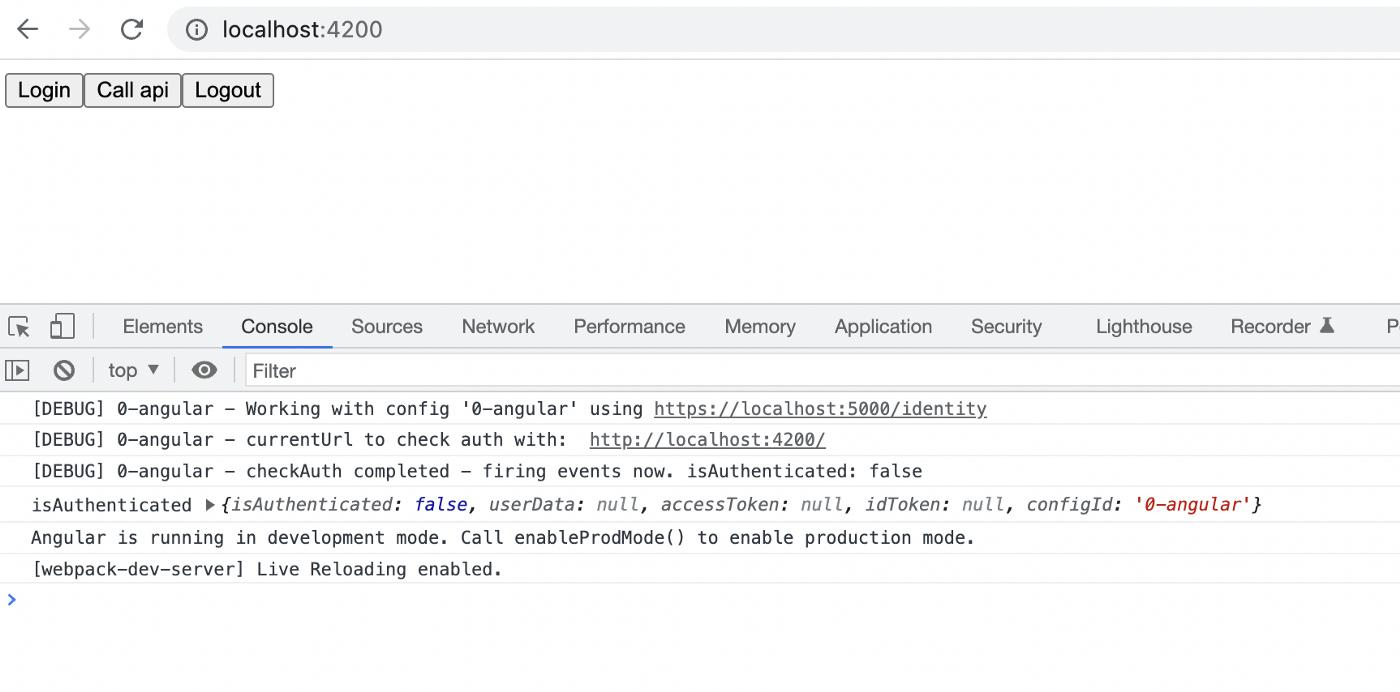
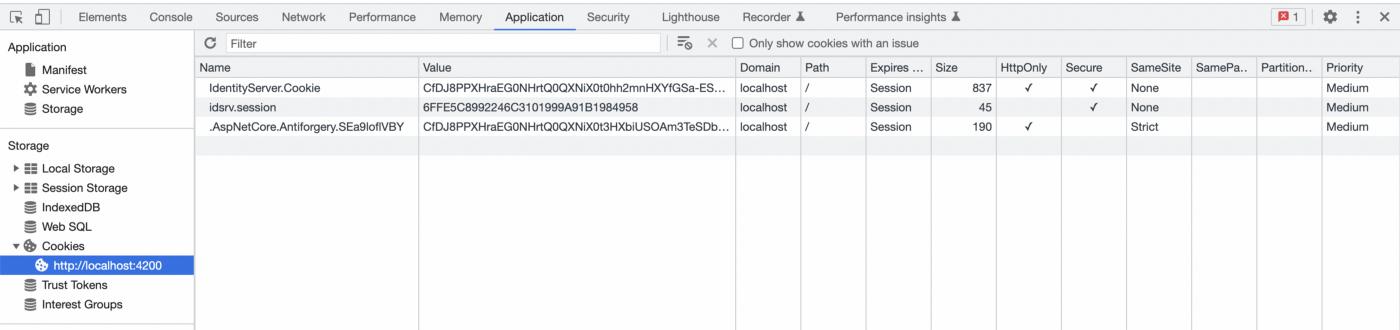
We will see that the login button redirects us to the Login page of our IdentityServer. If no user has been added before, you can login with the Register page. After successfully logging in, IdentityServer will set a cookie and redirect us back to the client.

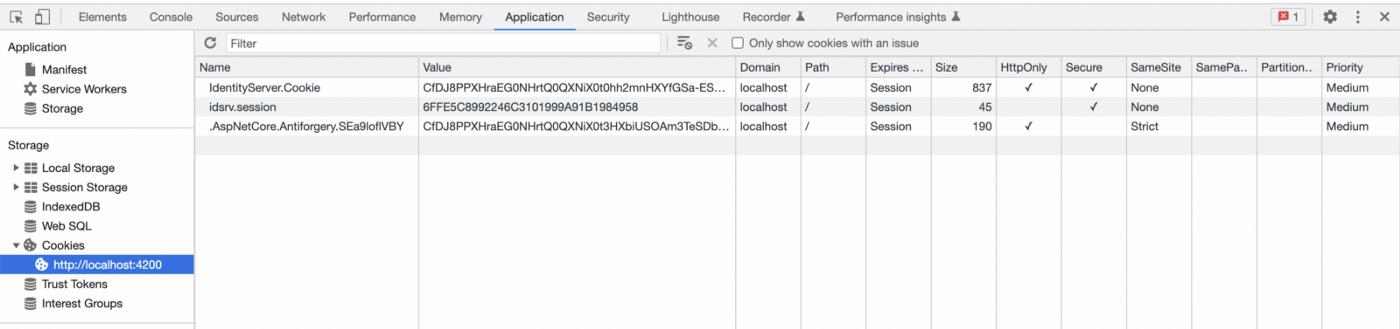
The logout process will allow you to successfully delete the cookie and log out. Thus, we have come to the end of our article. Feel free to review the source code and leave a star :)
Not: I would like to thank Mehmet Ozkaya and Raw Coding , whose resources helped me a lot in writing this article. I leave the links of the resources I have used below.
GitHub - aspnetrun/run-aspnet-identityserver4: Secure microservices with using standalone Identity…
Secure microservices with using standalone Identity Server 4 and backing with Ocelot API Gateway. Protect our ASP.NET…
github.com
GitHub - dotnet-architecture/eShopOnContainers: Cross-platform .NET sample microservices and…
Cross-platform .NET sample microservices and container based application that runs on Linux Windows and macOS. Powered…
github.com
GitHub - T0shik/aspnetcore3-authentication
You can't perform that action at this time. You signed in with another tab or window. You signed out in another tab or…
github.com
GitHub - damienbod/angular-auth-oidc-client: npm package for OpenID Connect, OAuth Code Flow with…
Secure your Angular app using the latest standards for OpenID Connect & OAuth2. Provides support for token refresh, all…
github.com


 已为社区贡献35528条内容

所有评论(0)