使用 Loki、Promtail 和 Grafana 进行日志聚合和可视化。
在本博客中,我们将集成 Loki、Promtail 和 Grafana。 Promtail-Loki-Grafana 是一种端到端的日志记录解决方案,用于获取日志以在集中位置进行可视化。在进入服务集成之前,我们将从了解每个组件的角色开始。 促销 Promtail 是一种代理,可将本地日志的内容传送到私有 Grafana Loki 实例或 Grafana Cloud。它通常部署到每台需要监控应用程序
在本博客中,我们将集成 Loki、Promtail 和 Grafana。
Promtail-Loki-Grafana 是一种端到端的日志记录解决方案,用于获取日志以在集中位置进行可视化。在进入服务集成之前,我们将从了解每个组件的角色开始。
促销
Promtail 是一种代理,可将本地日志的内容传送到私有 Grafana Loki 实例或 Grafana Cloud。它通常部署到每台需要监控应用程序的机器上。
它主要是
-
发现目标
-
将标签附加到日志流
-
将它们推送到 Loki 实例。
洛基
Loki 是一个受 Prometheus 启发的水平可扩展、高可用、多租户日志聚合系统。它的设计非常具有成本效益且易于操作。它不索引日志的内容,而是为每个日志流设置一组标签。
格拉法纳
Grafana 是多平台开源分析和交互式可视化 Web 应用程序。当连接到受支持的数据源时,它会为 Web 提供图表、图形和警报。
概述

Promtail 实例将从机器中获取日志文件,并将其推送到 Loki 实例。 Loki 将隔离原木并在其上贴上标签。一旦日志在 Loki 可用,我们就可以将数据源添加到 Grafana 以将其可视化。我们可以在下面看到端到端的配置。我们将使用 docker-compose 来部署所有组件。
1\。创建 Promtail 配置
promtail-config.yaml
--------------------------------------------------------------------

server:
 http_listen_port: 9080
 grpc_listen_port: 0
clients:
 - url: http://loki:3100/loki/api/v1/push
scrape_configs:
- job_name: myapplogs
  static_configs:
  - targets:
     - localhost
    labels:
       job: varlogs
       __path__: /var/log/*log
在 URL 字段下为 Loki 配置推送 API。添加需要监控的日志文件路径的_path_。
2\。创建 Loki 配置
loki-config.yaml
--------------------------------------------------------------------
auth_enabled: false
server:
  http_listen_port: 3100
  grpc_listen_port: 9096
ingester:
  wal:
    enabled: true
    dir: /tmp/wal
  lifecycler:
    address: 127.0.0.1
    ring:
      kvstore:
        store: inmemory
      replication_factor: 1
    final_sleep: 0s
  chunk_idle_period: 1h       # Any chunk not receiving new logs in this time will be flushed
  max_chunk_age: 1h           # All chunks will be flushed when they hit this age, default is 1h
  chunk_target_size: 1048576  # Loki will attempt to build chunks up to 1.5MB, flushing first if chunk_idle_period or max_chunk_age is reached first
  chunk_retain_period: 30s    # Must be greater than index read cache TTL if using an index cache (Default index read cache TTL is 5m)
  max_transfer_retries: 0     # Chunk transfers disabled
schema_config:
  configs:
    - from: 2020-10-24
      store: boltdb-shipper
      object_store: filesystem
      schema: v11
      index:
        prefix: index_
        period: 24h
storage_config:
  boltdb_shipper:
    active_index_directory: /tmp/loki/boltdb-shipper-active
    cache_location: /tmp/loki/boltdb-shipper-cache
    cache_ttl: 24h         # Can be increased for faster performance over longer query periods, uses more disk space
    shared_store: filesystem
  filesystem:
    directory: /tmp/loki/chunks
compactor:
  working_directory: /tmp/loki/boltdb-shipper-compactor
  shared_store: filesystem
limits_config:
  reject_old_samples: true
  reject_old_samples_max_age: 168h
chunk_store_config:
  max_look_back_period: 0s
table_manager:
  retention_deletes_enabled: false
  retention_period: 0s
ruler:
  storage:
    type: local
    local:
      directory: /tmp/loki/rules
  rule_path: /tmp/loki/rules-temp
  alertmanager_url: http://localhost:9093
  ring:
    kvstore:
      store: inmemory
  enable_api: true
对于这个演示,我们将数据存储在内存中。其他可以使用的商店是;
-
亚马逊 DynamoDB
-
谷歌大表
-
Apache Cassandra
-
亚马逊 S3
-
谷歌云存储
3\。创建 Docker Compose 文件
docker-compose.yml
--------------------------------------------------------------------
version: "3"
networks:
  loki:
services:
  loki:
    image: grafana/loki:latest
    ports:
      - "3100:3100"
    volumes:
      - /etc/loki:/etc/loki
    command: -config.file=/etc/loki/loki-config.yaml
    networks:
      - loki
promtail:
    image: grafana/promtail:latest
    volumes:
      - /etc/promtail:/var/log
      - /etc/promtail:/etc/promtail
    command: -config.file=/etc/promtail/promtail-config.yaml
    networks:
      - loki
grafana:
    image: grafana/grafana:latest
    ports:
      - "3000:3000"
    networks:
      - loki
使用公共网络配置所有服务。对于此示例,它是 Loki。将卷添加到所有服务以获取配置文件和日志文件。将端口映射添加到 Loki 和 Grafana。
4\。运行 Docker 文件。
docker-compose up
在 docker-compose 文件所在的目录中运行上述命令。一旦你运行它,所有的容器都会启动'
⠿ Container promtail-loki-grafana-using-docker-compose-loki-1      Created                                                                      0.0s
 ⠿ Container promtail-loki-grafana-using-docker-compose-promtail-1  Created                                                                      0.0s
 ⠿ Container promtail-loki-grafana-using-docker-compose-grafana-1   Created
5\。测试服务
通过点击localhost:3100/ready测试 Loki 服务
 如果您收到上述响应,您的 Loki 和 Promtail 配置成功。
在 Grafana 中添加 Loki 作为数据源登录到localhost:3000。
默认密码:admin
默认用户:管理员
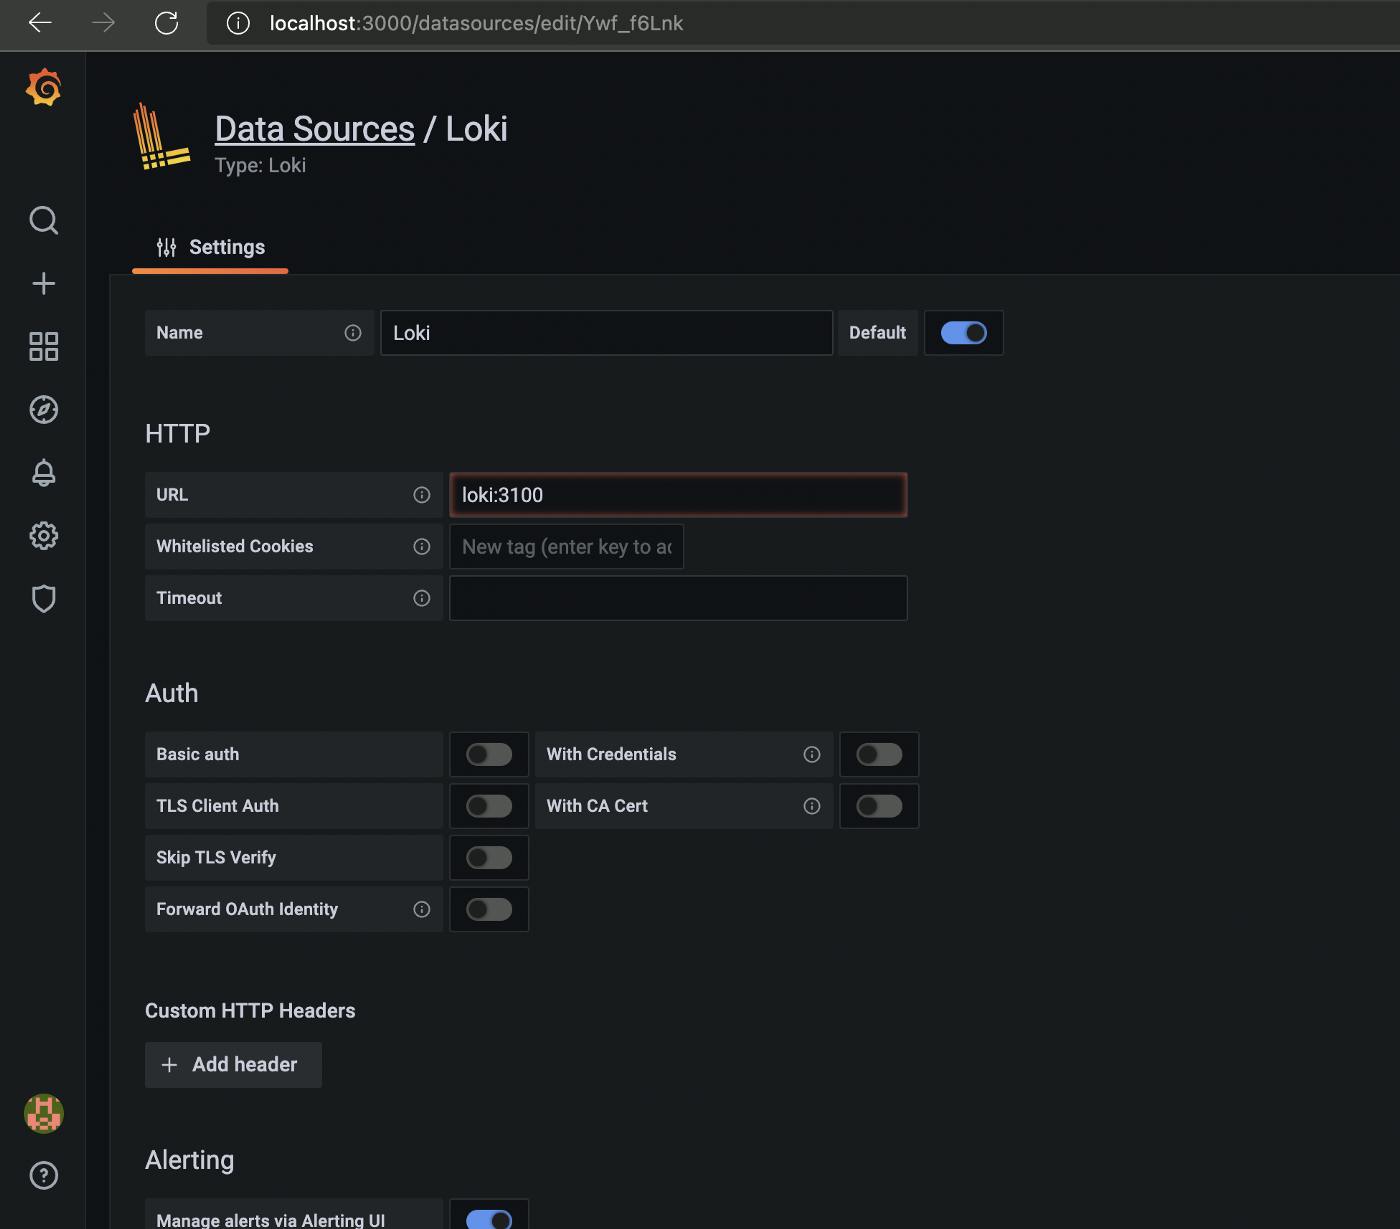
在数据源配置中添加 Loki URL。
 保存并测试连接。
6\。可视化日志。
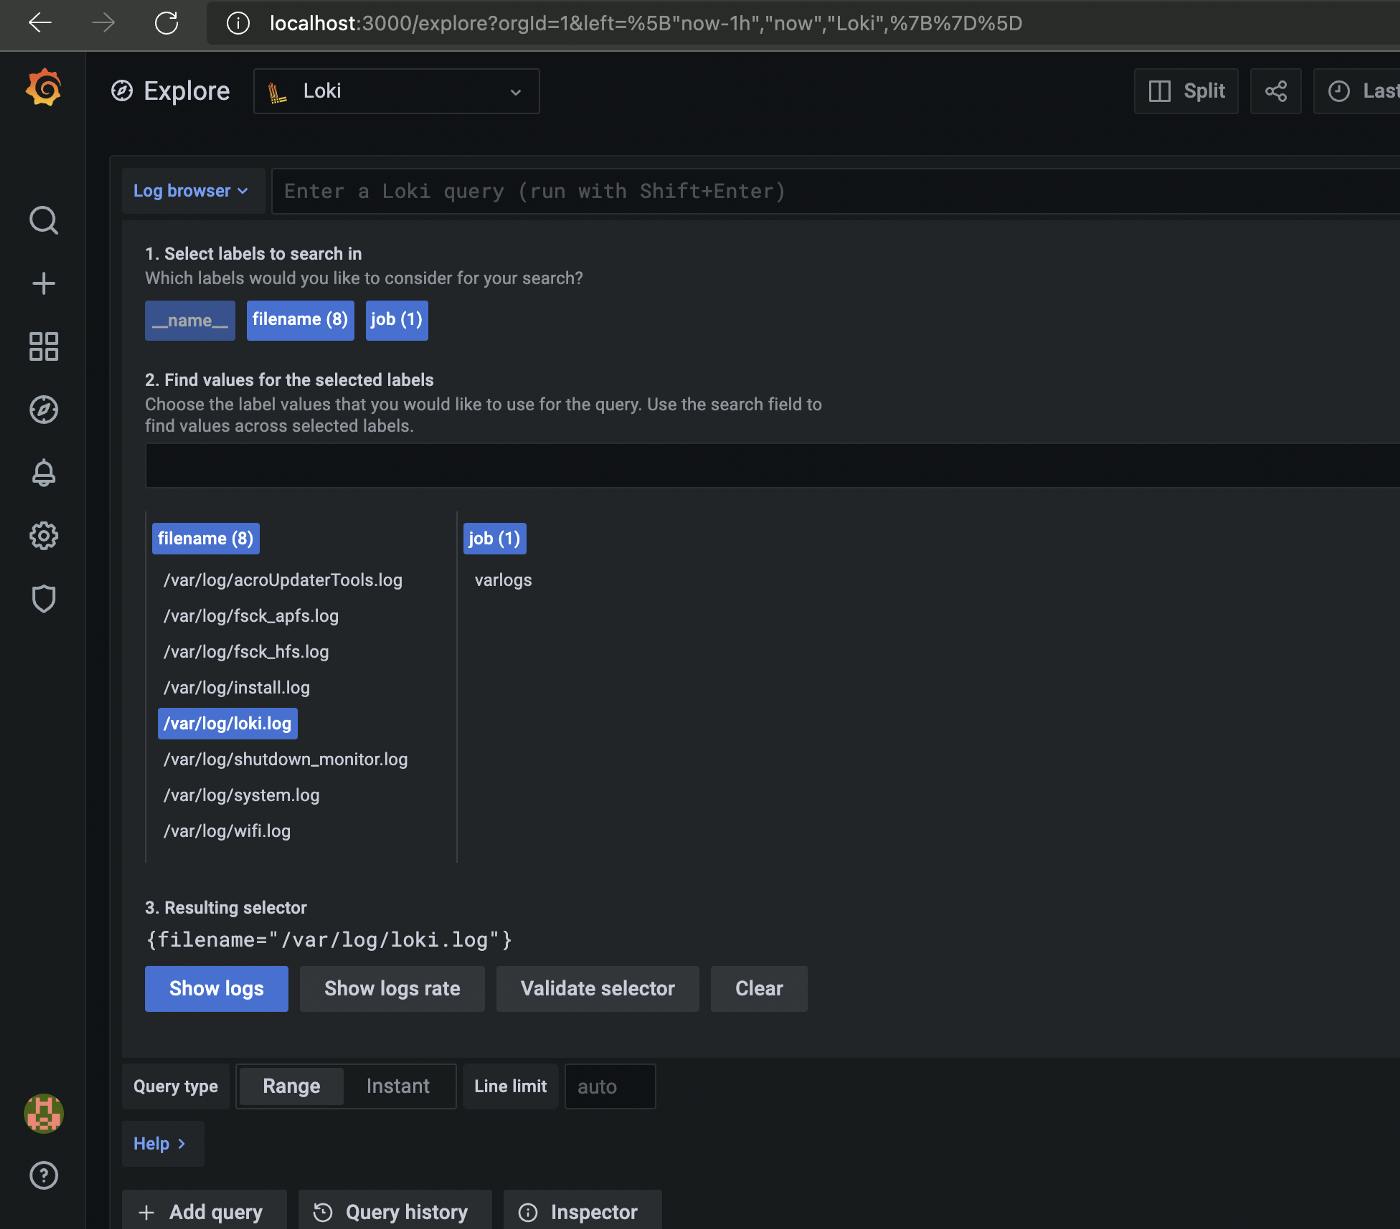
单击探索并选择 Loki 作为数据源。添加所需的过滤器以获取确切的日志文件。

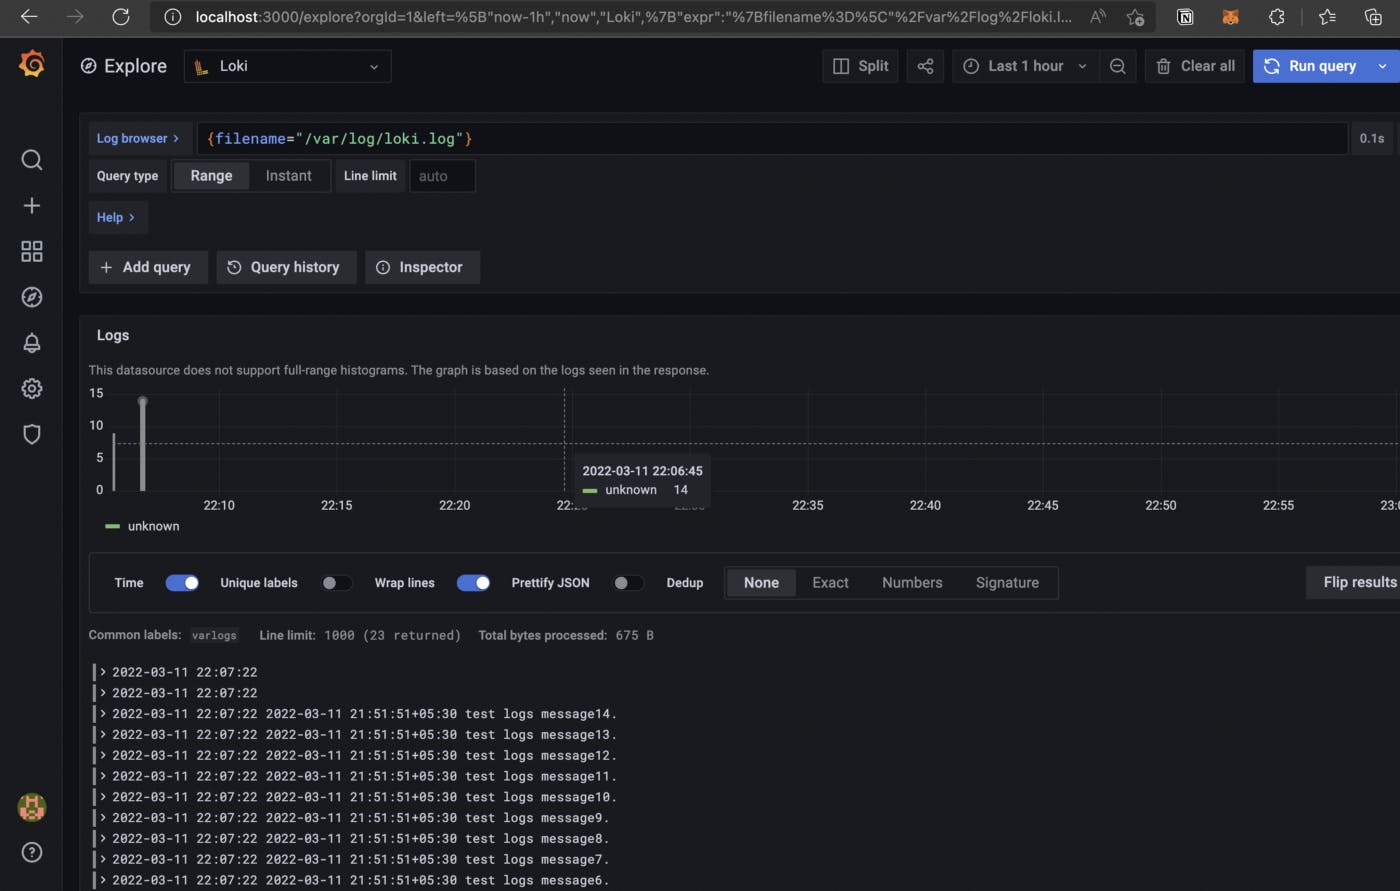
点击显示日志。

最后,可以在仪表板中看到日志。
谢谢阅读。我希望这个故事对您有所帮助。有兴趣的可以看看我的其他文章。
更多推荐
 已为社区贡献35531条内容


所有评论(0)