TypeScript
Step-by-Step Guide: NestJS Applications with TypeScript, gRPC, API Gateway, Authentication, and Validation
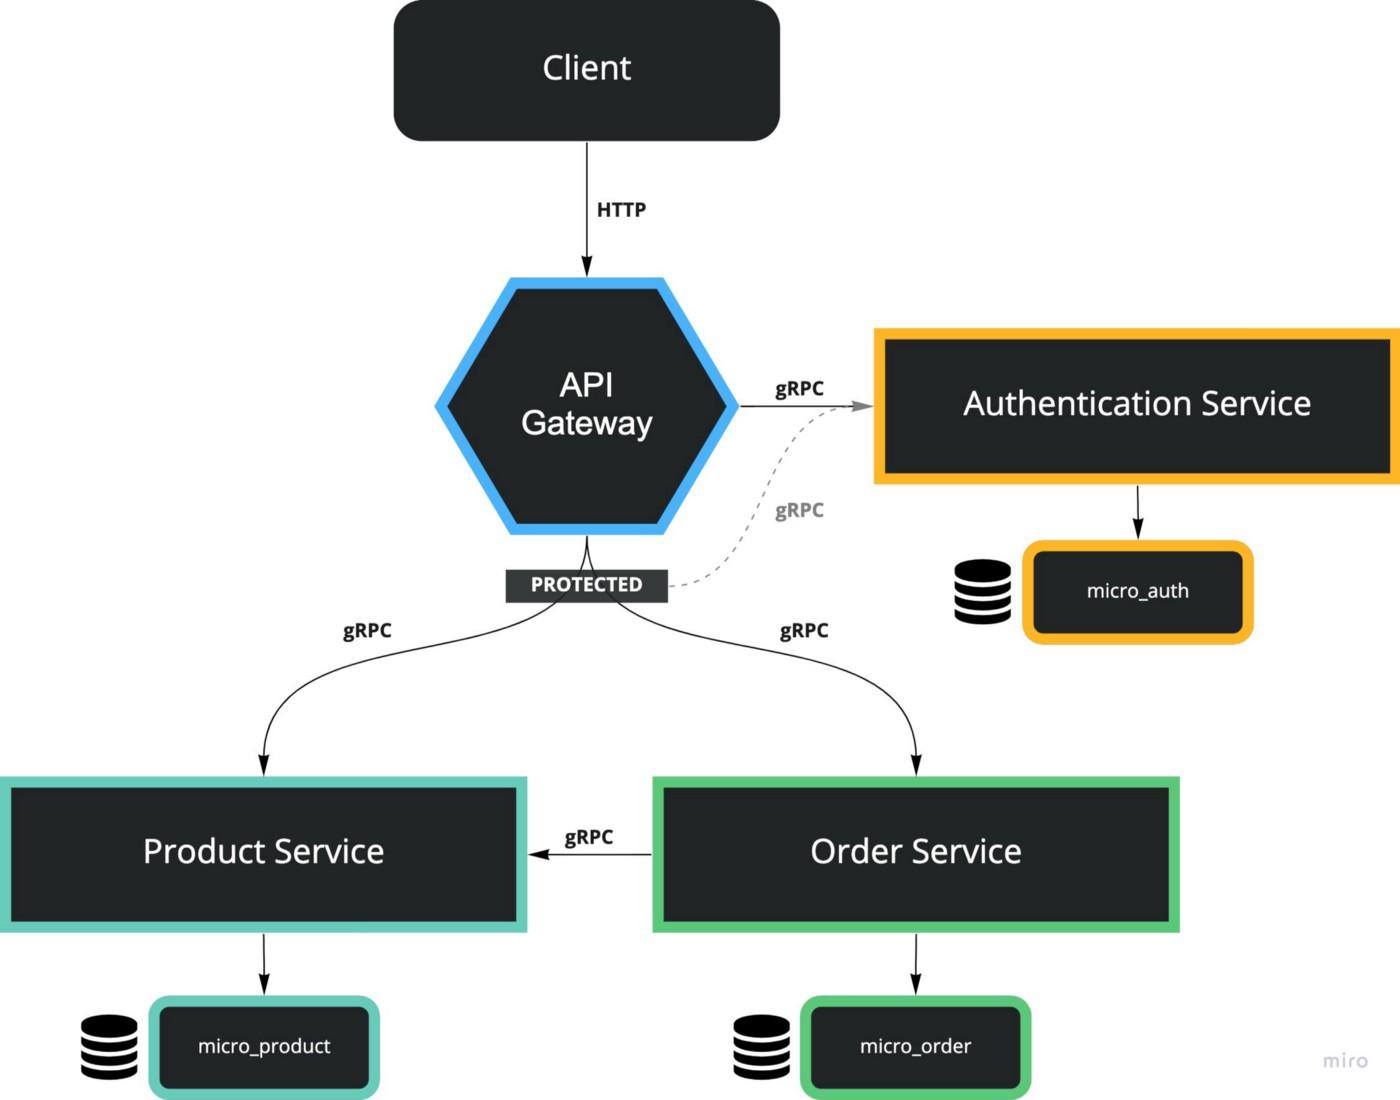
Today, I wanna introduce you to Microservices in NestJS (TypeScript) combined with Google’s gRPC framework, and API Gateway to handle incoming HTTP requests and authentication based on JWT. This article got very long, so I split it into 2 parts.
- Introduction, Preparation, Databases, Shared Proto Project
- Authentication Microservice, Product Microservice, Order Microservice
You’ll find a link to each repository in each section of this article. You can read the second part here.
Application Infrastructure
For this article, I decided to code a simple e-commerce Microservice project with an API Gateway that manages incoming HTTP requests and forwards them to the Microservices which will be 3 in total.
- The first service will be authentication, where users can sign up and sign in while we validate the request’s authorization.
- The second service will handle products to create a new product but also find a product based on its ID.
- This is important for the third service which handles incoming orders for our small e-commerce application.
You will see, that each of these services is as minimal as possible to introduce you to the basics of microservices in NestJS and TypeScript, while not blowing up our application.
We won’t deal with environment variables, deadlines, deep error handling, docker, and complex configurations. So don’t worry, we keep it simple!
Each service will be a standalone project, so keep that in mind. Additionally, we will have a shared repository, where we store and manage the Proto files, which is common practice when you work with gRPC. Last but not least, we will create another project which will be the API Gateway. So we talk about 5 projects in total.
Before we start with this guide, let's talk briefly about what frameworks and concepts we going to use here. It might sound boring, but stick with me, it’s essential to know what is going to happen to follow along and understand the application we going to build.
What is NestJS?
NestJS is a framework for building efficient, scalable Node.js web applications. It uses modern JavaScript and is built with TypeScript. If you develop an API built with TypeScript, then NestJS is the way to go! It’s heavily inspired by Spring and Angular.
What is gRPC?
gRPC is a modern, open-source, high-performance RPC framework that can run in any environment. It can efficiently connect services in and across data centers with pluggable support for load balancing, tracing, health checking, and authentication.
What is an API Gateway?
An API gateway is an entry point for all clients, in our case, for all client requests based on HTTP, but it doesn’t need to be limited to HTTP only. The API gateway handles requests in one of two ways. Some requests are simply proxied/routed to the appropriate service. It handles other requests by fanning out to multiple services.

Step-by-Step Guide
As I said, I split this article into 2 parts. The coverage will be like this:
- Databases, Shared Proto Project, API Gateway
- Authentication Microservice, Product Microservice, and Order Microservice
Prerequisites
It’s required to have a basic understanding of TypeScript, RPC, Git (+ Github), PostgreSQL which you have installed locally on your machine. I will choose Visual Studio Code as my code editor. You can use whatever you prefer.
Attention
You’ll see the command code . quite often in this article. This is a Visual Studio Code command which opens Visual Studio Code based on the current directory. If you don’t use Visual Studio Code, make sure, you open the right directory in your IDE or code editor.
Database
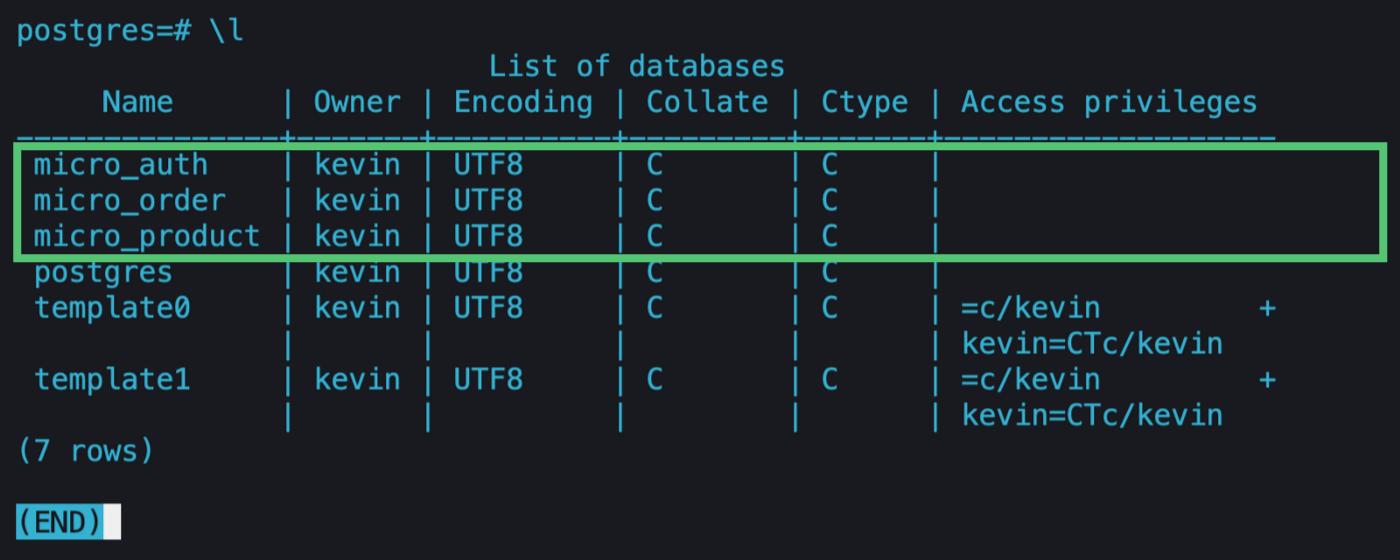
First, we need to create 3 PostgreSQL databases. This is because we’ll follow the Database per Service pattern. Every single microservice will have its database to be even independent when it comes to data management.
Everybody handles that differently, some people use some sort of GUI, but we going to use our terminal. Again, you need to have PostgreSQL installed on your machine. If you have PostgreSQL installed, the following four commands will run on Linux, Mac, and Windows machines.
$ psql postgres
$ CREATE DATABASE micro_auth;
$ CREATE DATABASE micro_product;
$ CREATE DATABASE micro_order;
$ \l
$ \q
Command Explanation:
psql postgresopens the psql CLI with user PostgresCREATE DATABASE micro_auth;creating the databaseCREATE DATABASE micro_product;creating the databaseCREATE DATABASE micro_order;creating the database\llist all databases\qquitting the psql CLI
My terminal would look like this after we executed all four commands successfully. As we can see, the 3 databases were created successfully.
Creating Projects
Let’s continue with NestJS. We are going to install the NestJS CLI globally.
$ npm i -g @nestjs/cli
We initialize 4 new NestJS projects with its CLI. Additionally, we create a project for our proto files we going to share by Github.
I recommend creating a folder as workspace where you going to execute the following commands in your terminal, to have all projects in one place, but this is up to you. So it’s not part of this guide.
$ mkdir grpc-nest-proto
$ nest new grpc-nest-api-gateway -p npm
$ nest new grpc-nest-auth-svc -p npm
$ nest new grpc-nest-product-svc -p npm
$ nest new grpc-nest-order-svc -p npm
Shared Proto Repository
So, as I said, we going to start with the shared proto project. We need to do this because we have to use these files in all other projects.
Github: https://github.com/hellokvn/grpc-nest-proto
First, we need to open the project in our code editor, this command code . command opens the grpc-proto project in our VSCode editor.
$ cd grpc-nest-proto
$ npm init --y
$ git init
$ mkdir proto
$ touch proto/auth.proto && touch proto/product.proto && touch proto/order.proto
$ code .
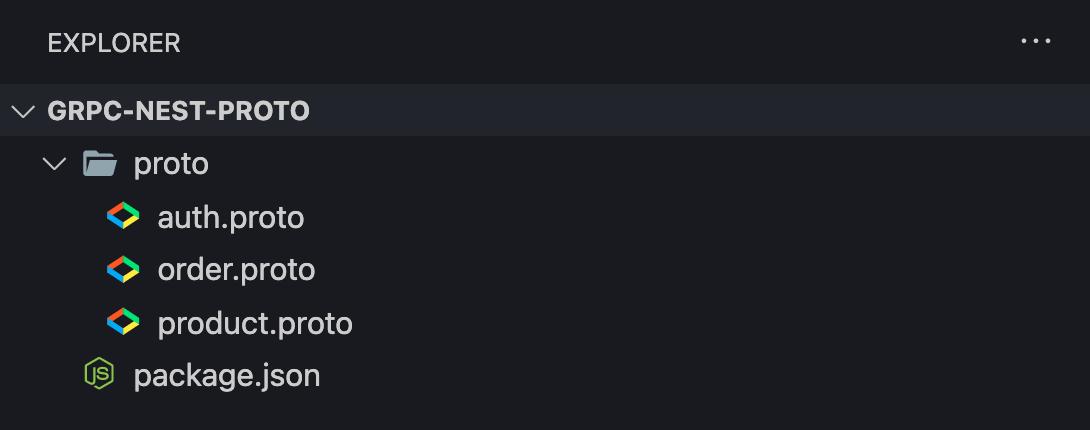
The project will look like this:
Then, we going to add some code to our proto files. Follow me along.
Auth Proto
First, we going to create the Proto file for our Authentication Service. We’ll add 3 RPC endpoints: Register, Login, and Validate
Let’s add some code to proto/auth.proto
Order Proto
Second, we going to create the Proto file for our Order Service. We’ll add only 1 RPC endpoint called CreateOrder.
Let’s add some code to proto/order.proto
Product Proto
Last but not least, we going to create the Proto file for our Product Service. We’ll add 3 RPC endpoints: CreateProduct, FineOne and DecreaseStock
Let’s add some code to proto/product.proto
Creating a Repository on Github
As I said, we need to share this project somehow. For this guide, I choose Github. So let’s create a public repository here. By the way, this is the only repository you need to create in this tutorial. We’ll install this repository as an NPM package later in our projects.
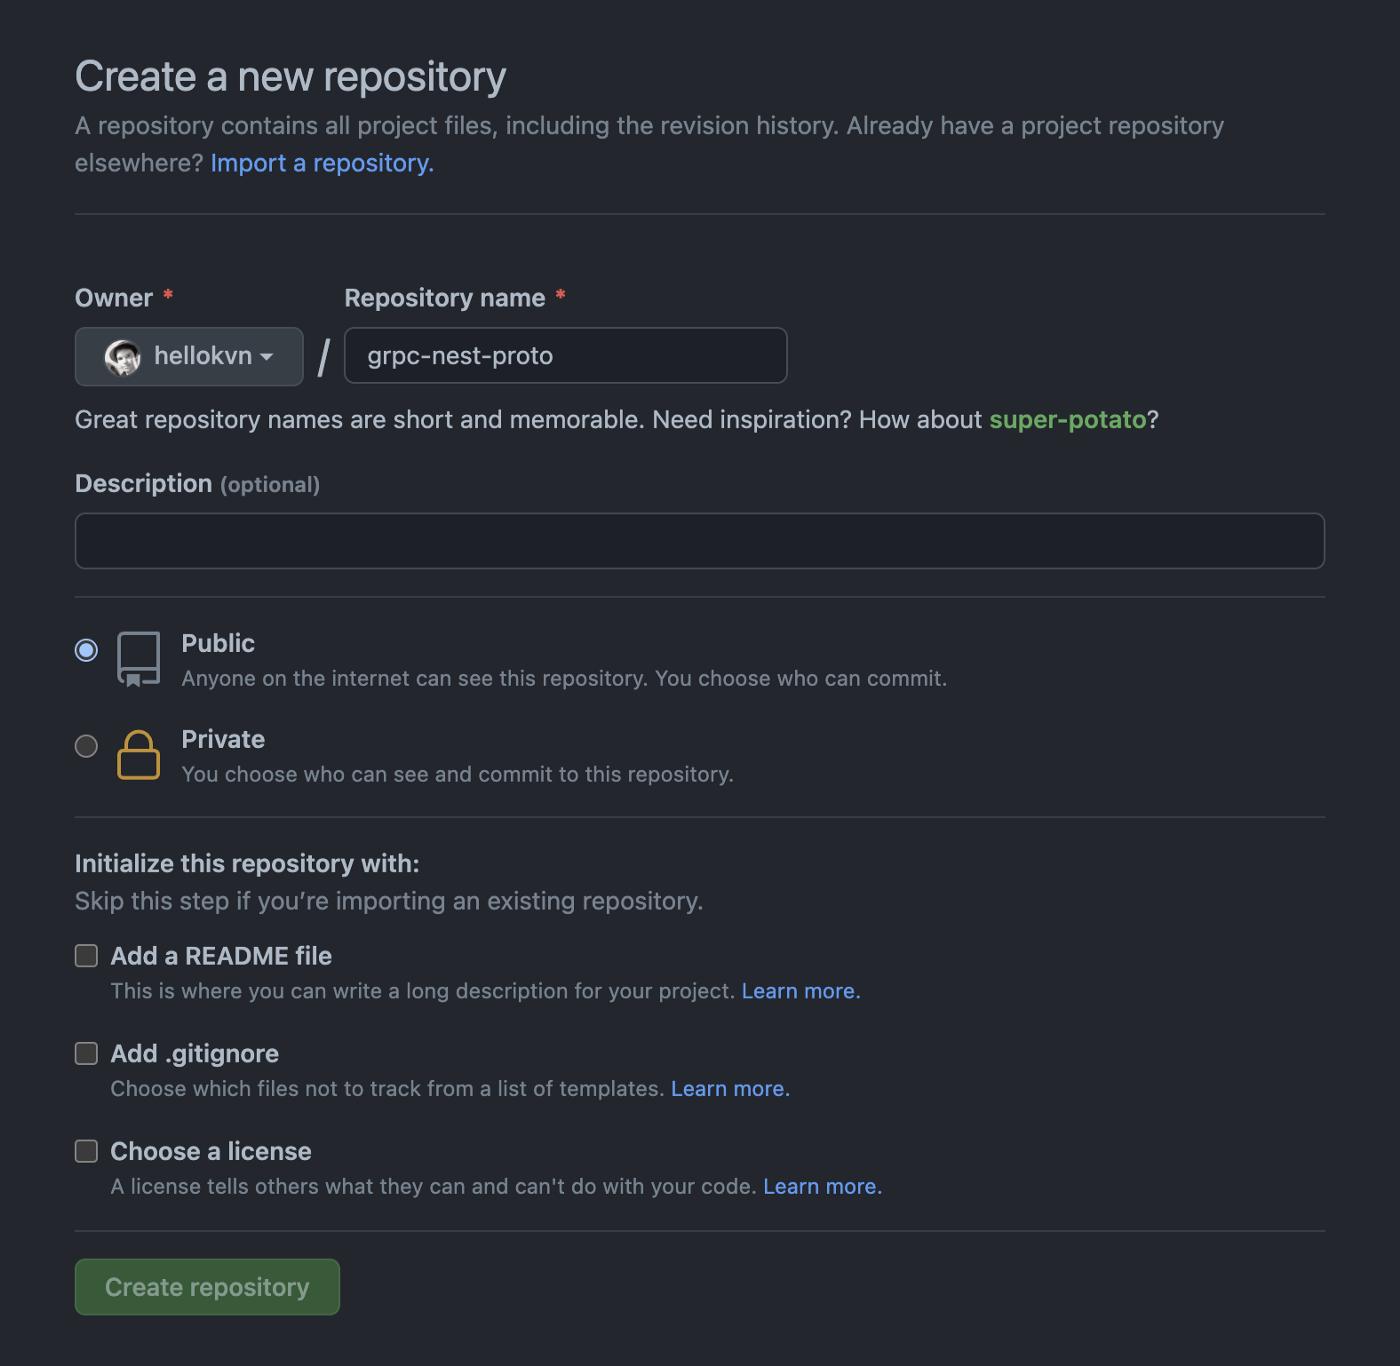
Let’s go back to our code because we need to commit and push our project.
Replace YOUR_USERNAME with your Github username.
$ git remote add origin https://github.com/YOUR_USERNAME/grpc-nest-proto.git
$ git add .
$ git commit -m "chore(): init nestjs"
$ git branch -M main
$ git push -u origin main
That’s it. Now our code should be on Github. We won’t do any changes here anymore, let’s move forward to the API Gateway.
API Gateway
Repository: https://github.com/hellokvn/grpc-nest-api-gateway
In this project, we going to forward our HTTP requests to our Microservices. Sometimes, it’s required to authorize incoming requests, and that’s what is partly happening here in the combination with our Auth Service we are going to code later.
First, we need to open the project in our code editor, so go back inside your terminal to the directory, where we store our projects.
$ cd grpc-nest-api-gateway
$ code .
Installing Dependencies
Let’s install some dependencies we are going to need.
$ npm i @nestjs/microservices @grpc/grpc-js @grpc/proto-loader
$ npm i -D @types/node ts-proto
Project Structure
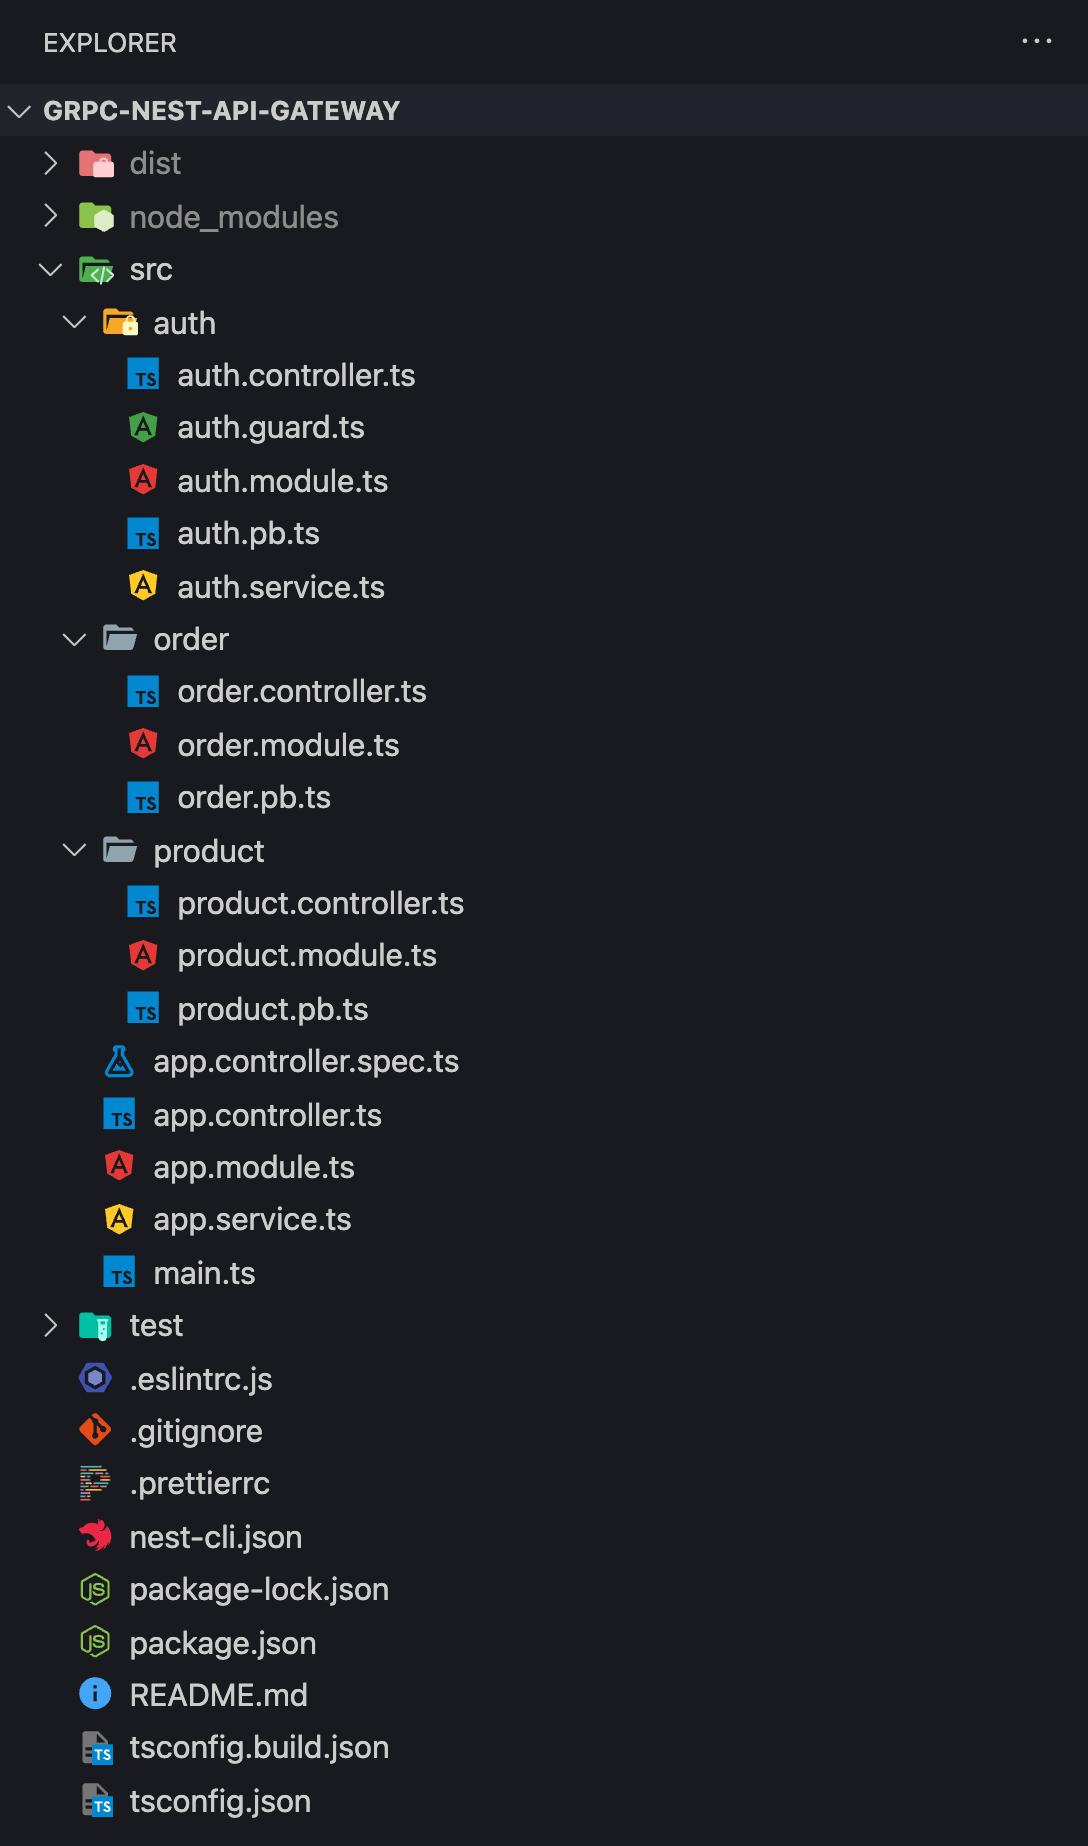
As usual in my guides, I will continue with creating the final folder and file structure. For simplicity, we just go for a single module here.
$ nest g mo auth && nest g co auth --no-spec && nest g s auth --no-spec
$ nest g mo product && nest g co product --no-spec
$ nest g mo order && nest g co order --no-spec
$ touch src/auth/auth.guard.ts
Adding Scripts
We need to add some scripts to our package.json to generate our protobuf files based on the shared proto project we just completed.
Let’s simply add these 5 lines of code inside the scripts property of our package.json file.
Replace YOUR_USERNAME with your Github username.
This is how it will look at my package.json or check out this file on my repository.
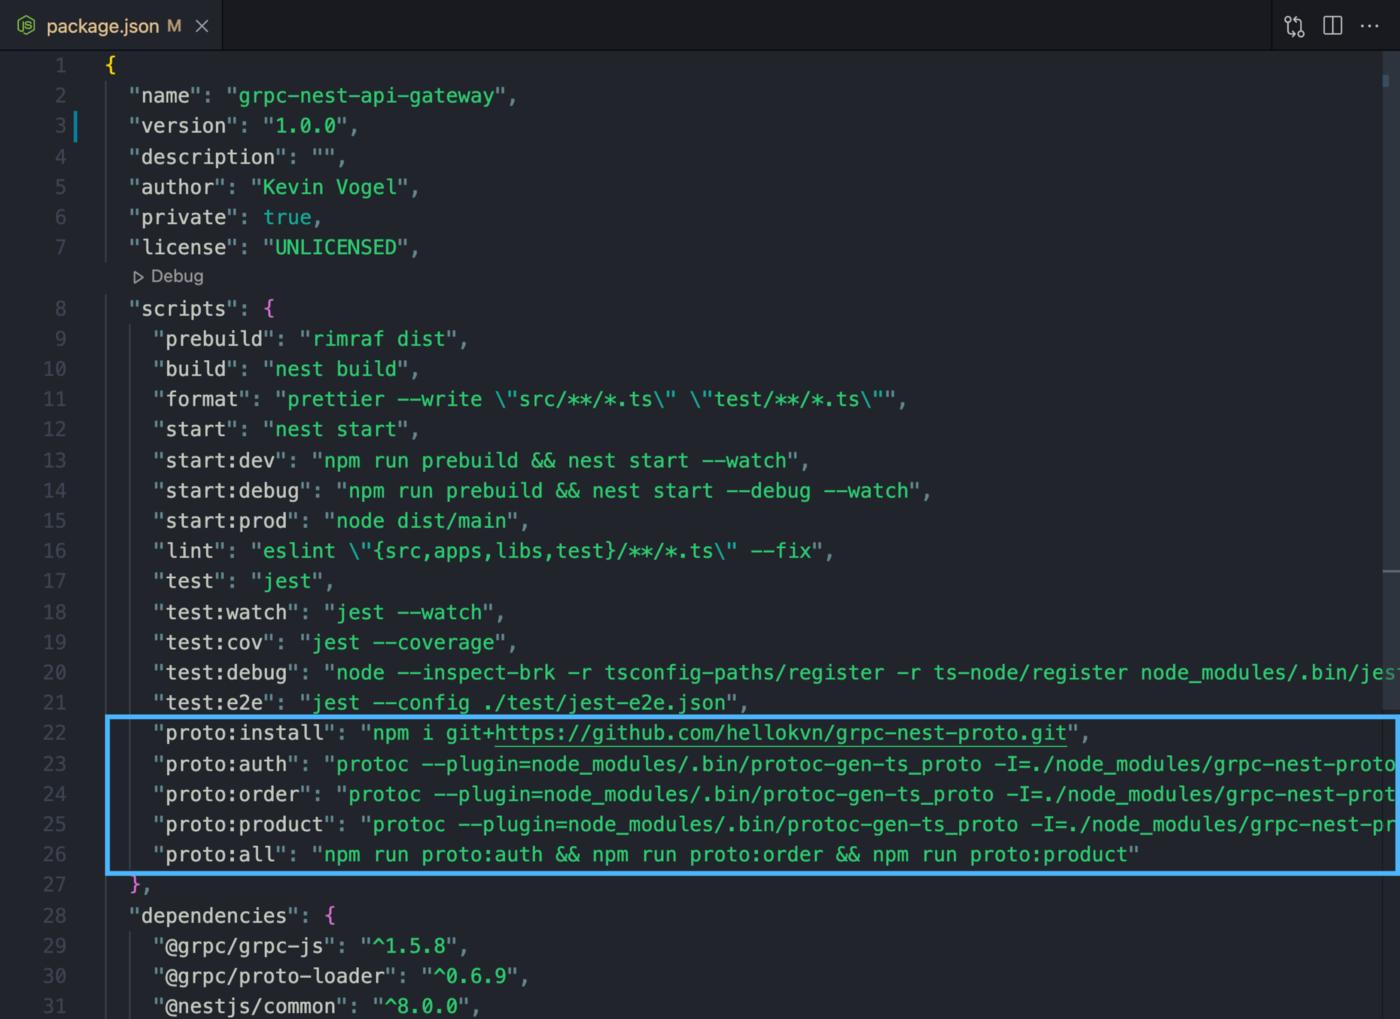
Let’s run these scripts!
$ npm run proto:install && npm run proto:all
proto:installwill install our shared proto repository as an NPM packageproto:allwill generate our protobuf files with the suffix of.pb.tsinside our modules:auth,order, andproduct
So after these steps, the project should look like this:
Now, let’s start to code.
AuthService
So what we going to do here is to get our Authentication Service to call its validate method we going to code later. But, we already can prepare it, since we have its protobuf file. We know its response and payload.
Let’s change src/auth/auth.service.ts from
to
Auth Guard
Our AuthGuard depends on the service we just created. Here we get the Bearer Token which we are going to get later. Then we validate this token, if it’s invalid, we throw an unauthorized exception, so we block a request for users without a valid authorization.
Let’s change src/auth/auth.guard.ts from
Auth Controller
The Auth Microservice will also take care of new users and user logins, so we also add a controller in our API Gateway to forward these requests to our Authentication Microservice.
Let’s change src/auth/auth.controller.ts from:
to
Auth Module
Now we need to register our Authentication Service. We going to need to make this module global and export our AuthService because we need to use our AuthGuard, which depends on the AuthService, inside our other modules. So keep this in mind.
Let’s change src/auth/auth.module.ts file
to
Now we are done with the auth module of our API Gateway. Let’s continue with the order module. It’s way simpler than our auth module.
Order Module
Similar to our AuthModule, we need to register our Order Microservice to communicate with it later.
Probably, you’ll realize, that we’re going to use a different port compared to the Authentication Service, this is necessary because we can’t use the same port twice.
Let’s change src/order/order.module.ts form
to
Order Controller
Here we need to code just 1 endpoint because our Order Microservice just owns 1 endpoint. Have a look, we going to use our AuthGuard service here, to validate the authorization of this POST request we going to code now.
If the user who makes this request is authorized, the AuthGuard adds the user’s ID to the request, which we going to merge with the request body in here, since our protobuf file order.pb.ts requires a User ID.
Let’s change src/order/order.controller.ts form
to
Product Module
Now let’s kinda repeat this process for our Product module of our API Gateway.
Let’s change src/product/product.module.ts from
to
Product Controller
The Product Microservice contains 3 endpoints, but DecreaseStock shouldn’t be reachable from our API Gateway, that’s why just going to add the 2 other endpoints.
Let’s change src/product/product.controller.ts form
to
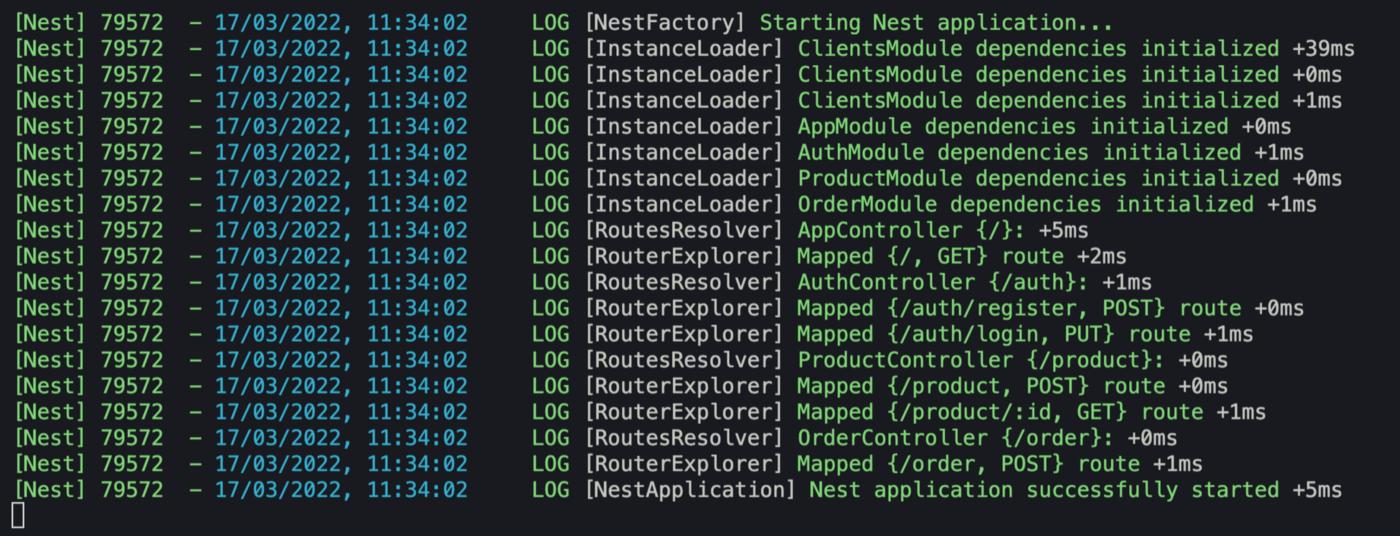
Great! That’s it. The API Gateway has been completed. Now we can run it. Unfortunately, this API Gateway is useless without its microservices, so let’s continue with Part 2 of this article.
$ npm run start:dev
Thanks for reading the first part of my article about Microservices with NestJS. Click here to get to Part 2.
Cheers!
I hope you enjoyed reading this. If you’d like to support me as a writer, consider signing up to become a Medium member. It’s just $5 a month and you get unlimited access to Medium.
Want to support me? Buy me a coffee.
Read Next
NestJS: Microservices with gRPC, API Gateway, and Authentication — Part 2/2
Authentication Service (grpc-nest-auth-svc)
levelup.gitconnected.com
Level Up Coding
Thanks for being a part of our community! Hire incredible software engineers on the Level Up jobs platform.
Level Up Jobs Platform
The best roles for software engineers, data scientists, managers, designers, builders, and programmers
jobs.levelup.dev


 已为社区贡献35528条内容

所有评论(0)