

How I learned to stop worrying, and love the PHP container
If you’ve ever needed to run an nginx (engine x) web server using PHP-FPM (PHP FastCGI Process Manager) for development or otherwise, you know that configuration and setup is kind of a pain.
You have to spin up a VM or find a local server (which could also be your local dev box). Then you have to install and configure nginx. Then you have to install and configure PHP-FPM. Then you have to hope for the best.
This is usually done for every single project you work on due to, if for nothing else, the plethora of different settings in both PHP and nginx that have to be specifically set for that project.
With all of that said, I suppose I don’t need to convince you of the benefits if you’re still reading this article, now do I?
Definitions
Let’s get some definitions out of the way for those new to these technologies!
nginx
Pronounced “engine x”. For all intents and purposes in the context of this article, nginx is a web server. It is defined at http://nginx.org as:
A HTTP and reverse proxy server, a mail proxy server, and a generic TCP/UDP proxy server.
PHP
Pronounced “P H P” (I know, very clever). This is the both the language and engine used to build dynamic web sites equipped with any/all bells and whistles you can probably think of. For this article, we will be focused on the latest release (at the time of this writing) which is 8.1. However, this setup will at least work with 7.x versions (I have not tested it on versions prior to that). PHP is defined at https://www.php.net as:
A popular general-purpose scripting language that is especially suited to web development.
Fast, flexible and pragmatic, PHP powers everything from your blog to the most popular websites in the world.
PHP FPM
This is the FastCGI Process Manager for PHP, surprisingly enough called PHP FPM. This allows the PHP engine to be accessed by nginx via a socket or exposed TCP/IP port. It is incredibly fast, and generally provides the fastest response time for your application (vs. running PHP as a module in nginx or say Apache). Simply enough, it is defined at https://php-fpm.org as:
A simple and robust FastCGI Process Manager for PHP
Docker
What we use to create, build and run the container. You can run the container in Docker, in Kubernetes, and other cloud provider container services (such as Azure’s App Service). For the scope if this article, however, we will simply be running our container in Docker locally. It is defined at https://www.docker.com as:
Docker takes away repetitive, mundane configuration tasks and is used throughout the development lifecycle for fast, easy and portable application development — desktop and cloud. Docker’s comprehensive end to end platform includes UIs, CLIs, APIs and security that are engineered to work together across the entire application delivery lifecycle.
Prerequisites
Docker
We don’t really need PHP or nginx installed locally to containerize it (that’s the beauty of the container!). We do, however, need Docker so that we can test our container in just a bit, and the easiest way to do this on macOS or Windows is by installing Docker Desktop. If you’re on Linux, the install will (of course) be via a CLI install of Docker.
Note
Docker Desktop includes Docker App, developer tools, Kubernetes and version synchronization to production Docker Engines. Docker Desktop allows you to leverage certified images and templates and your choice of languages and tools. Development workflows leverage Docker Hub to extend your development environment to a secure repository for rapid auto-building, continuous integration and secure collaboration.
You can get the .dmg or .exe installer from Docker Desktop for Mac and Windows | Docker
On Windows
On Windows, installation is as simple as running the .exe (you know, the ol’ double click?).
On Mac
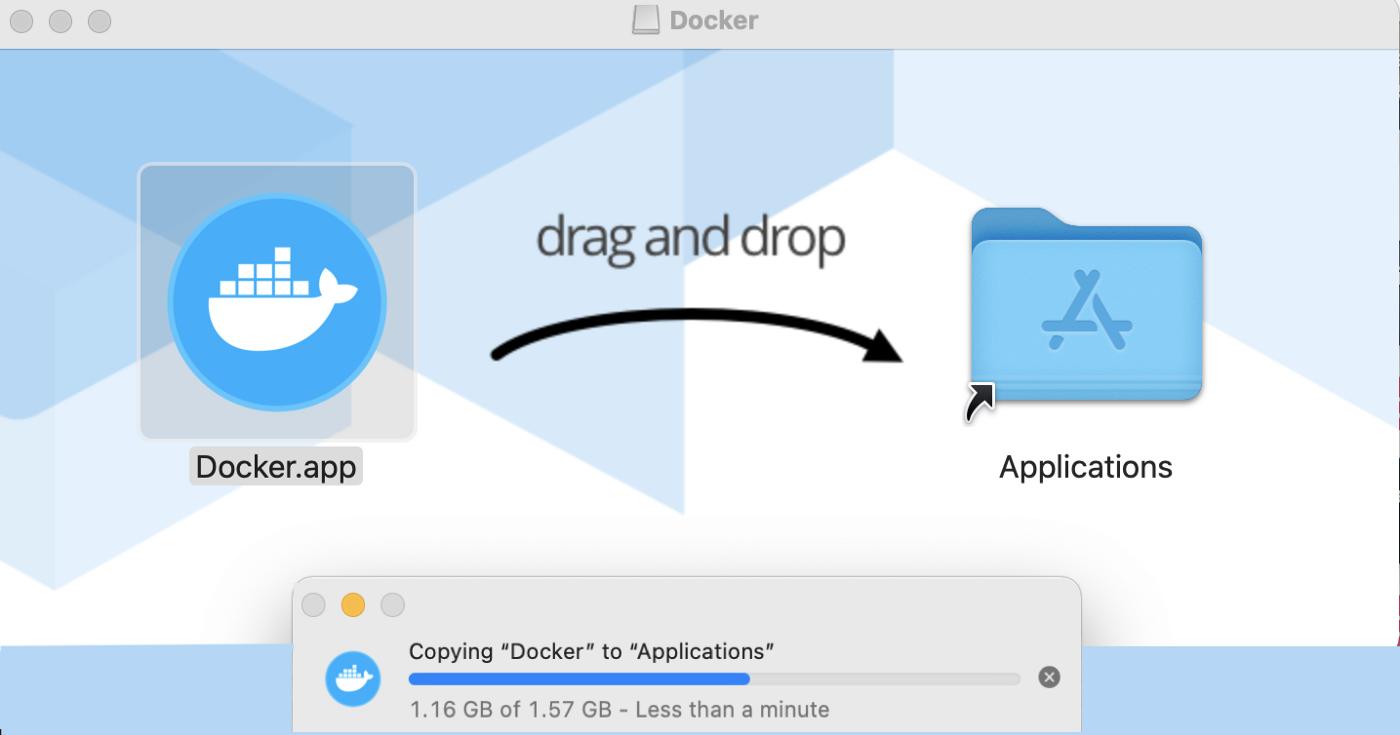
On macOS, installation is as simple as running the .dmg and then the common drag and drop to Applications.
Note
On macOS, you may need to start Docker from your Launchpad to allow it to initialize before you are able to use docker commands.
On Linux
So — on Linux, the install isn’t quite as easy, but it’s close! We’re going to perform this install on Ubuntu — but once again, the installation on other Linux platforms is similar.
Step 1 — Set up the Repository
1. Ensure there is no existing install.sudo apt-get remove docker docker-engine docker.io containerd runc
2. Refresh the APT repository.sudo apt-get update
3. Install supporting applications.
sudo apt-get install apt-transport-https ca-certificates curl gnupg lsb-release
4. Add Docker’s GPG key
curl -fsSL https://download.docker.com/linux/ubuntu/gpg | sudo gpg --dearmor -o /usr/share/keyrings/docker-archive-keyring.gpg
5. Set up the stable Docker repository
echo \
  "deb [arch=amd64 signed-by=/usr/share/keyrings/docker-archive-keyring.gpg] https://download.docker.com/linux/ubuntu \
  $(lsb_release -cs) stable" | sudo tee /etc/apt/sources.list.d/docker.list > /dev/null
Step 2 — Install Docker Engine
- Update the APT repository.
sudo apt-get update - Install Docker and containerd. This will install the latest stable version of Docker.
sudo apt-get install docker-ce docker-ce-cli containerd.io
3. Verify the Docker engine is working properly by downloading a sample container and running it.sudo docker run hello-world
This should generate a message in your shell that looks similar to this:
Unable to find image 'hello-world:latest' locallylatest: Pulling from library/hello-worldb8dfde127a29: Pull completeDigest: sha256:9f6ad537c5132bcce57f7a0a20e317228d382c3cd61edae14650eec68b2b345cStatus: Downloaded newer image for hello-world:latestHello from Docker!This message shows that your installation appears to be working correctly.
Docker Engine on Linux
Installation instructions for additional Linux distributions can be found here: https://docs.docker.com/engine/install/
All done! You have successfully installed and configured Docker!
The Project
Now that we have Docker ready to go, it’s time to set up our project. It’s going to consist of three main pieces:
- Server configuration including nginx, PHP and PHP FPM
- Content to serve
- Docker/Container configuration
Note
This is a very basic setup, and you will almost certainly want to, at a minimum, change the configuration in nginx and php for a production deployment.
Structure
We need to copy in our nginx and php config to the container to overwrite the default settings on install.
Note
You can follow along by cloning or just taking a look at the sample project i’ve provided here https://github.com/johnathanesanders/docker-nginx-fpm
I like to make a directory off of the project root called server and then mimic the linux filesystem from there. So we’ll create an etc directory with a nginx and a php subdirectory. Inside nginx we’ll create a conf.d subdirectory and inside php we’ll create a php-fpm.d subdirectory. All of this will result in a structure in the project root that looks like this:
server
   --- etc
       --- nginx
           --- conf.d
       --- php
           --- php-fpm.d
We will also need an src directory under our project root. This will be used to store our site content. Once this directory has been created, the root of the project directory should look like this:
<project root>
   --- server
       --- etc
           --- nginx
           --- conf.d
        --- php
            --- php-fpm.d
   --- src
Site Content
Let’s go ahead and knock out the easy pieces first, our site content. We’re only going to create two files an index.php and a 404.html to provide an example of how a .php file and a static .html file play together in this setup. Again, in a real-world environment, you’re going to have a lot more here (such as custom 5xx.html pages).
index.php
This is a simple phpinfo() call to show configuration info. Not a great index file, but it shows us what we need for this article!
<?php phpinfo(); ?>
404.html
An absolutely ugly 404 (not found) page. It simply shows how a plain html file can play nicely in our configuration.
<html>
    <head>
        <title>NOT FOUND</title>
    </head>
    <body>
        <h1>404 NOT FOUND!</h1>
        <h3>Oh noes...</h3>
    </body>
</html>
Server Configuration
In order to get nginx and php-fpm running properly in our container, we have to provide some changes to our configuration files. These are all located in the /etc directory in the container after creation, in the two directories off of etc that we created earlier under server under the project root: nginx and php.
Note
There are countless configuration options available for nginx, almost all of which are outside the scope of this article. To start learning more about configuration of nginx, check out the Admin Guide | NGINX
nginx/nginx.conf
This is the base nginx server configuration file. It is supplemented by site specific configuration files provided in conf.d under the nginx directory.
error_log /var/log/nginx/error.log notice;
events {
    worker_connections 1024;
}
http {
    default_type application/octet-stream;
    gzip on;
    include /etc/nginx/mime.types;
    include /etc/nginx/conf.d/*.conf;
    keepalive_timeout 65;
    log_format main '$remote_addr - $remote_user [$time_local "$request" ' '$status $body_bytes_sent "$http_referer" ' '"$http_user_agent" "$http_x_forwarded_for"';    access_log /var/log/nginx/access.log  main;
    sendfile on;
}
pid /var/run/nginx.pid;
user nginx;
worker_processes auto;
nginx/conf.d/default.conf
This is where you can define more than one site configuration (if you’re hosting multiple sites on the same server). That is outside the scope (and what is probably counter-productive to a containerized instance) of this article. Therefore, we’re just going to configure a default site configuration using default.conf.
server {
    index index.php index.html index.htm;
    listen 80;
    listen [::]:80;
    location / {
        try_files $uri $uri/ =404;
    }
    location ~ \.php$ {
        fastcgi_pass unix:/var/run/php/php8-fpm.sock;
        include fastcgi.conf;
    }
    root /usr/share/nginx/html;
    server_name localhost;
}
php/php-fpm.conf
As you might have derived from the name, this file manages the configuration for PHP-FPM. Unfortunately, there isn’t a lot of documentation around this file other than the comments provided in the initial file. We’re only going to verify and/or set one line that handles where to find additional php-fpm configuration. The entry that we’re looking for is typically found at the bottom of this file include=/etc/php8/php-fpm.d/*.conf. Keep in mind that if you’re NOT installing PHP8.x to your container, and instead using an older version of PHP, you’ll want to ensure the path reflects that accordingly. The entire file should look like this:
;;;;;;;;;;;;;;;;;;;;;
; FPM Configuration ;
;;;;;;;;;;;;;;;;;;;;;; All relative paths in this configuration file are relative to PHP's install
; prefix (/usr). This prefix can be dynamically changed by using the
; '-p' argument from the command line.;;;;;;;;;;;;;;;;;;
; Global Options ;
;;;;;;;;;;;;;;;;;;[global]
; Pid file
; Note: the default prefix is /var
; Default Value: none
;pid = run/php-fpm8.pid; Error log file
; If it's set to "syslog", log is sent to syslogd instead of being written
; into a local file.
; Note: the default prefix is /var
; Default Value: log/php8/error.log
;error_log = log/php8/error.log; syslog_facility is used to specify what type of program is logging the
; message. This lets syslogd specify that messages from different facilities
; will be handled differently.
; See syslog(3) for possible values (ex daemon equiv LOG_DAEMON)
; Default Value: daemon
;syslog.facility = daemon; syslog_ident is prepended to every message. If you have multiple FPM
; instances running on the same server, you can change the default value
; which must suit common needs.
; Default Value: php-fpm8
;syslog.ident = php-fpm8; Log level
; Possible Values: alert, error, warning, notice, debug
; Default Value: notice
;log_level = notice; Log limit on number of characters in the single line (log entry). If the
; line is over the limit, it is wrapped on multiple lines. The limit is for
; all logged characters including message prefix and suffix if present. However
; the new line character does not count into it as it is present only when
; logging to a file descriptor. It means the new line character is not present
; when logging to syslog.
; Default Value: 1024
;log_limit = 4096; Log buffering specifies if the log line is buffered which means that the
; line is written in a single write operation. If the value is false, then the
; data is written directly into the file descriptor. It is an experimental
; option that can potentionaly improve logging performance and memory usage
; for some heavy logging scenarios. This option is ignored if logging to syslog
; as it has to be always buffered.
; Default value: yes
;log_buffering = no; If this number of child processes exit with SIGSEGV or SIGBUS within the time
; interval set by emergency_restart_interval then FPM will restart. A value
; of '0' means 'Off'.
; Default Value: 0
;emergency_restart_threshold = 0; Interval of time used by emergency_restart_interval to determine when
; a graceful restart will be initiated.  This can be useful to work around
; accidental corruptions in an accelerator's shared memory.
; Available Units: s(econds), m(inutes), h(ours), or d(ays)
; Default Unit: seconds
; Default Value: 0
;emergency_restart_interval = 0; Time limit for child processes to wait for a reaction on signals from master.
; Available units: s(econds), m(inutes), h(ours), or d(ays)
; Default Unit: seconds
; Default Value: 0
;process_control_timeout = 0; The maximum number of processes FPM will fork. This has been designed to control
; the global number of processes when using dynamic PM within a lot of pools.
; Use it with caution.
; Note: A value of 0 indicates no limit
; Default Value: 0
; process.max = 128; Specify the nice(2) priority to apply to the master process (only if set)
; The value can vary from -19 (highest priority) to 20 (lowest priority)
; Note: - It will only work if the FPM master process is launched as root
;       - The pool process will inherit the master process priority
;         unless specified otherwise
; Default Value: no set
; process.priority = -19; Send FPM to background. Set to 'no' to keep FPM in foreground for debugging.
; Default Value: yes
;daemonize = yes; Set open file descriptor rlimit for the master process.
; Default Value: system defined value
;rlimit_files = 1024; Set max core size rlimit for the master process.
; Possible Values: 'unlimited' or an integer greater or equal to 0
; Default Value: system defined value
;rlimit_core = 0; Specify the event mechanism FPM will use. The following is available:
; - select     (any POSIX os)
; - poll       (any POSIX os)
; - epoll      (linux >= 2.5.44)
; - kqueue     (FreeBSD >= 4.1, OpenBSD >= 2.9, NetBSD >= 2.0)
; - /dev/poll  (Solaris >= 7)
; - port       (Solaris >= 10)
; Default Value: not set (auto detection)
;events.mechanism = epoll
; When FPM is built with systemd integration, specify the interval,
; in seconds, between health report notification to systemd.
; Set to 0 to disable.
; Available Units: s(econds), m(inutes), h(ours)
; Default Unit: seconds
; Default value: 10
;systemd_interval = 10
;;;;;;;;;;;;;;;;;;;;
; Pool Definitions ;
;;;;;;;;;;;;;;;;;;;;
; Multiple pools of child processes may be started with different listening
; ports and different management options.  The name of the pool will be
; used in logs and stats. There is no limitation on the number of pools which
; FPM can handle. Your system will tell you anyway :)
; Include one or more files. If glob(3) exists, it is used to include a bunch of
; files from a glob(3) pattern. This directive can be used everywhere in the
; file.
; Relative path can also be used. They will be prefixed by:
;  - the global prefix if it's been set (-p argument)
;  - /usr otherwise
include=/etc/php8/php-fpm.d/*.conf
php/php.info
The core PHP configuration file. We aren’t really touching this file for the purposes of this article, but know there are a lot of configuration options you may want to take a look at if you’re not familiar with PHP setup. You can find comprehensive documentation on this at: https://www.php.net/configuration.file.
You can find a starter php.info file in the sample repo at https://github.com/johnathanesanders/docker-nginx-fpm.
php/php-fpm.d/www.conf
This file manages how php-fpm behaves (or mis-behaves, depending on your configuration). There’s only one entry we need to modify for the purposes of this article, and that’s the location of the socket. Near line 36 you should find a listen= entry that needs the socket updated to the entry we used earlier:
listen = /var/run/php/php8-fpm.sock
You can find the rest of this file in the sample repo at https://github.com/johnathanesanders/docker-nginx-fpm.
Dockerfile
Alright, now we have all that out of the way, let’s create our docker configuration file. We’re going to base everything on Alpine Linux due to it being so lightweight and awesome.
Within this dockerfile we’re going to start with a FROM alpine:latest to signify the latest Alpine base image as our start point. Next, we need to update APK (Alpine’s package manager) and then install bash (told you it was lightweight!), nginx, PHP, PHP-FPM, and some ancillary libraries for it.
Next, we need to COPY the content of our configuration above from the server/etc/nginx to the container’s /etc/nginx directory. The configuration from server/etc/php to the container’s /etc/php8 directory. And finally, the content of our site from src to /usr/share/nginx/html (which was defined in our nginx config above).
The next step is to create the /var/run/php directory that will hold our socket file with mkdir.
Depending on the port(s) you want to run nginx on, you’ll want to EXPOSE them. In the sample below, we’re exposing both 80 and 443 — however in production it would be strange to expose anything other than 443 (HTTPS).
We’ll tell the container to stop on SIGTERM.
Lastly, we’ll run a chain of commands in the CMD entry to start everything up.
/bin/bash -csimply tells this line to execute via the bash shell as bash is not native to Alpine (hence why we had to add it withRUN apk add bash).php-fpm8starts up PHP-FPMchmod 777 /var/run/php/php8-fpm.sockmakes the socket usable by nginx and PHP.chmod 755 /usr/share/nginx/html/*ensures that permissions are set for read and execute on contents of our public HTML directory.- Finally,
nginx -g 'daemon off;'instructs nginx to start standalone (e.g. without systemd).
FROM alpine:latestRUN apk update && apk upgrade
RUN apk add bash
RUN apk add nginx
RUN apk add php8 php8-fpm php8-opcache
RUN apk add php8-gd php8-zlib php8-curlCOPY server/etc/nginx /etc/nginx
COPY server/etc/php /etc/php8
COPY src /usr/share/nginx/htmlRUN mkdir /var/run/phpEXPOSE 80
EXPOSE 443STOPSIGNAL SIGTERMCMD ["/bin/bash", "-c", "php-fpm8 && chmod 777 /var/run/php/php8-fpm.sock && chmod 755 /usr/share/nginx/html/* && nginx -g 'daemon off;'"]
Optional Helper Script
While it’s not necessary, I find it very helpful to have a script that stops a running container, removes it, and then rebuilds and restarts it based on updates to the project. Otherwise, i’m stuck running all of that by hand each time I want to test a change. This assumes you’re using bash —but honestly it doesn’t matter what executes these lines as it’s only calling docker to do its bidding anyhow. Therefore you could just as easily create a Powershell (.ps1) script, Windows batch file (.bat), etc. to run these commands.
I’m using the name php-nginx-run for the container and php-nginx for the image, but you can call them whatever you’d like!
Here is the content of my build.sh:
#!/bin/bash
#"docker container stop php-nginx-run -t 1" only use if we want to wait for it to shutdown using -t as seconds to waitdocker container rm -f php-nginx-run
docker build -t php-nginx . --no-cache
docker run --name php-nginx-run -d -p 80:80 -p 443:443 php-nginx
Note
The-p 80:80and-p 443:443instruct docker to expose those ports to the outside world. If you’re using different port(s) in your Dockerfile, be sure to specify them accordingly here.
Wrapping Up
That’s it! From here just run the script we just created to build and run this new PHP container.
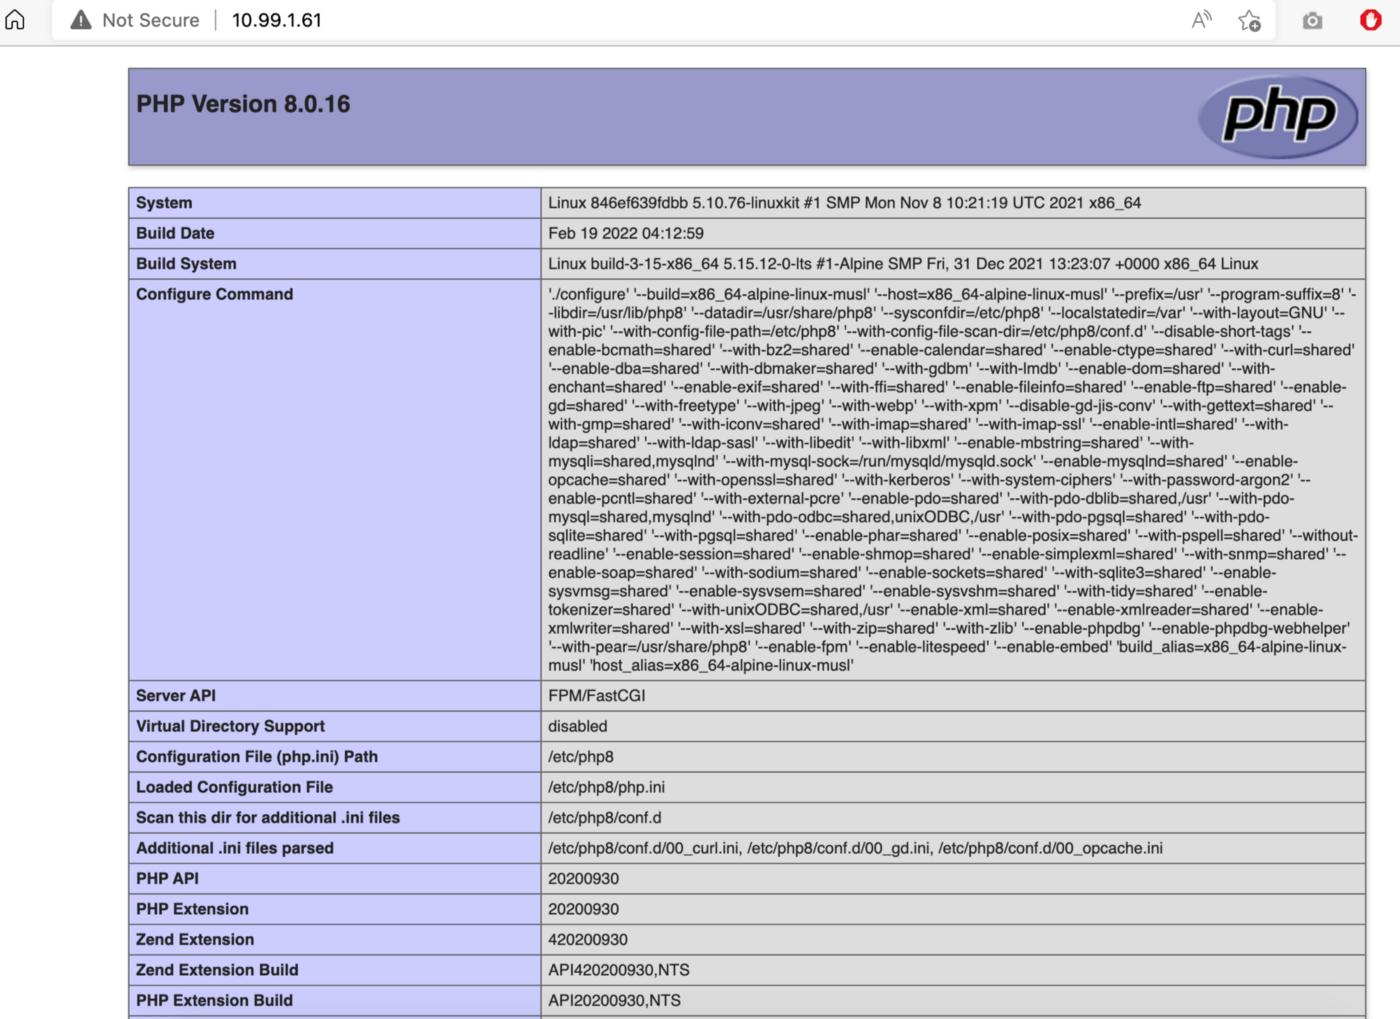
If all goes well, you should get a page similar to this when you navigate to your local machine (say via localhost or your network IP address):


 已为社区贡献15557条内容

所有评论(0)