
【全志t113s3串口232调试+minicom使用过程中踩过的坑】
·
第一步 看手册+原理图
链接:https://bbs.aw-ol.com/assets/uploads/files/1645063043398-t113-s3_datasheet_v1.2.pdf
ps:这里我们的硬件工程师给咱挖了个坑。U2对应的芯片UART3,U3对应芯片UART2。
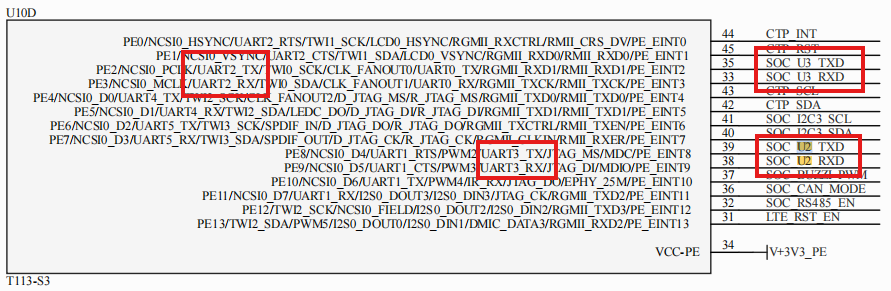
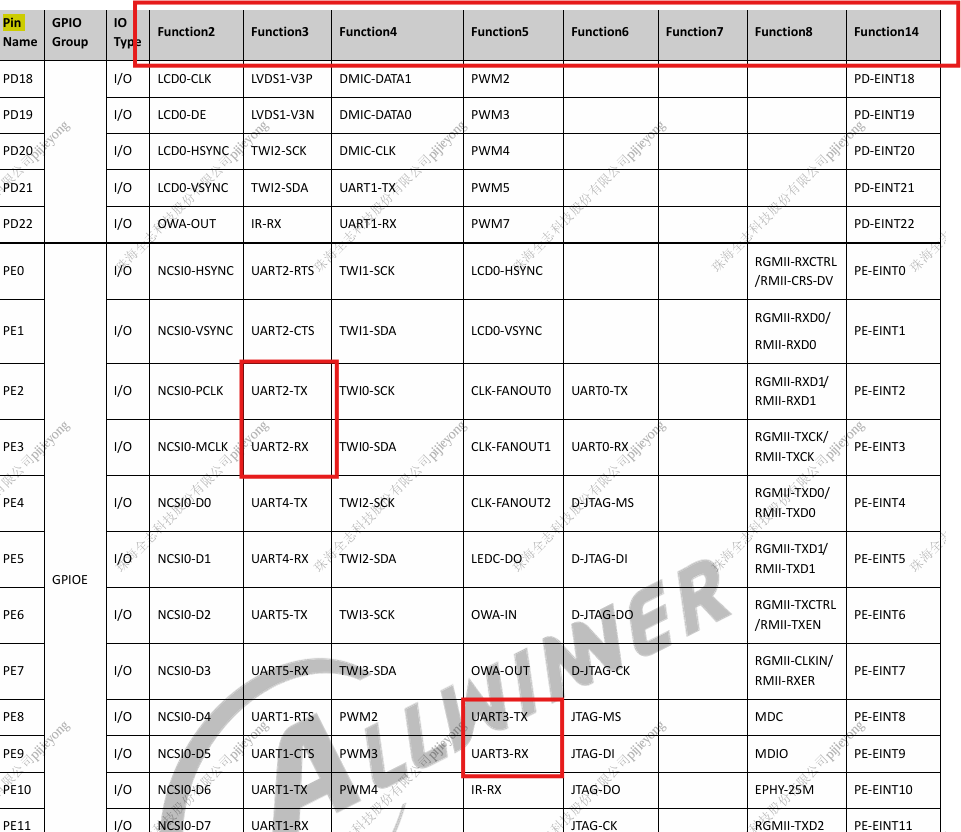
手册写到PE2 PE3 在Fuction3时对应UART2;同理,PE8和PE9对应UART3(Fuction5)
第二步 改设备树(追加设备树)
这里注意屏蔽其他复用的引脚!!!
&uart2 {
	pinctrl-names = "default", "sleep";
	pinctrl-0 = <&uart2_pins_a>;
	pinctrl-1 = <&uart2_pins_b>;
	status = "okay";
};

&uart3 {

	pinctrl-names = "default", "sleep";
	pinctrl-0 = <&uart3_pins_a>;
	pinctrl-1 = <&uart3_pins_a>;
	status = "okay";
};
uart2_pins_a: uart2_pins@0 {  /* For EVB1 board 对应U3*/
		pins = "PE2", "PE3";
		function = "uart2";
		muxsel = <3>; /*对应Fuction3*/
		drive-strength = <10>;
		bias-pull-up;
	};

	uart2_pins_b: uart2_pins@1 {  /* For EVB1 board 对应U3*/
		allwinner,pins = "PE2", "PE3";
		allwinner,function = "gpio_in";
	};

	uart3_pins_a: uart3_pins@0 {  /* For EVB1 board 对应U2*/
		pins = "PE8", "PE9";
		function = "uart3";
		muxsel = <5>;  /*对应Fuction5*/
		drive-strength = <10>;
		bias-pull-up;
	}; /*这里没有uart3_pins_b也不会影响什么,就是没有睡眠模式而已*/
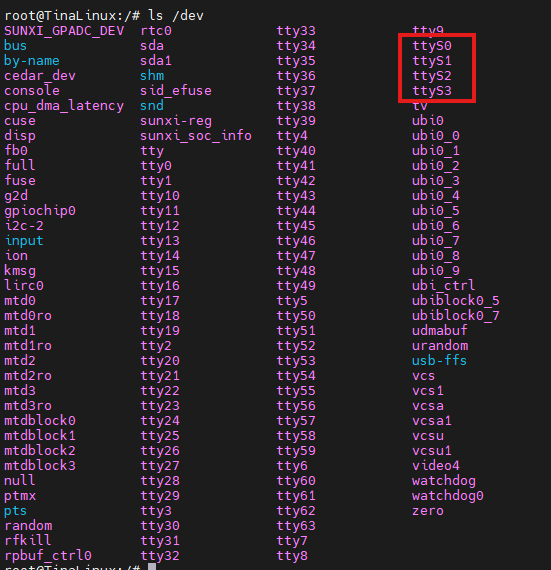
第三步 烧录,观察/dev
看有木有多出我们所添加的串口
第四步 验证串口是否通信正常
最简单,直接(波特率似乎默认9600,注意修改串口助手波特率)
echo 3333333 > /dev/ttyS2
MINICOM验证
minicom -D /dev/ttyS2
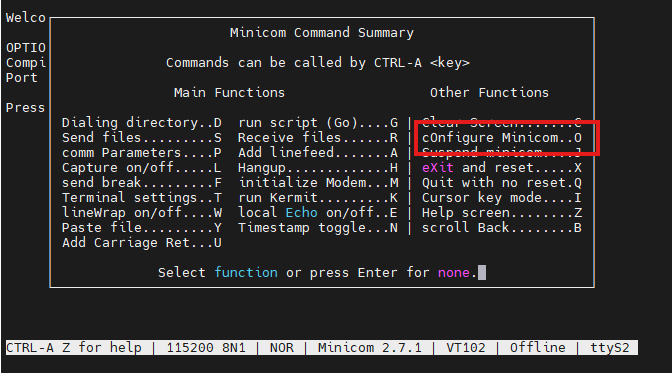
CTRL+A
Z
O
serial port setup
F                                            #这一步很重要,不然minicom只能收,不能发
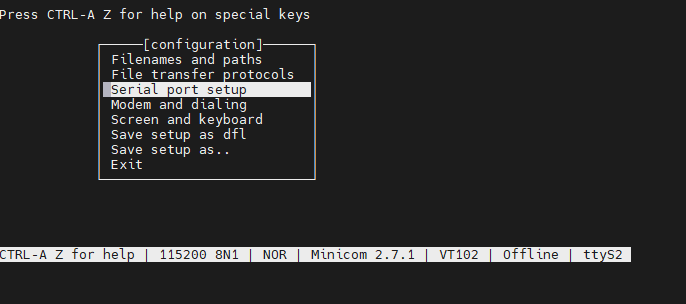
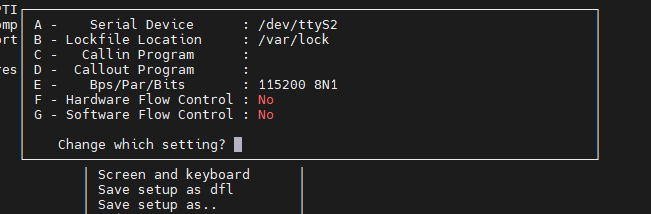
ctrl+a
E
可以显示发送的内容
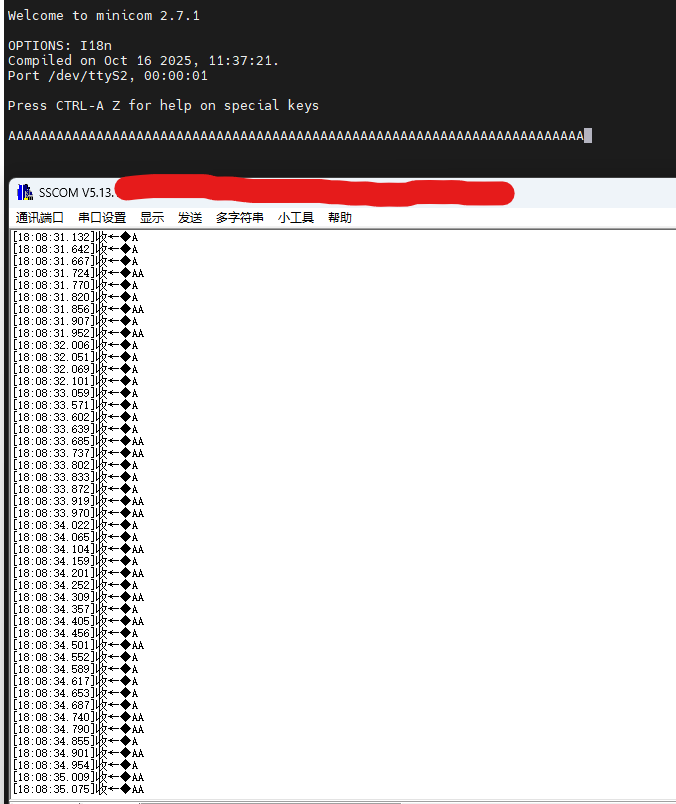
成功
ps:minicom 折腾了半天,一定要关注上文minicom使用
更多推荐
 8
8 0
0- 0


 已为社区贡献1条内容

所有评论(0)