
远程连接容器开发
·
SSH
linux安装ssh
安装必要依赖
sudo apt update
sudo apt install openssh-server -y
sudo systemctl enable --now ssh
验证ssh服务状态
sudo systemctl status sshd # 应显示 active(running)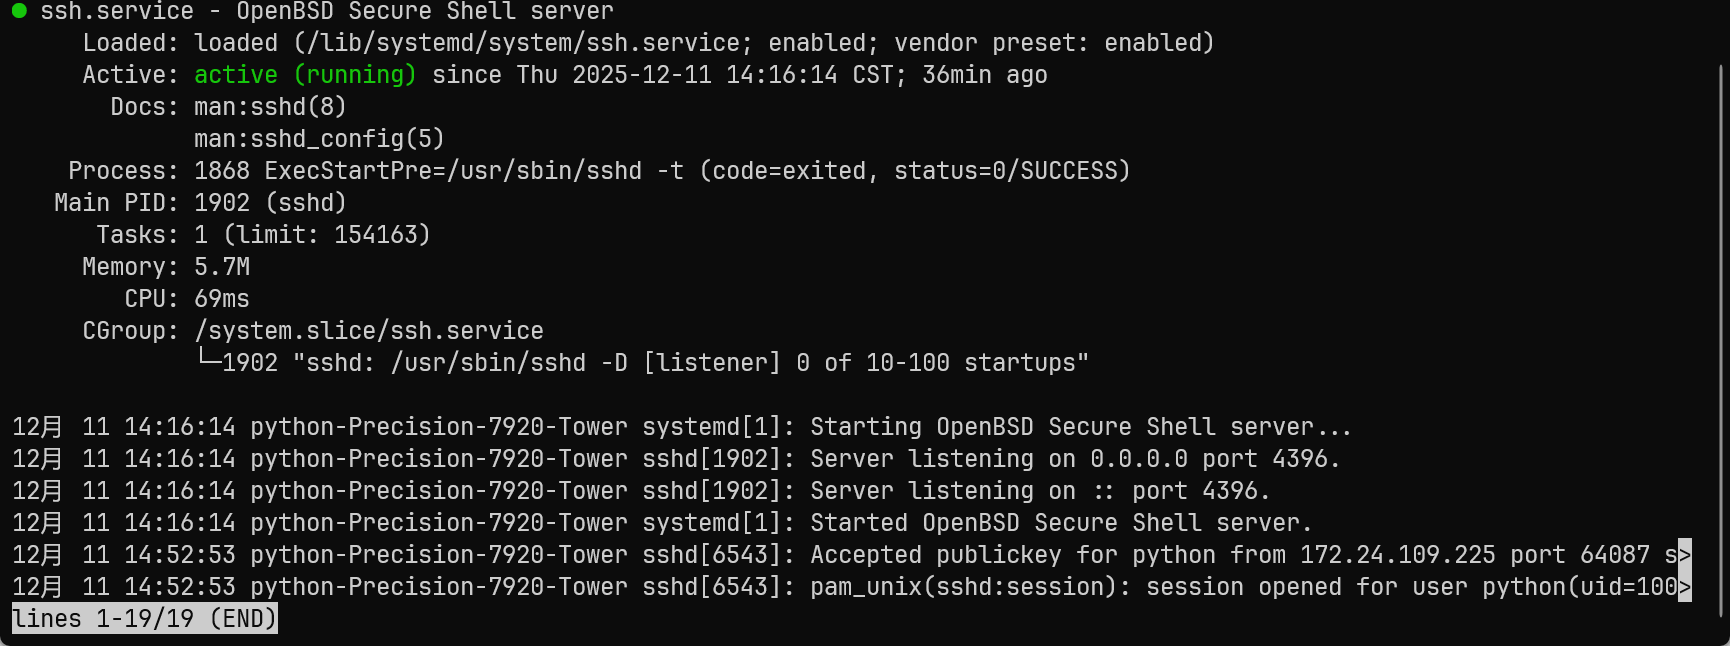
停止ssh服务
sudo systemctl stop sshd 修改端口
sudo vim /etc/ssh/sshd_config将Port改为4396
确认SSH端口监听
ss -tuln | grep :4396 # 应看到 LISTEN 状态
防火墙放行 SSH 端口
sudo ufw allow 4396/tcp
sudo ufw reload
重启 SSH 服务
sudo systemctl restart ssh新建用户
# 创建新用户
sudo adduser user

# 设置密码(交互式)
sudo passwd user

# (可选)加入 sudo 组(Ubuntu)
sudo usermod -aG sudo user
在 Windows 生成 SSH 密钥
ssh-keygen -t ed25519 -C "your_email@example.com"将公钥上传到 Linux 宿主机
type $env:USERPROFILE\.ssh\id_ed25519.pub | ssh -p 4396 user@xxx.xxx.xxx.xxx "mkdir -p ~/.ssh && cat >> ~/.ssh/authorized_keys"在 Linux 上设置正确权限
chmod 700 ~/.ssh
chmod 600 ~/.ssh/authorized_keys
修改设置
# 禁用密码
PasswordAuthentication no
ChallengeResponseAuthentication no
# 启用公钥
PubkeyAuthentication yes
AuthorizedKeysFile .ssh/authorized_keys
# 禁用 root 登录
PermitRootLogin no
# 只允许特定用户(可选)
AllowUsers user
修改后重启 SSH 服务
测试免密登录
ssh -p 4396 user@xxx.xxx.xxx.xxx安装并配置 Fail2ban
安装 Fail2ban
sudo apt update
sudo apt install fail2ban -y
创建自定义配置
sudo cp /etc/fail2ban/jail.conf /etc/fail2ban/jail.local编辑 jail.local
sudo vim /etc/fail2ban/jail.local找到[sshd]部分,修改为:
[sshd]
enabled = true
port = 4396
# 你的自定义 SSH 端口!
filter = sshd
logpath = %(sshd_log)s
maxretry = 3
# 允许失败 3 次
bantime = 1h
# 封禁 1 小时(可设 -1 永久)
findtime = 10m
# 在 10 分钟内失败 3 次就封
action = ufw[name=sshd, port="4396", protocol="tcp"]
# 使用 UFW 封禁
启动 Fail2ban
sudo systemctl enable --now fail2ban验证 Fail2ban 是否工作
sudo fail2ban-client status sshd
Docker
linux安装docker
卸载旧版本
sudo apt remove docker docker-engine docker.io containerd runc安装必要依赖
sudo apt update
sudo apt install -y ca-certificates curl gnupg lsb-release
安装 Docker Engine
# 添加仓库
sudo mkdir -p /etc/apt/keyrings
curl -fsSL https://mirrors.aliyun.com/docker-ce/linux/ubuntu/gpg | sudo gpg --dearmor -o /etc/apt/keyrings/docker.gpg

echo \
  "deb [arch=$(dpkg --print-architecture) signed-by=/etc/apt/keyrings/docker.gpg] https://mirrors.aliyun.com/docker-ce/linux/ubuntu \
  $(lsb_release -cs) stable" | sudo tee /etc/apt/sources.list.d/docker.list > /dev/null

# 安装
sudo apt update
sudo apt install -y docker-ce docker-ce-cli containerd.io docker-compose-pluginsudo mkdir -p /etc/docker
sudo cp -v /etc/docker/daemon.json /etc/docker/daemon.json.bak
sudo tee /etc/docker/daemon.json <<EOF
{
"registry-mirrors": [
"https://<your-accelerator>.mirror.aliyuncs.com",
"https://docker.1ms.run",
"https://docker-0.unsee.tech",
"https://docker.m.daocloud.io"
]
}
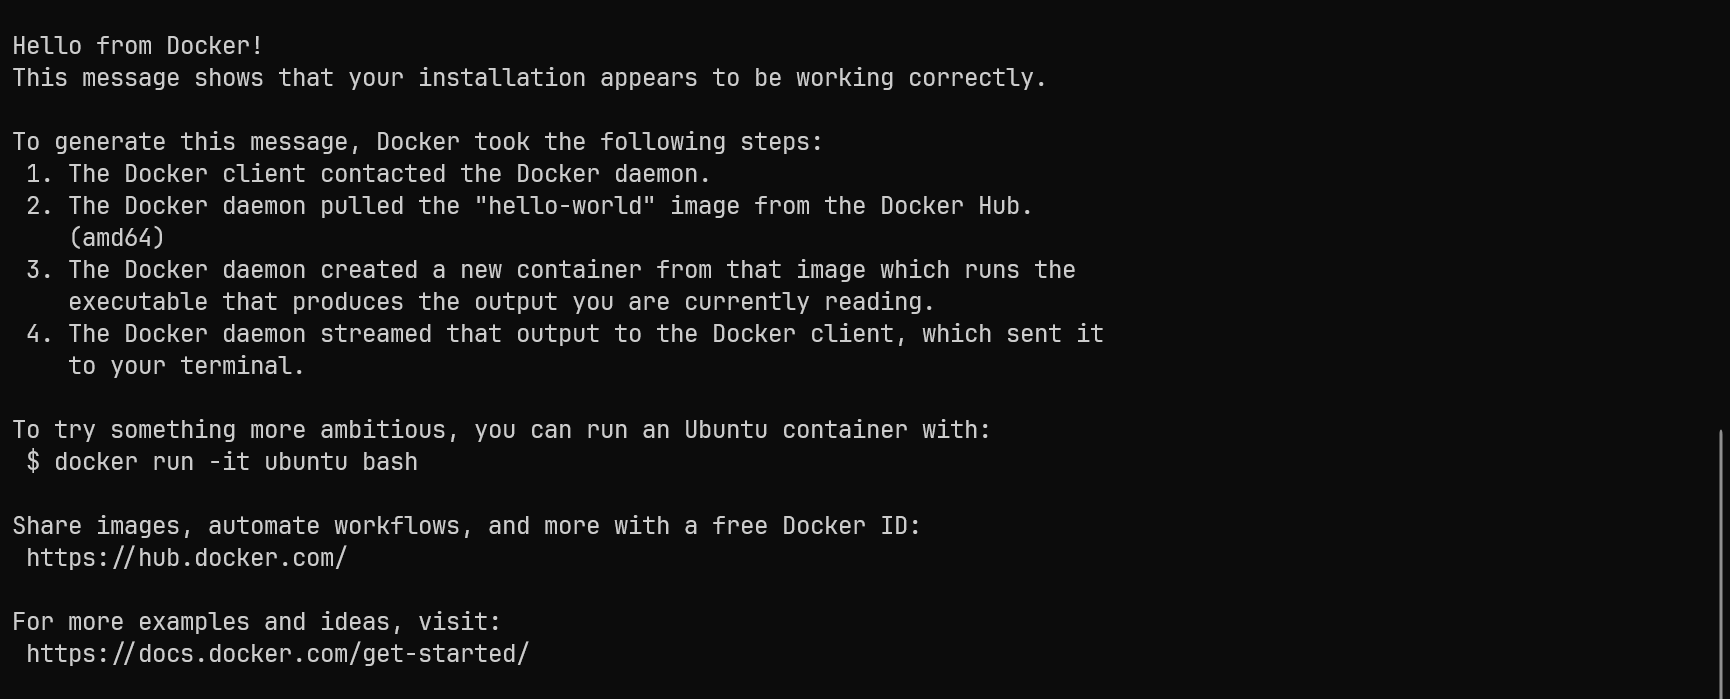
EOF验证安装
sudo docker run hello-world
配置非 root 用户使用 Docker
# 创建 docker 组(通常已存在)
sudo groupadd docker

# 将当前用户加入组
sudo usermod -aG docker user

# 刷新组权限(或直接重新登录 SSH)
newgrp docker
启用 Docker 开机自启(默认已启用,可确认)
sudo systemctl is-active docker    # 应显示 active
sudo systemctl enable docker       # 确保开机启动
启用 GPU 支持
确认宿主机有 NVIDIA GPU 并已装驱动
nvidia-smi安装 NVIDIA Container Toolkit
# 添加仓库
curl -fsSL https://mirrors.ustc.edu.cn/libnvidia-container/gpgkey | sudo gpg --dearmor -o /usr/share/keyrings/nvidia-container-toolkit-keyring.gpg

curl -s -L https://mirrors.ustc.edu.cn/libnvidia-container/stable/deb/nvidia-container-toolkit.list | \
  sed 's#deb https://nvidia.github.io#deb [signed-by=/usr/share/keyrings/nvidia-container-toolkit-keyring.gpg] https://mirrors.ustc.edu.cn#g' | \
  sudo tee /etc/apt/sources.list.d/nvidia-container-toolkit.list

# 安装
sudo apt update
sudo apt install -y nvidia-container-toolkit
配置 Docker 使用 NVIDIA runtime
# 配置 Docker 使用 nvidia runtime
sudo nvidia-ctk runtime configure --runtime=docker

# 重启 Docker
sudo systemctl restart docker
检查 Docker 是否加载了 nvidia runtime
sudo docker info | grep -i nvidia
配置容器
写入Dockerfile
# ============================================================
# 深度学习镜像
# 基础:NVIDIA CUDA 12.6.3 + cuDNN(开发版)+ Ubuntu 24.04
# 包含:Miniforge + pip 阿里源 + conda 清华源 + zsh + oh-my-zsh
#       + Powerlevel10k 主题 + zsh-autosuggestions
#       + zsh-syntax-highlighting + zsh-history-substring-search
# ============================================================
FROM nvcr.io/nvidia/cuda:12.6.3-cudnn-devel-ubuntu24.04

# 禁用 apt 安装过程中的交互式提示(如时区选择等)
ENV DEBIAN_FRONTEND=noninteractive
# 设置容器默认 shell 为 zsh
ENV SHELL=/bin/zsh

# ============================================================
# Step 1: 安装基础依赖
# ============================================================
RUN apt-get update \
    && apt-get install -y --no-install-recommends \
        zsh \
        curl \
        git \
        wget \
        vim \
        locales \
        zip \
        tzdata \
    && ln -snf /usr/share/zoneinfo/Asia/Shanghai /etc/localtime \
    && echo "Asia/Shanghai" > /etc/timezone \
    && apt-get clean \
    && rm -rf /var/lib/apt/lists/* /tmp/* /var/tmp/*

# 生成 en_US.UTF-8 语言环境,避免中文或特殊字符乱码
RUN locale-gen en_US.UTF-8
ENV LANG=en_US.UTF-8
ENV LANGUAGE=en_US:en
ENV LC_ALL=en_US.UTF-8

# ============================================================
# Step 2: 安装 oh-my-zsh
# ============================================================
ENV ZSH=/root/.oh-my-zsh

RUN git clone --depth=1 https://gitee.com/mirrors/oh-my-zsh.git "$ZSH"

# ============================================================
# Step 3: 安装 Powerlevel10k 主题
# ============================================================
RUN git clone --depth=1 https://gitee.com/romkatv/powerlevel10k.git \
    "${ZSH_CUSTOM:-/root/.oh-my-zsh/custom}/themes/powerlevel10k"

# ============================================================
# Step 4: 安装三个 zsh 插件
# ============================================================
RUN git clone --depth=1 https://gitee.com/zsh-users/zsh-autosuggestions \
        "${ZSH_CUSTOM:-/root/.oh-my-zsh/custom}/plugins/zsh-autosuggestions" \
    && git clone --depth=1 https://gitee.com/zsh-users/zsh-syntax-highlighting.git \
        "${ZSH_CUSTOM:-/root/.oh-my-zsh/custom}/plugins/zsh-syntax-highlighting" \
    && git clone --depth=1 https://gitee.com/zsh-users/zsh-history-substring-search \
        "${ZSH_CUSTOM:-/root/.oh-my-zsh/custom}/plugins/zsh-history-substring-search"

# ============================================================
# Step 5: 写入 ~/.zshrc
# ============================================================
RUN printf '%s\n' \
    '# p10k Instant Prompt(必须位于文件最顶部,在任何产生输出的语句之前)' \
    'if [[ -r "${XDG_CACHE_HOME:-$HOME/.cache}/p10k-instant-prompt-${(%):-%n}.zsh" ]]; then' \
    '  source "${XDG_CACHE_HOME:-$HOME/.cache}/p10k-instant-prompt-${(%):-%n}.zsh"' \
    'fi' \
    '' \
    '# oh-my-zsh 核心配置' \
    'export ZSH="$HOME/.oh-my-zsh"' \
    'ZSH_THEME="powerlevel10k/powerlevel10k"' \
    'plugins=(git zsh-autosuggestions zsh-syntax-highlighting zsh-history-substring-search)' \
    'source $ZSH/oh-my-zsh.sh' \
    '' \
    '# 加载 p10k 个性化配置(文件不存在时静默跳过)' \
    '[[ ! -f ~/.p10k.zsh ]] || source ~/.p10k.zsh' \
    > /root/.zshrc

# ============================================================
# Step 6: 配置 p10k
# ============================================================
COPY .p10k.zsh /root/.p10k.zsh

# ============================================================
# Step 7: 安装 Miniforge
# ============================================================
ENV MINIFORGE_PATH=/opt/miniforge3

RUN wget -q "https://mirrors.tuna.tsinghua.edu.cn/github-release/conda-forge/miniforge/LatestRelease/Miniforge3-Linux-x86_64.sh" \
        -O /tmp/miniforge.sh \
    && bash /tmp/miniforge.sh -b -p "${MINIFORGE_PATH}" \
    && rm /tmp/miniforge.sh

# 将 Miniforge bin 目录追加到 PATH
ENV PATH="${MINIFORGE_PATH}/bin:${PATH}"

# conda / mamba 初始化写入 .zshrc
RUN conda init zsh \
    && mamba shell init --shell zsh --root-prefix "${MINIFORGE_PATH}"

# ============================================================
# Step 8: 配置 conda 清华源
# ============================================================
RUN conda config --add channels https://mirrors.tuna.tsinghua.edu.cn/anaconda/pkgs/free/ \
    && conda config --add channels https://mirrors.tuna.tsinghua.edu.cn/anaconda/pkgs/main/ \
    && conda config --add channels https://mirrors.tuna.tsinghua.edu.cn/anaconda/cloud/conda-forge/ \
    && conda config --add channels https://mirrors.tuna.tsinghua.edu.cn/anaconda/cloud/pytorch/ \
    && conda config --set show_channel_urls true \
    && conda config --set auto_activate_base true

# ============================================================
# Step 9: 配置 pip 阿里云源
# ============================================================
RUN pip config set global.index-url https://mirrors.aliyun.com/pypi/simple/ \
    && pip config set global.trusted-host mirrors.aliyun.com \
    && pip config set global.timeout 120

# 屏蔽 pip 在 root 用户下运行时的警告信息(容器内 root 运行属正常场景)
ENV PIP_ROOT_USER_ACTION=ignore

# 容器启动时默认进入 zsh 交互式终端
CMD ["/bin/zsh"]
从本地传入到宿主机
scp -P 4396 C:\Users\user\Dockerfile user@xxx.xxx.xxx.xxx:/home/user/上传整个目录
scp -P -r 4396 C:\Users\user user@xxx.xxx.xxx.xxx:/home/user/从宿主机下载文件到本地
scp -P 端口 user@xxx.xxx.xxx.xxx:/home/user/Dockerfile C:\Users\user\构建镜像
docker build -f Dockerfile -t tag:latest .
# - f Dockerfile     指定Dockerfile的文件名
# - t tag:latest     给构建出的镜像打上标签(tag),格式为名称:版本,版本默认为latest
# .                  指定构建上下文,为当前目录(. 表示当前路径)
运行容器
docker run -d \
  --ipc=host \
  --ulimit memlock=-1 \
  --ulimit stack=67108864 \
  --gpus all \
  --name name \
  -v ~/workspace:/home/user/workspace \
  -w /home/user/workspace \
  tag:latest \
  sleep infinity
# -d                后台运行
# ipc=host          复用宿主机共享内存
# ulimit memlock    内存锁定无限制
# ulimit            堆栈大小限制
# --gpus            启用GPU
# --name            给容器起个名字
# -v                挂载宿主机目录到容器
# -w                设置工作目录
# tag:latest        名称:版本
# sleep infinity    让容器主进程持续运行
进入容器
docker exec -it name bash更多推荐
 4
4 0
0- 0


 已为社区贡献2条内容

所有评论(0)