
云原生高级课前置复习--RHCE
一、定时任务和延迟服务
1、at
at命令用法
at的黑白名单
2、cron
用户级定时任务
定时任务的黑白名单
#建立实验素材
[root@node10 ~]# useradd lee
[root@node10 ~]# useradd timinglee#1.测试无名单情况下的crontab执行效果
[root@node10 ~]# su - lee
[lee@node10 ~]$ crontab -e
[root@node10 ~]# su - timinglee
[timinglee@node10 ~]$ crontab -e
#当系统中未设定黑白名单时,系统中的所有用户都可以执行定时任务的设定#2.设定黑名单
[root@node10 ~]# vim /etc/cron.deny
timinglee[timinglee@node10 ~]$ crontab -e
You (timinglee) are not allowed to use this program (crontab)
See crontab(1) for more information[root@node10 ~]# su - lee
[lee@node10 ~]$ crontab -e#3.白名单在系统中默认不存在,如果白名单出现,那么只有白名单中的用户和root可以设定定时任务
[root@node10 ~]# ll /etc/cron.allow
ls: 无法访问 '/etc/cron.allow': 没有那个文件或目录[root@node10 ~]# ll /etc/cron.allow
-rw-r--r-- 1 root root 10 1月 19 09:54 /etc/cron.allow[lee@node10 ~]$ crontab -e
You (lee) are not allowed to use this program (crontab)
See crontab(1) for more information[root@node10 ~]# su - timinglee
[timinglee@node10 ~]$ crontab -e
系统级定时任务
[root@node10 cron.d]# vim timinglee
[root@node10 cron.d]# pwd
/etc/cron.d
[root@node10 cron.d]# cat timinglee
* * * * * root touch /mnt/lee{1..10}#测试
[root@node10 ~]# watch -n 1 ls /mnt
二、sshd远程连接服务
1、ssh命令的用法
2、sshd的key认证
#1建立认证key
[root@node10 ~]# ssh-keygen -f /root/.ssh/id_rsa -P ""#2.上锁
[root@node10 ~]# ssh-copy-id -i /root/.ssh/id_rsa.pub root@localhost#3.配置客户端自动认证新主机
[root@node10 ~]# vim /etc/ssh/ssh_config
Host *
StrictHostKeyChecking no
#4.设定新建用户自动支持免密认证
[root@node10 ~]# cp -rp /root/.ssh/ /etc/skel/
#5测试
克隆出2太主机,建立lee用,用lee用户和root用户登录远程主机。彼此可以实现免疫认证
3、sshd服务的安全加固
port22
PermitRootLogin yes|no
PasswordAuthentication yes|no
AllowUsers 用户名称
DenyUsers 用户黑名单
三、利用nginx|apach构建简单的web服务器
实验环境:
火墙未开启
systemctl stop firewalld
systemctl disable firewalld
selinux关闭
setenforce 0
挂载镜像:vi /etc/yum.repos.d/local.repo
[local-BaseOS]
name=Local BaseOS Repository
baseurl=file:///mnt/BaseOS
enabled=1
gpgcheck=0[local-AppStream]
name=Local AppStream Repository
baseurl=file:///mnt/AppStream
enabled=1
gpgcheck=0
1、服务安装
[root@node10]# dnf install httpd -y
[root@webserver ~]# systemctl enable --now httpd
2、基本配置信息
端口: 80
默认发布目录: /var/www/html
默认发布文件: index.html
主配置文件: /etc/httpd/conf/httpd.conf
子配置文件: /etc/httpd/conf.d/*.conf
管理命令: systemctl enable --now httpd
基本信息设定方法
#1.更改默认发布文件
[root@webserver ~]# echo hello timinglee > /var/www/html/index.html
[root@webserver ~]# curl 172.25.254.10
hello timinglee[root@webserver ~]# echo hello test > /var/www/html/lee.html
[root@webserver ~]# curl 172.25.254.10/lee.html
hello test[root@webserver ~]# vim /etc/httpd/conf/httpd.conf
168 <IfModule dir_module>
169 DirectoryIndex lee.html index.html #更改
170 </IfModule>[root@webserver ~]# systemctl restart httpd
#测试:
[root@webserver ~]# curl 172.25.254.10
hello test完成一个实验就恢复之前更改的
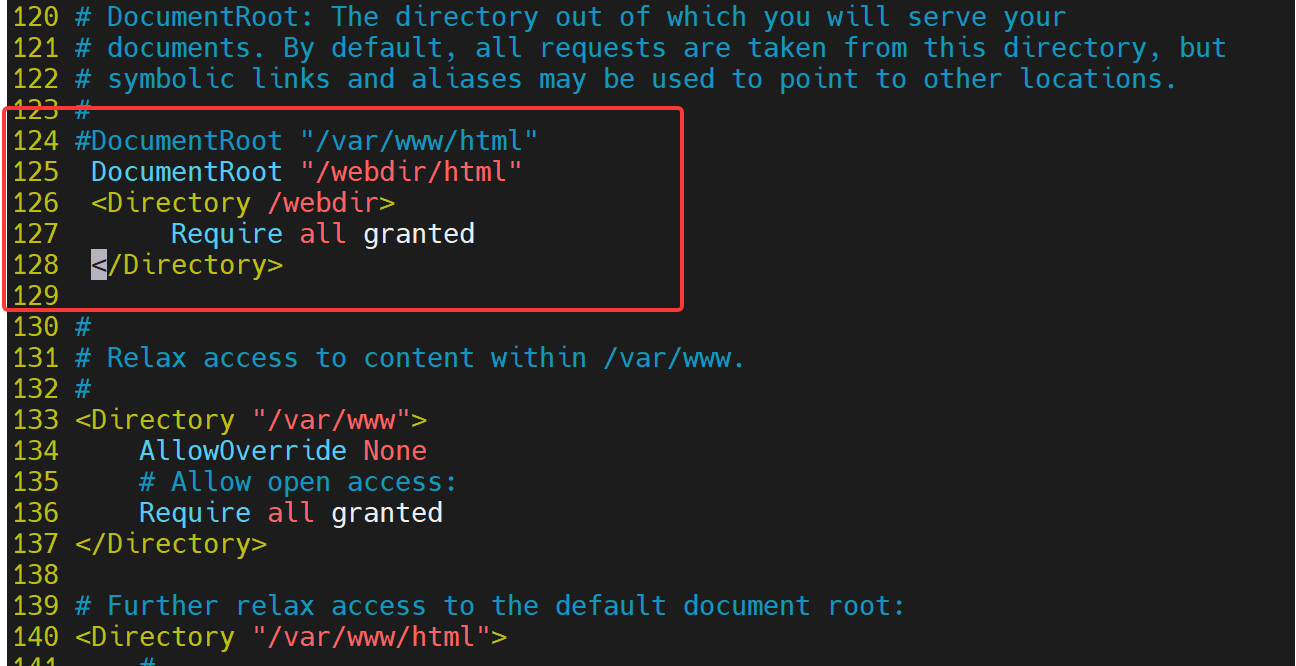
#2.如何修改默认发布目录
[root@webserver ~]# mkdir /webdir/html -p
[root@webserver ~]# echo /var/www/webdir > /webdir/html/index.html[root@webserver ~]# curl 172.25.254.10
hello timinglee
[root@webserver ~]# cat /var/www/html/index.html
hello timinglee[root@webserver ~]# vim /etc/httpd/conf/httpd.conf
124 #DocumentRoot "/var/www/html"
125 DocumentRoot "/webdir/html"
126 <Directory /webdir>
127 Require all granted
128 </Directory>:wq
[root@webserver ~]# systemctl restart httpd
[root@webserver ~]# curl 172.25.254.10
/var/www/webdir
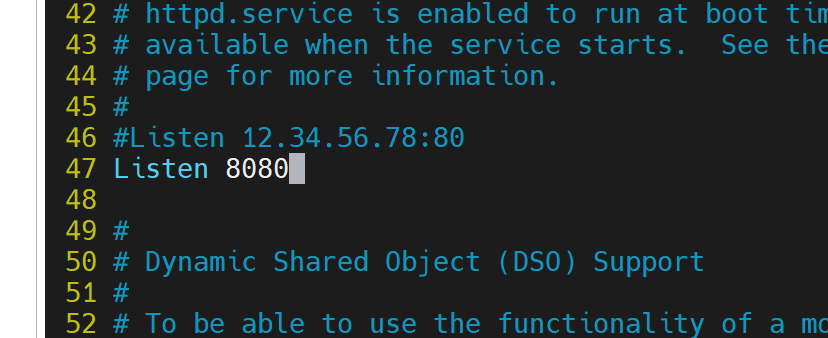
#3.端口修改
[root@webserver ~]# vim /etc/httpd/conf/httpd.conf
47 Listen 8080
[root@webserver ~]# systemctl restart httpd
[root@webserver ~]# netstat -antlupe | grep httpd
tcp6 0 0 :::8080 :::* LISTEN 0 60919 31766/httpd[root@webserver ~]# curl 172.25.254.10:8080
hello timinglee
3、虚拟主机
[root@node10 conf.d]# vim /etc/httpd/conf/httpd.conf
[root@webserver conf.d]# mkdir /etc/httpd/logs/timinglee.org #存放日志
[root@webserver conf.d]# mkdir -p /webdir/timinglee.org/{news,bbs}/html #站点默认发布目录
[root@webserver conf.d]# echo news.timinglee.org > /webdir/timinglee.org/news/html/index.html
[root@webserver conf.d]# echo bbs.timinglee.org > /webdir/timinglee.org/bbs/html/index.html
[root@webserver ~]# cd /etc/httpd/conf.d/
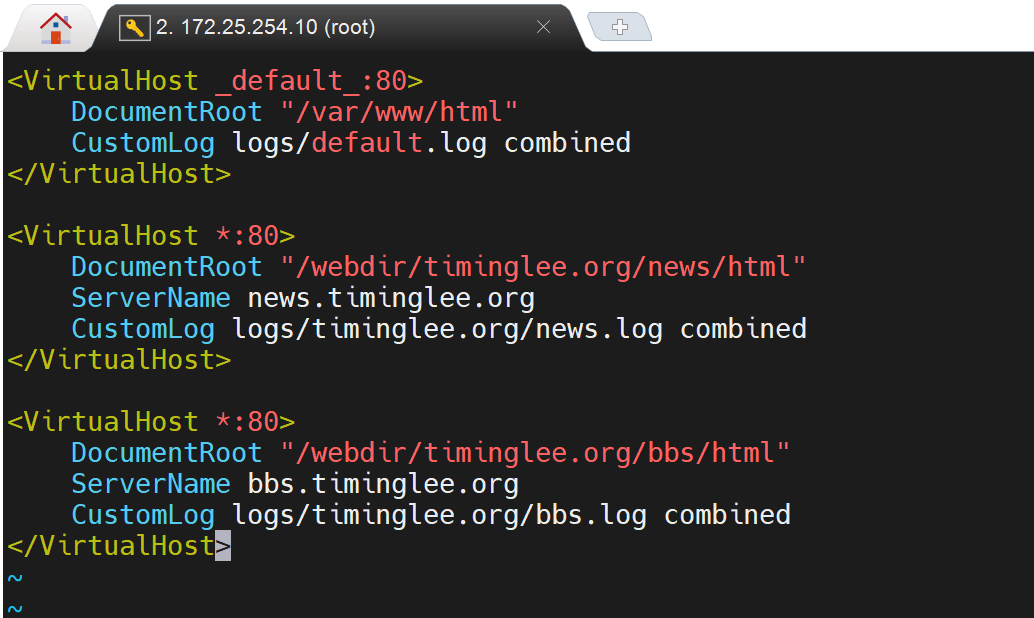
[root@webserver conf.d]# vim vhosts.conf
<VirtualHost _default_:80>
DocumentRoot "/var/www/html"
CustomLog logs/default.log combined
</VirtualHost><VirtualHost *:80>
DocumentRoot "/webdir/timinglee.org/news/html"
ServerName news.timinglee.org
CustomLog logs/timinglee.org/news.log combined
</VirtualHost><VirtualHost *:80>
DocumentRoot "/webdir/timinglee.org/bbs/html"
ServerName bbs.timinglee.org
CustomLog logs/timinglee.org/bbs.log combined
</VirtualHost>
[root@webserver ~]# systemctl restart httpd#测试,在要访问站点的主机中设置虚拟站点的解析
[root@webserver ~]# vim /etc/hosts
172.25.254.10 webserver www.timinglee.org bbs.timinglee.org news.timinglee.org
[root@webserver ~]# curl www.timinglee.org
hello timinglee
[root@webserver ~]# curl news.timinglee.org
news.timinglee.org
[root@webserver ~]# curl bbs.timinglee.org
bbs.timinglee.org

4、访问控制
基于IP的访问控制
[root@webserver ~]# mkdir /var/www/html/admin
[root@webserver ~]# echo admin > /var/www/html/admin/index.html
[root@webserver ~]# curl 172.25.254.10/admin/
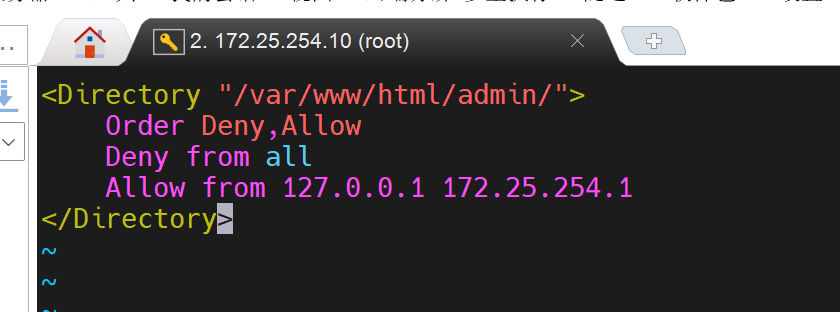
admin[root@webserver ~]# vim /etc/httpd/conf.d/vhosts.conf
<Directory "/var/www/html/admin/">
Order Deny,Allow
Deny from all
Allow from 127.0.0.1 172.25.254.1
</Directory>
#测试:
在10主机中
[root@webserver ~]# curl 172.25.254.10/admin/
<!DOCTYPE HTML PUBLIC "-//IETF//DTD HTML 2.0//EN">
<html><head>
<title>403 Forbidden</title>
</head><body>
<h1>Forbidden</h1>
<p>You don't have permission to access this resource.</p>
</body></html>
基于用户认证的
[root@webserver ~]# mkdir -p /var/www/html/auth/
[root@webserver ~]# echo auth > /var/www/html/auth/index.html
[root@webserver ~]# curl 172.25.254.10/auth/
auth
#生成认证文件
htpasswd -cm /etc/httpd/.htpasswd lee
New password:
Re-type new password:
Adding password for user lee
[root@webserver ~]# cat /etc/httpd/.htpasswd
lee:$apr1$6.XbEAJ9$E6tcPN6O56u9Zx2EHvYIt0[root@webserver ~]# vim /etc/httpd/conf.d/vhosts.conf
<Directory "/var/www/html/auth/">
AuthUserFile /etc/httpd/.htpasswd
AuthType basic
AuthName "Please input your username and password"
Require valid-user
</Directory>
[root@webserver ~]# systemctl restart httpd#测试:
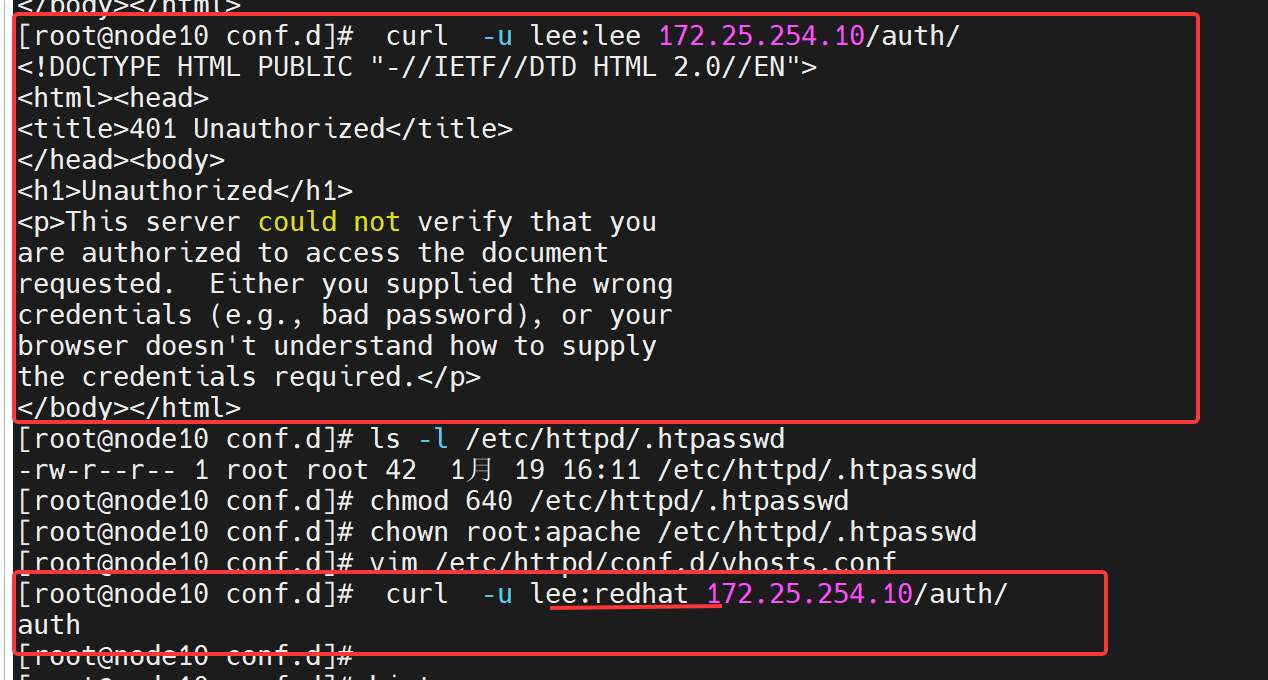
[root@webserver ~]# curl 172.25.254.10/auth/
<!DOCTYPE HTML PUBLIC "-//IETF//DTD HTML 2.0//EN">
<html><head>
<title>401 Unauthorized</title>
</head><body>
<h1>Unauthorized</h1>
<p>This server could not verify that you
are authorized to access the document
requested. Either you supplied the wrong
credentials (e.g., bad password), or your
browser doesn't understand how to supply
the credentials required.</p>
</body></html>[root@webserver ~]# curl -u lee:你的密码(redhat) 172.25.254.10/auth/
auth
5、https
[root@webserver ~]# dnf install mod_ssl.x86_64 -y
[root@webserver ~]# mkdir /etc/httpd/certs
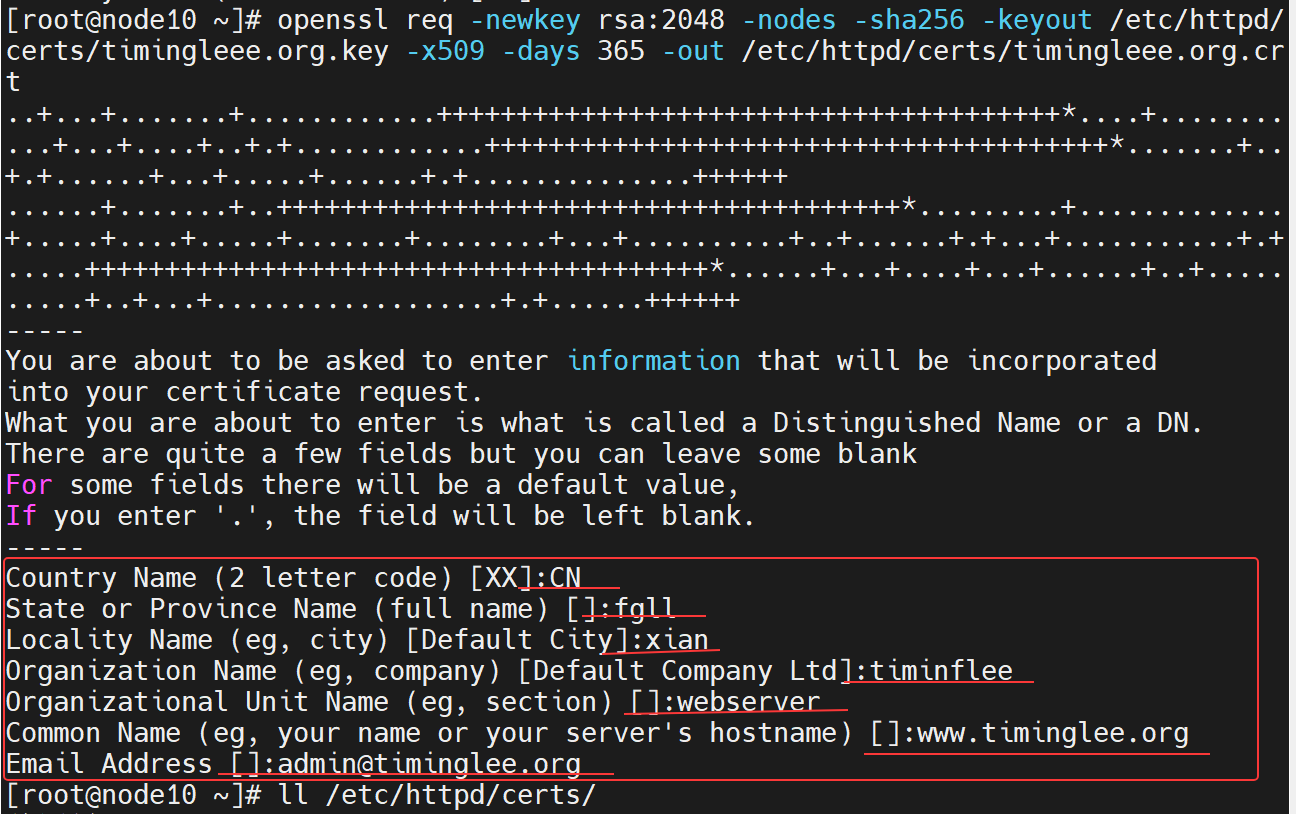
[root@webserver ~]# openssl req -newkey rsa:2048 -nodes -sha256 -keyout /etc/httpd/certs/timinglee.org.key -x509 -days 365 -out /etc/httpd/certs/timinglee.org.crt
You are about to be asked to enter information that will be incorporated
into your certificate request.
What you are about to enter is what is called a Distinguished Name or a DN.
There are quite a few fields but you can leave some blank
For some fields there will be a default value,
If you enter '.', the field will be left blank.
-----
Country Name (2 letter code) [XX]:CN
State or Province Name (full name) []:Shaanxi
Locality Name (eg, city) [Default City]:Xi'an
Organization Name (eg, company) [Default Company Ltd]:timinglee
Organizational Unit Name (eg, section) []:webserver
Common Name (eg, your name or your server's hostname) []:www.timinglee.org
Email Address []:admin@timinglee.org
[root@webserver ~]# ll /etc/httpd/certs/
总用量 8
-rw-r--r-- 1 root root 1472 1月 19 15:12 timinglee.org.crt
-rw------- 1 root root 1704 1月 19 15:11 timinglee.org.key[root@webserver ~]# vim /etc/httpd/conf.d/vhosts.conf
<VirtualHost *:443>
DocumentRoot "/webdir/timinglee.org/login/html"
ServerName login.timinglee.org
CustomLog logs/timinglee.org/login.log combined
SSLEngine on
SSLCertificateFile /etc/httpd/certs/timinglee.org.crt
SSLCertificateKeyFile /etc/httpd/certs/timinglee.org.key
</VirtualHost>[root@webserver ~]# systemctl restart httpd
#测试
[root@webserver ~]# curl -k https://login.timinglee.org
login.timinglee.org
#问题是用户不会手动添加访问协议。默认还是会访问80端口
[root@webserver ~]# curl -k https://login.timinglee.org
login.timinglee.org
[root@webserver ~]# curl login.timinglee.org
hello timinglee#解决问题----网页从写
[root@webserver ~]# vim /etc/httpd/conf.d/vhosts.conf
<VirtualHost *:80>
ServerName login.timinglee.org
RewriteEngine On
RewriteRule ^/(.*)$ https://login.timinglee.org/$1
</VirtualHost>
[root@webserver ~]# systemctl restart httpd#测试:
[root@webserver ~]# curl -I login.timinglee.org/aaa
HTTP/1.1 302 Found
Date: Mon, 19 Jan 2026 07:26:48 GMT
Server: Apache/2.4.62 (Red Hat Enterprise Linux) OpenSSL/3.2.2
Location: https://login.timinglee.org/
Content-Type: text/html; charset=iso-8859-1
四、dns服务器的搭建
1、dns的访问流程
2、dns高速缓存
3、dns正向解析
4、dns反向解析
5、
五、nfs+autofs
六、selinux
七、firewalld
更多推荐


 12
12 0
0- 0


 已为社区贡献11条内容

所有评论(0)